Fitting Morph-Man on any Avatar
Fitting cloth meshes inside Marvelous Designer
Blauw Films
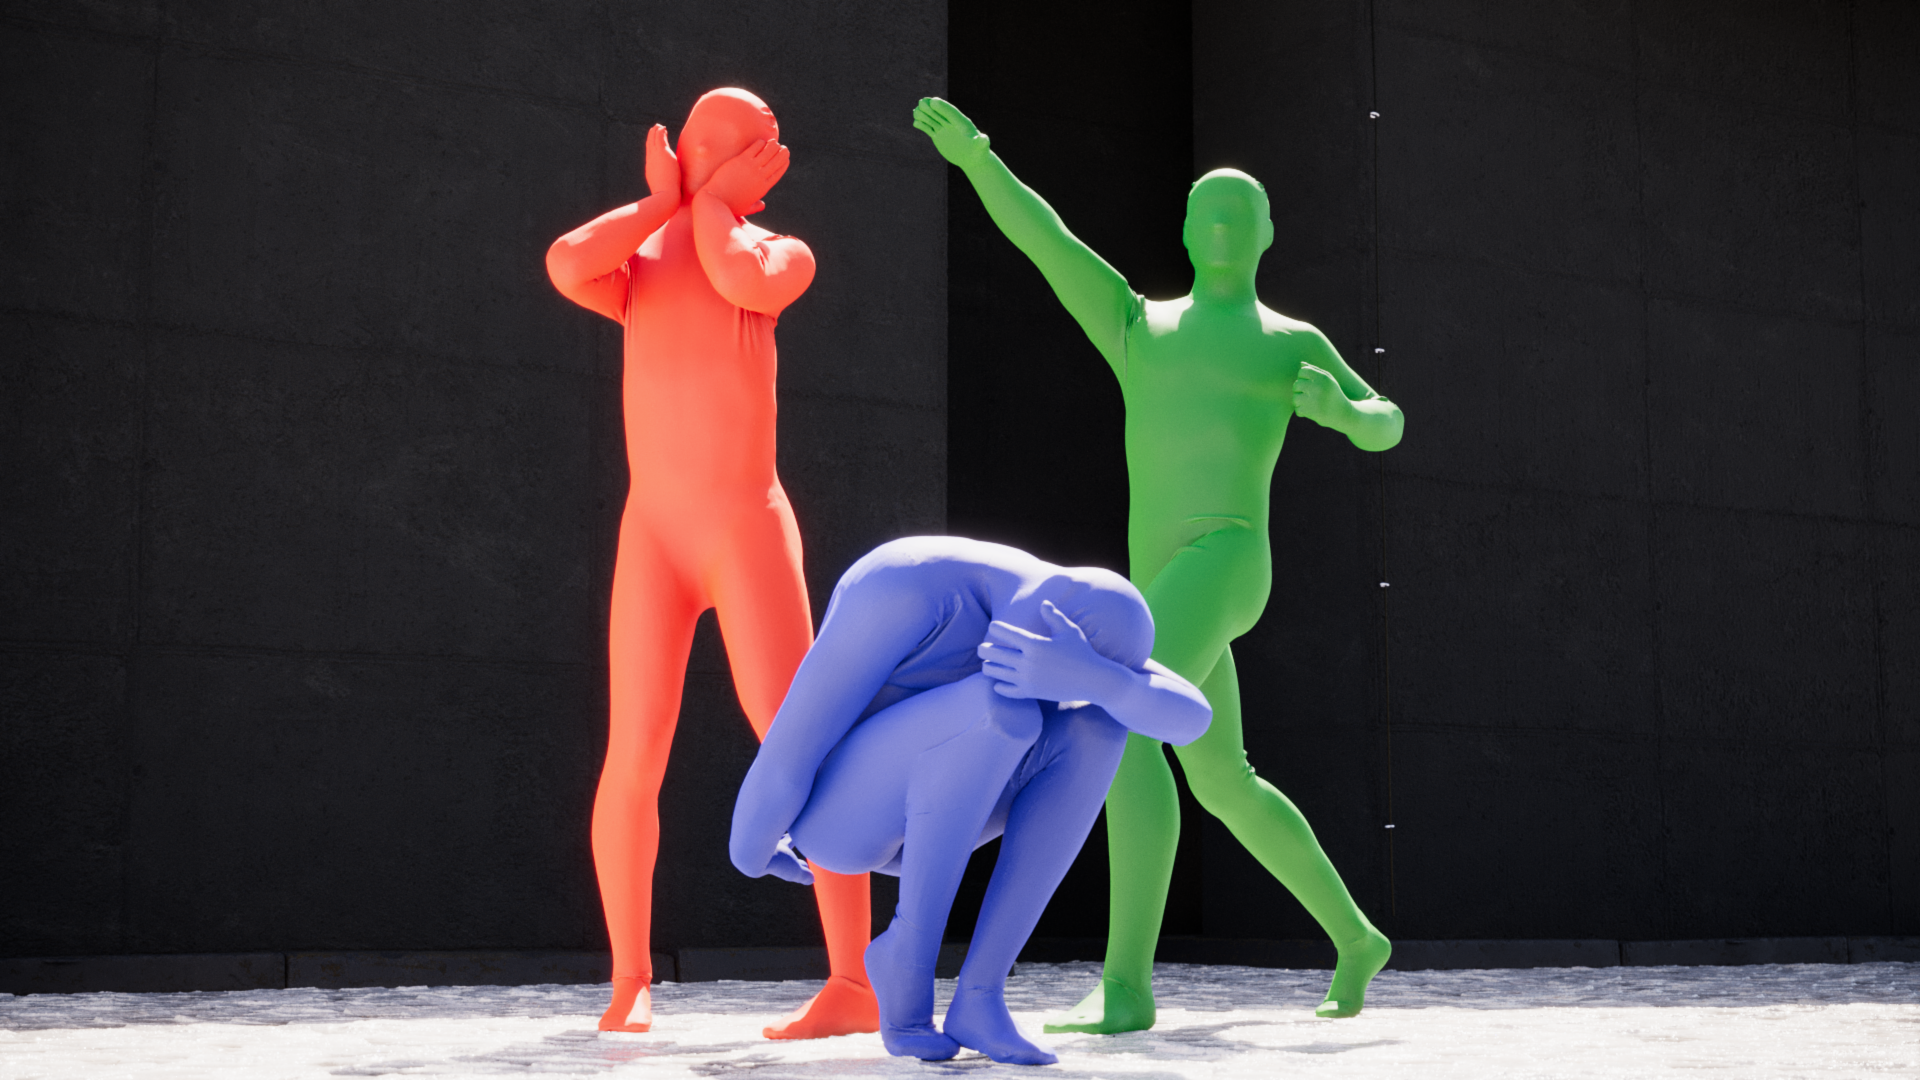
Morph-Man is our full-body mesh for Marvelous Designer. In this blog I’ll show the basics of Morph-Man.
To use Morph-Man for your own projects, you’ll need to know:
- How to export and import a posed character.
- How to put your new avatar in the Morph-Man costume .
- How to export that mesh.
Blender to Marvelous Designer
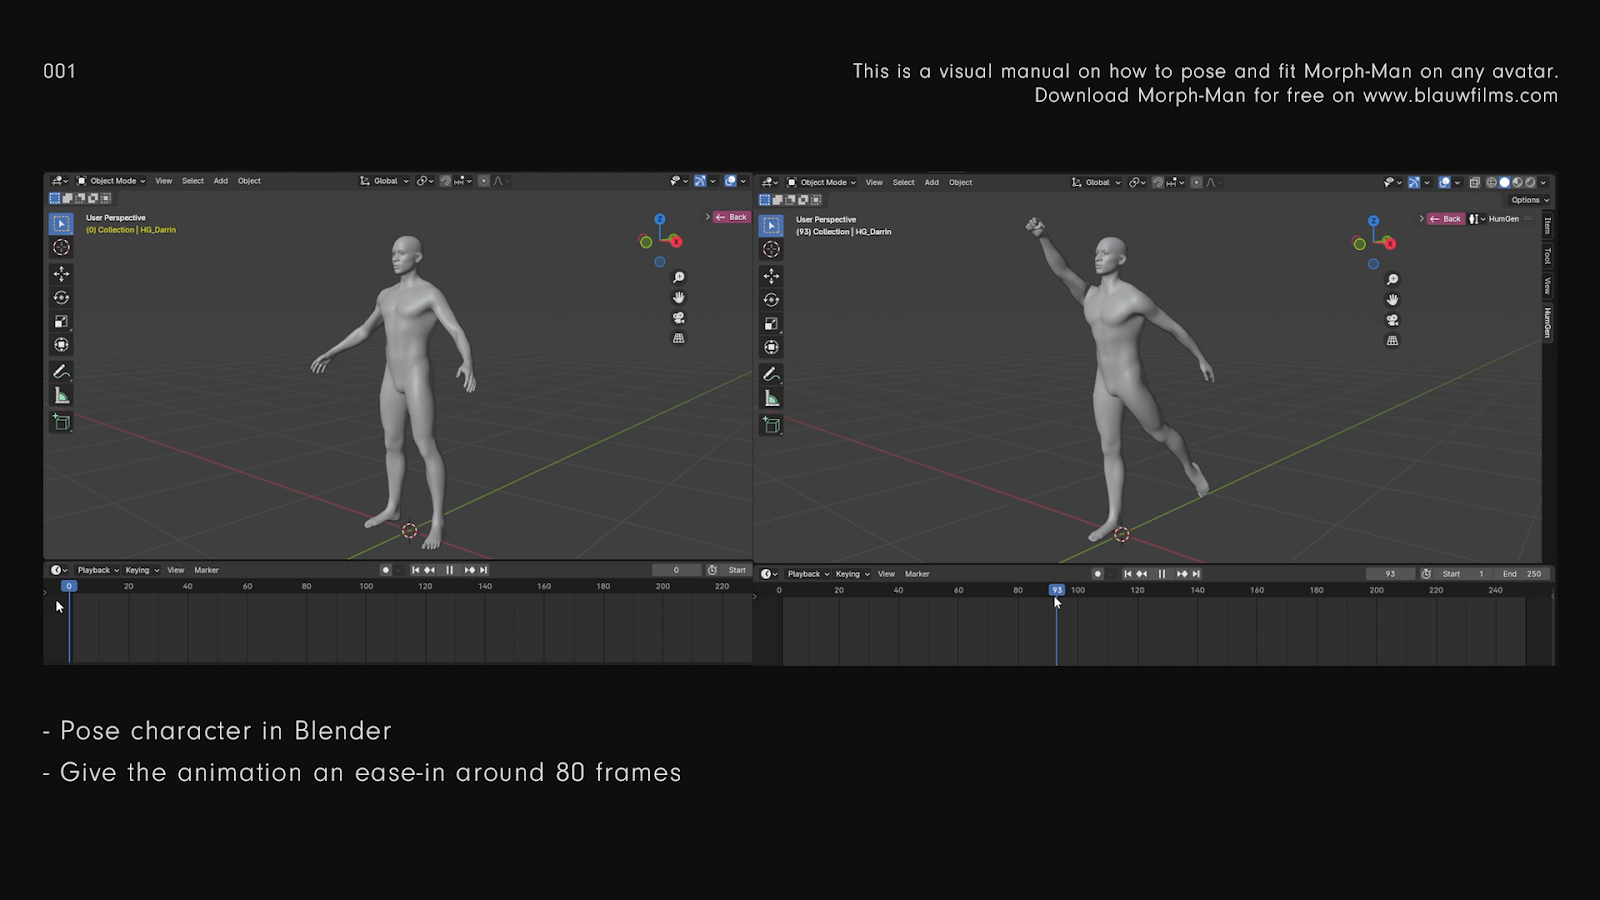
I usually pose my character in Blender. Right here I used the Human Generator plugin for Blender to create a character. When posing a character, it has to start in T-pose before gradually transforming into the pose.
This transformation should last a dozen keyframes. When the Avatar moves too quickly, the Marvelous Designer simulation won’t keep up, and you’ll get all sorts of glitches.
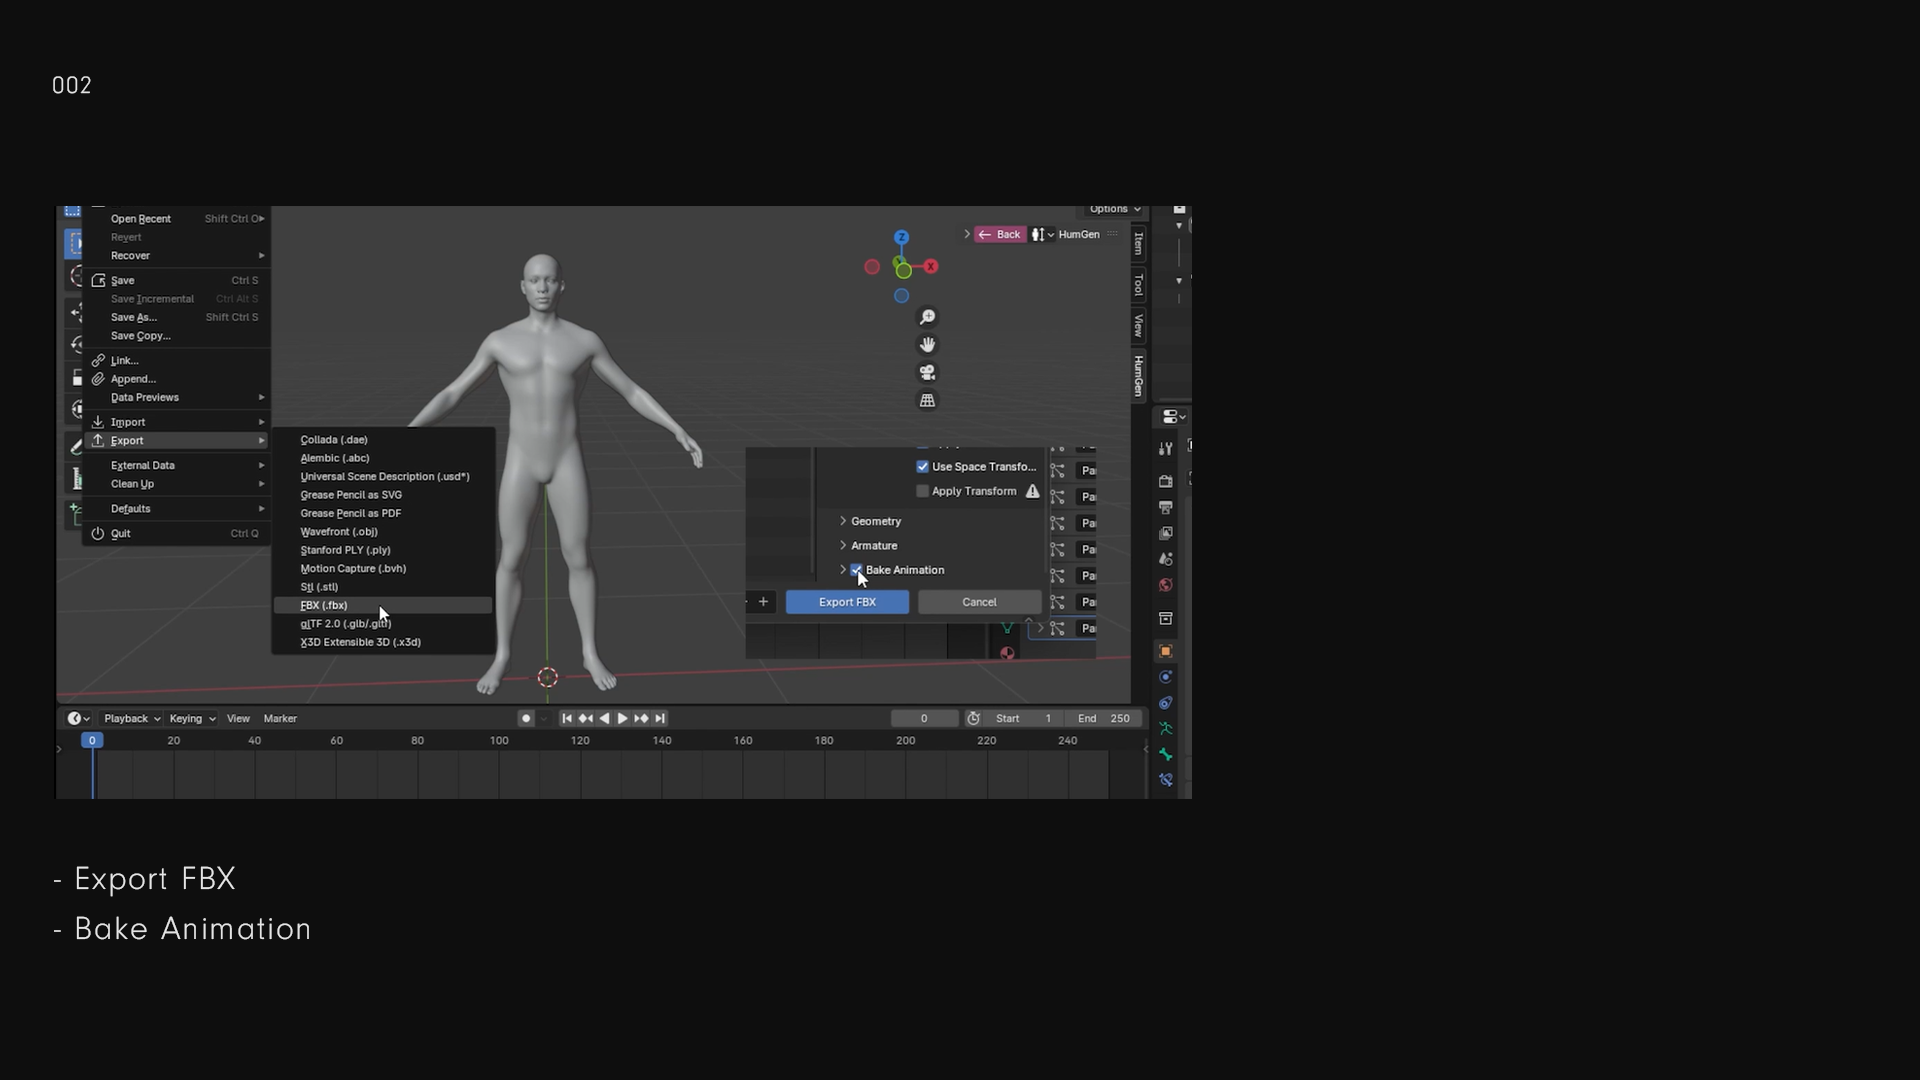
Export this animation as FBX, and make sure Bake Animation is checked.
Blender sometimes has a glitch when exporting FBX objects with animation, where it deletes the animation. With Bake Animation, this is usually avoided.
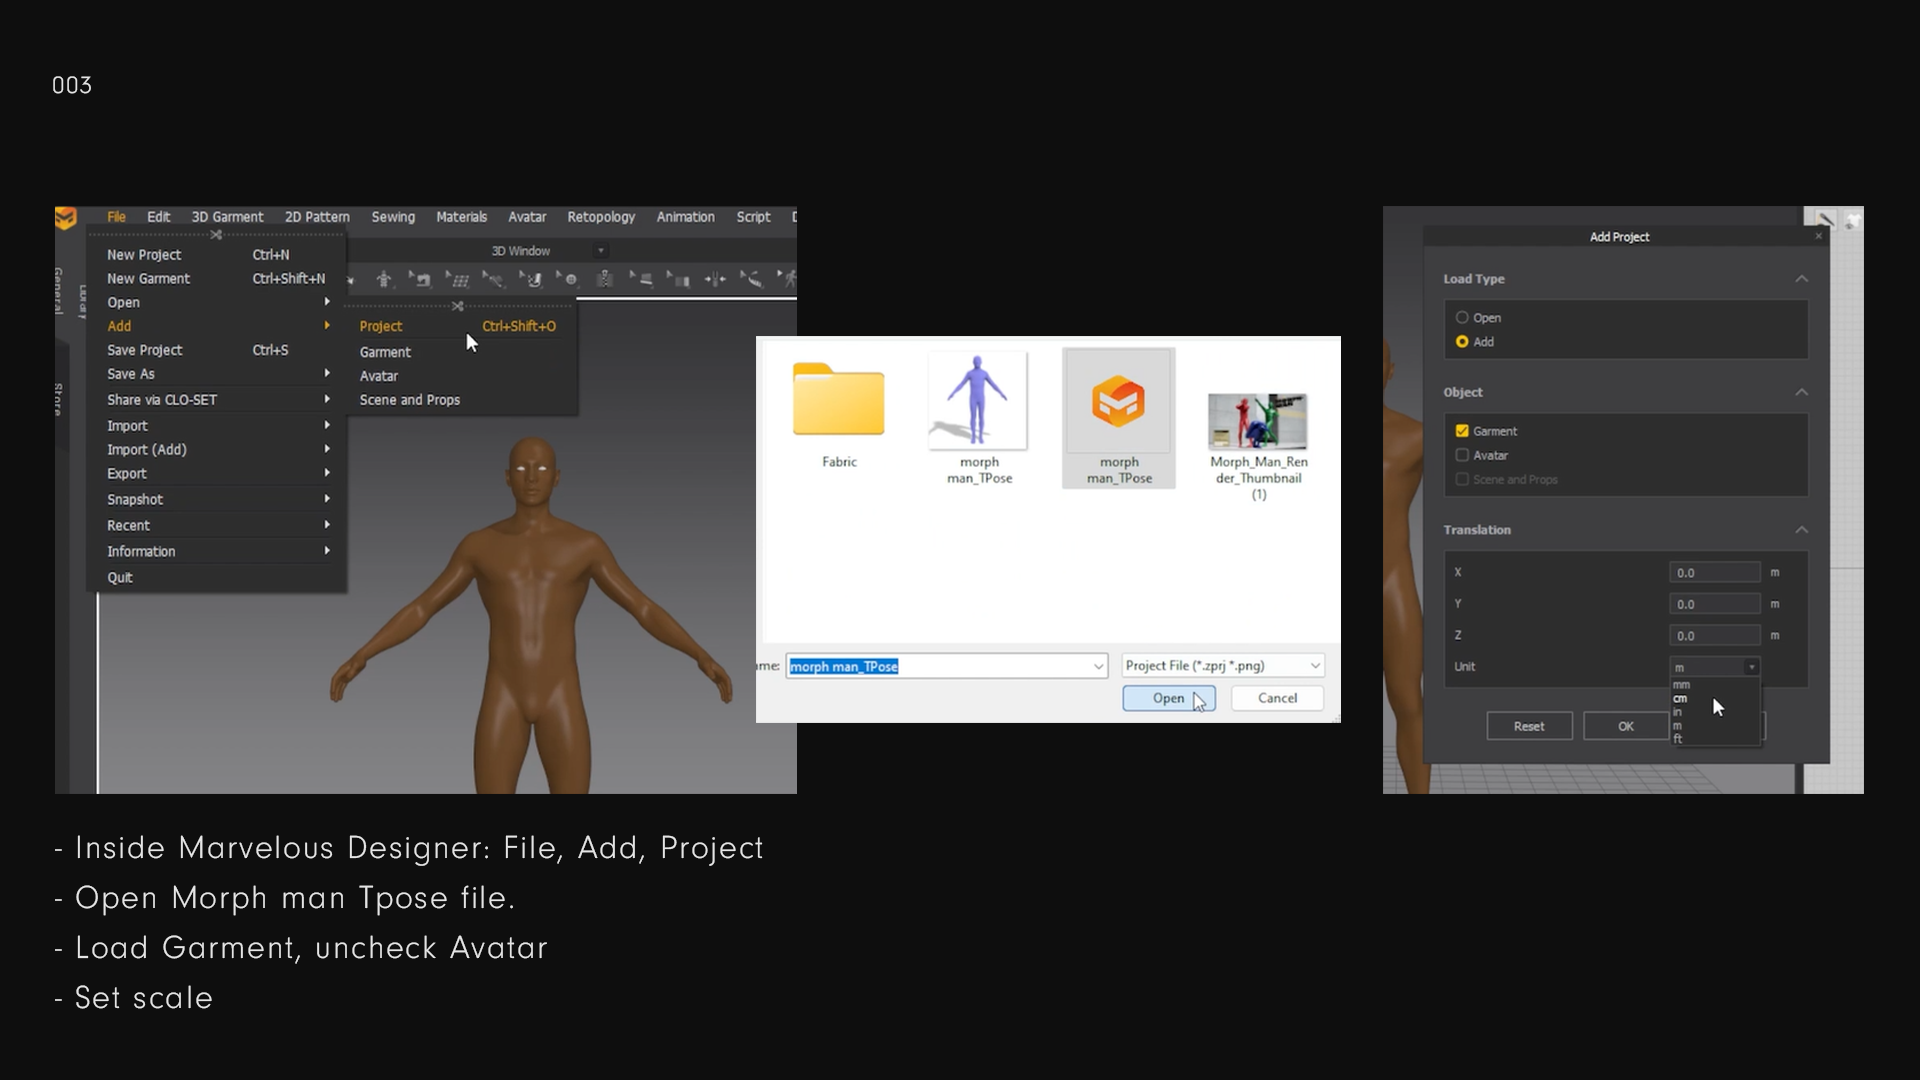
Inside of Marvelous Designer go to File > Add > Projects, and add the Morph_Man_TPose.ZPRJ.
Morph Man comes with a Marvelous Designer default Avatar, so don’t add it to your file. Make sure that the scale will be the same as the scale you used to import your Avatar.
Now you can start to turn your Character into Morph Man!
Fitting and Simulating the Pattern
Adjust the pattern pieces one by one, and simulate them one after the other for quicker simulation. Deactivate the other pattern pieces so that the sewing doesn’t interfere.
Simulating gloves can be very tedious. I have noticed it helps if you keep the particle distance rather low, between 5 and 10.
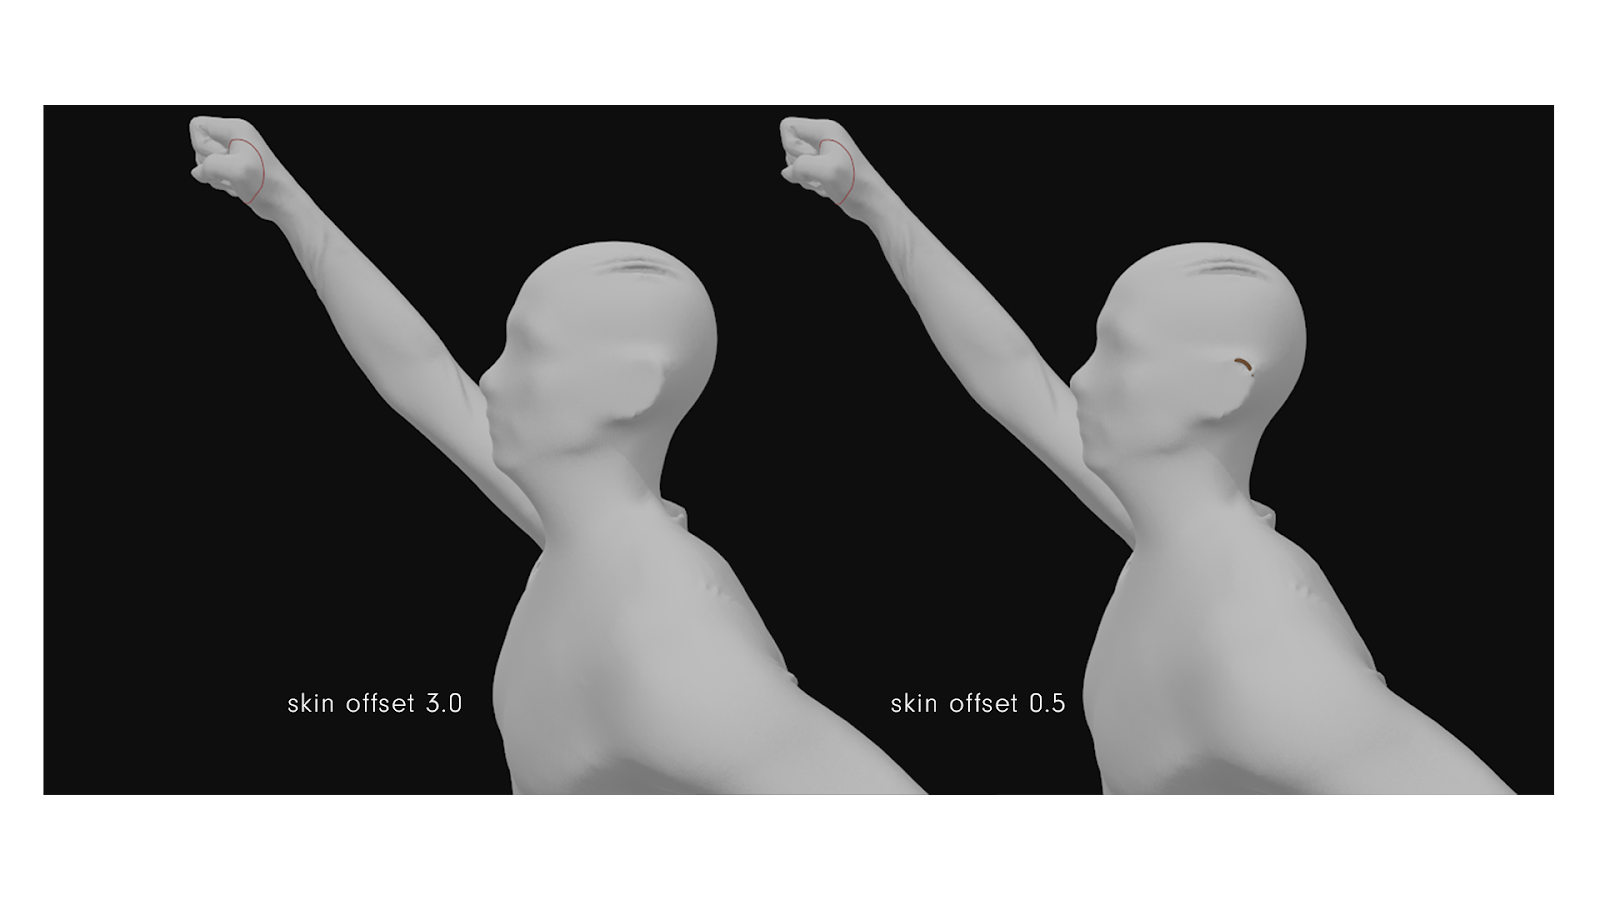
If you still experience glitches, you could try to lower the Skin Offset of your Avatar.
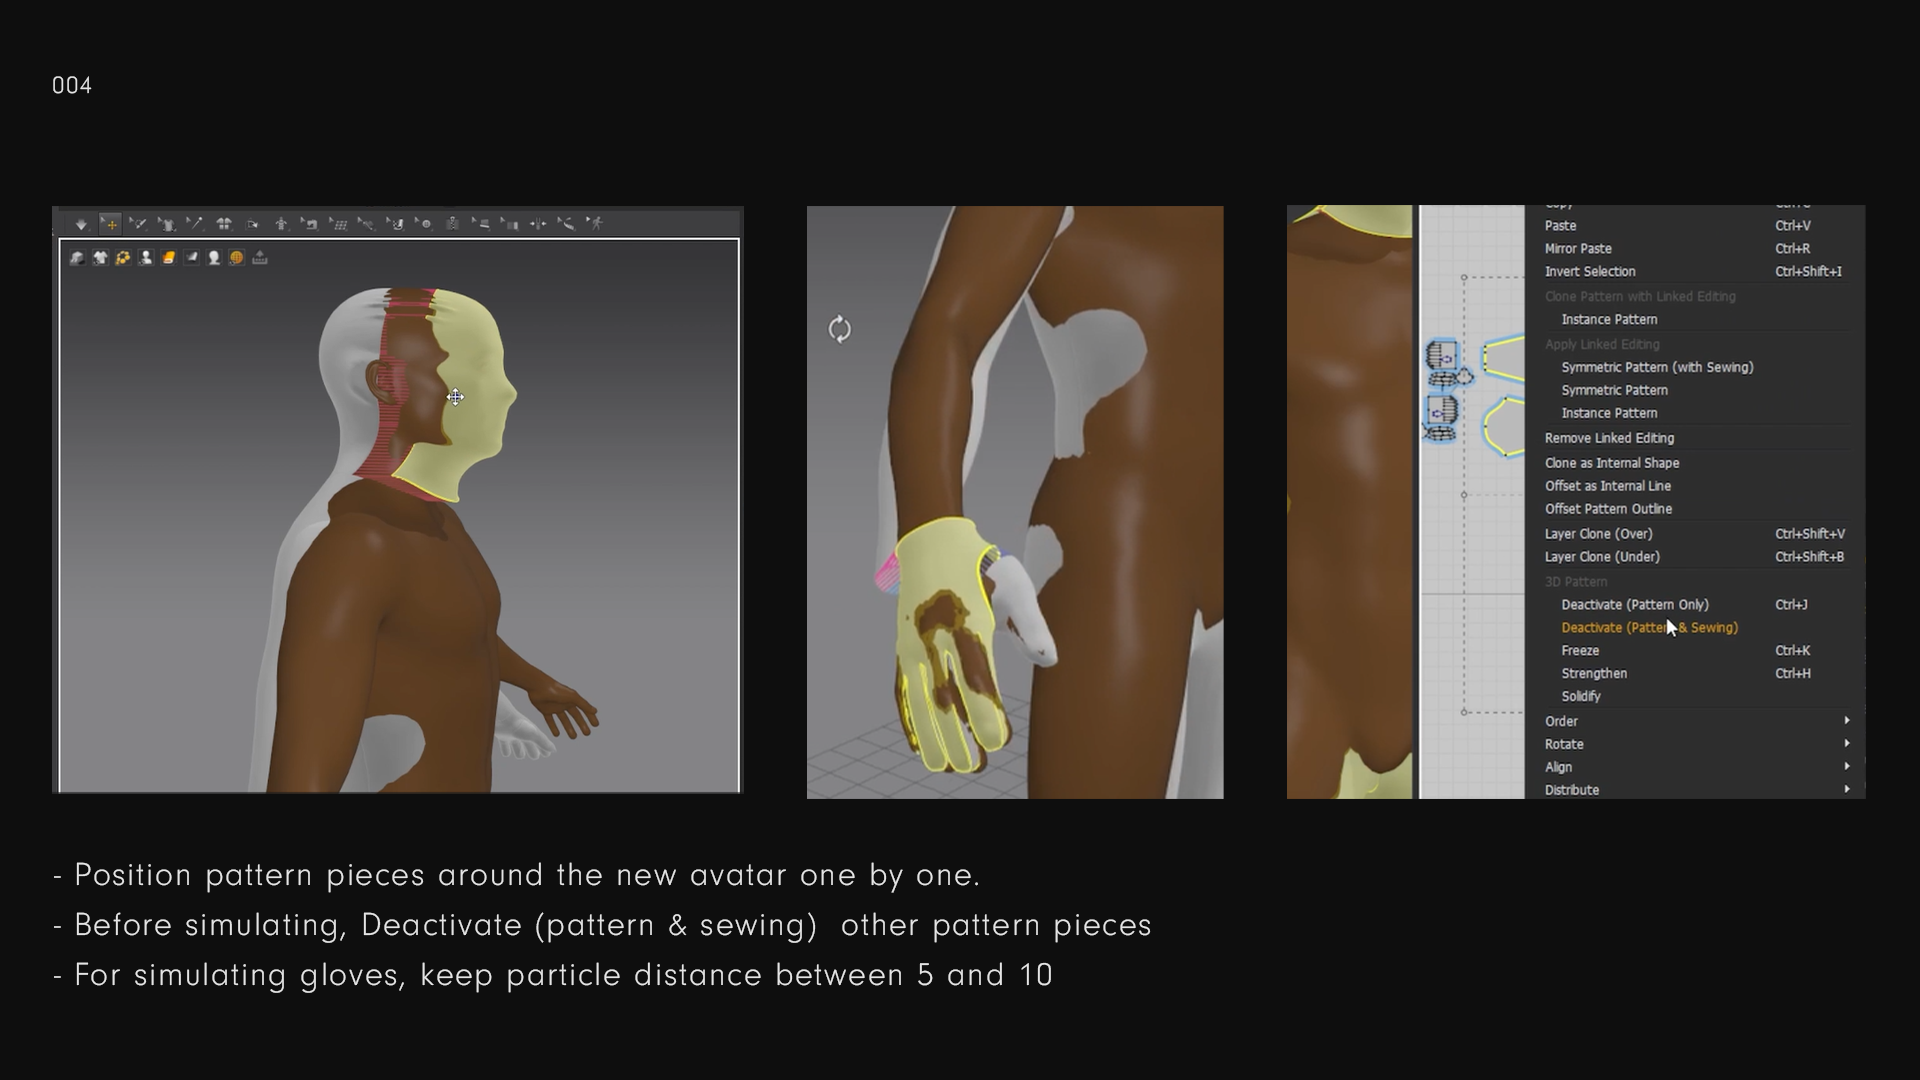
Gloves are easier to simulate when they’re already in the shape of a hand. With large pattern pieces, this is usually not the case.
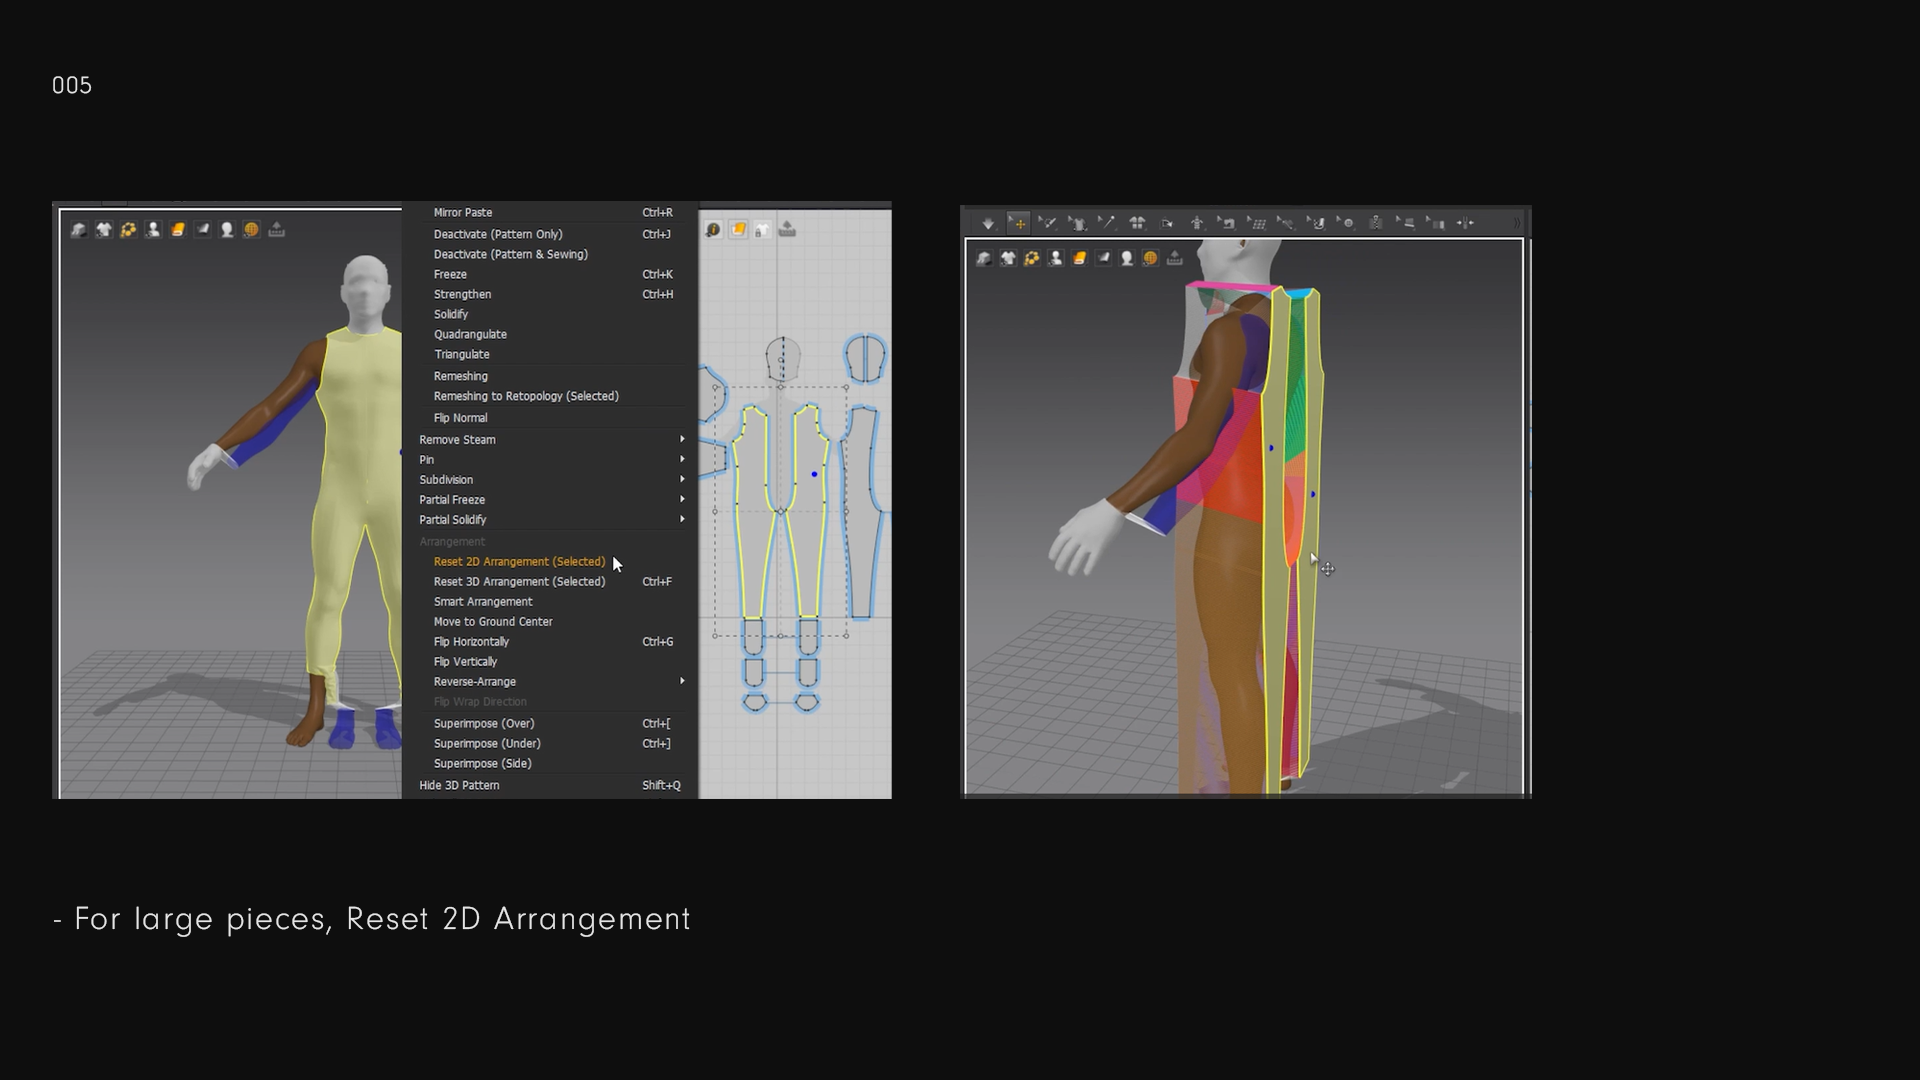
For the main body pattern, I rearrange the pattern to its 2D layout.
When MD starts a simulation, the cloth usually drops down a bit (gravity) before joining together at the sewn seams. For that reason, I position the shoulder seams quite a bit above the body. This way the cloth drapes properly when the simulation runs. Otherwise the cloth gets stuck in or under the arm, in my experience.
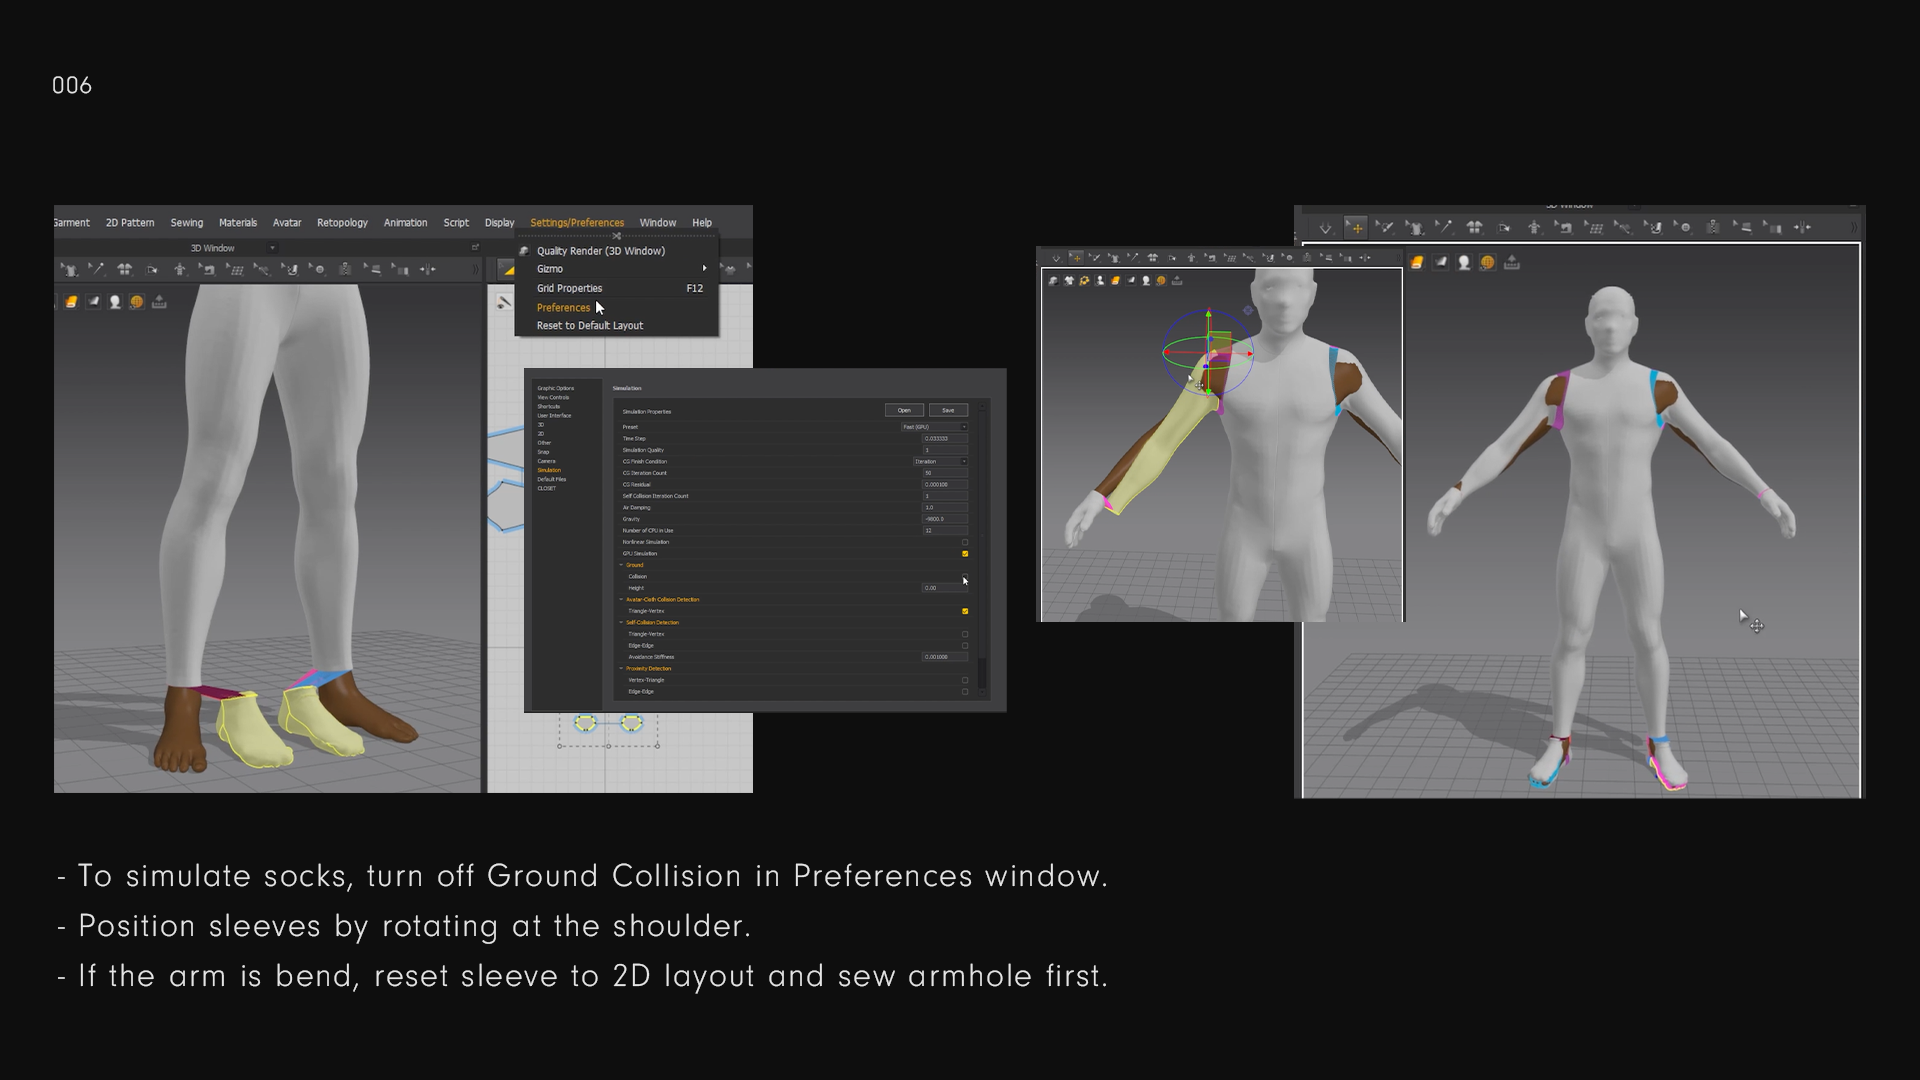
For the socks it’s important to turn off Ground Collision in the Preferences Window. Fitting the sleeves is easy. Best method is to attach the sleeve to the armhole first, then close the side seams.
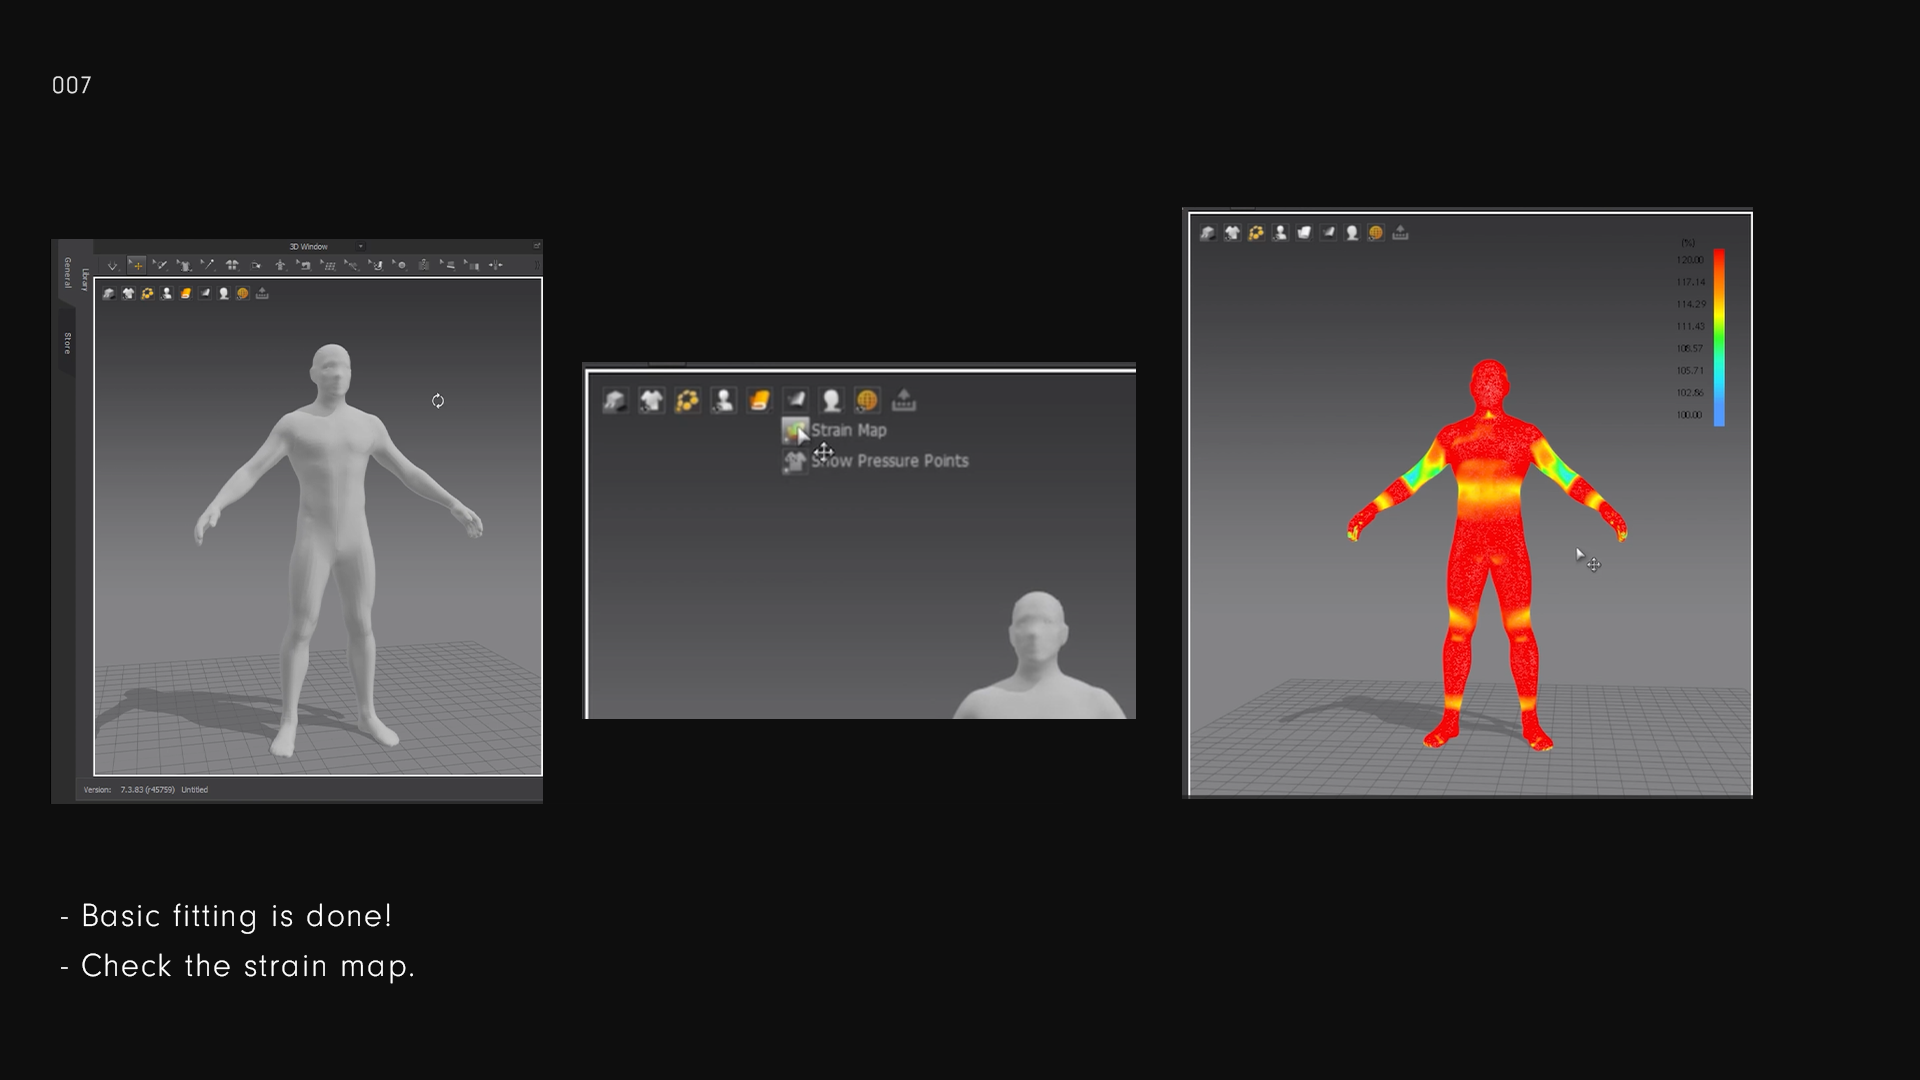
When your Avatar is wearing the full Morph Suit, check the strain-map to see the fit.
Depending on what you are going for, decide the fit of the suit. Right now, it’s tight all-over. Red indicates that the cloth is stretching 120% bigger to fit your Avatar.
The Morph-Suit can be fine as it is now. But note that the 120% increase in stretch translates over to the UV.
With this checkered wool applied, you can more clearly see the effect of the stretch.
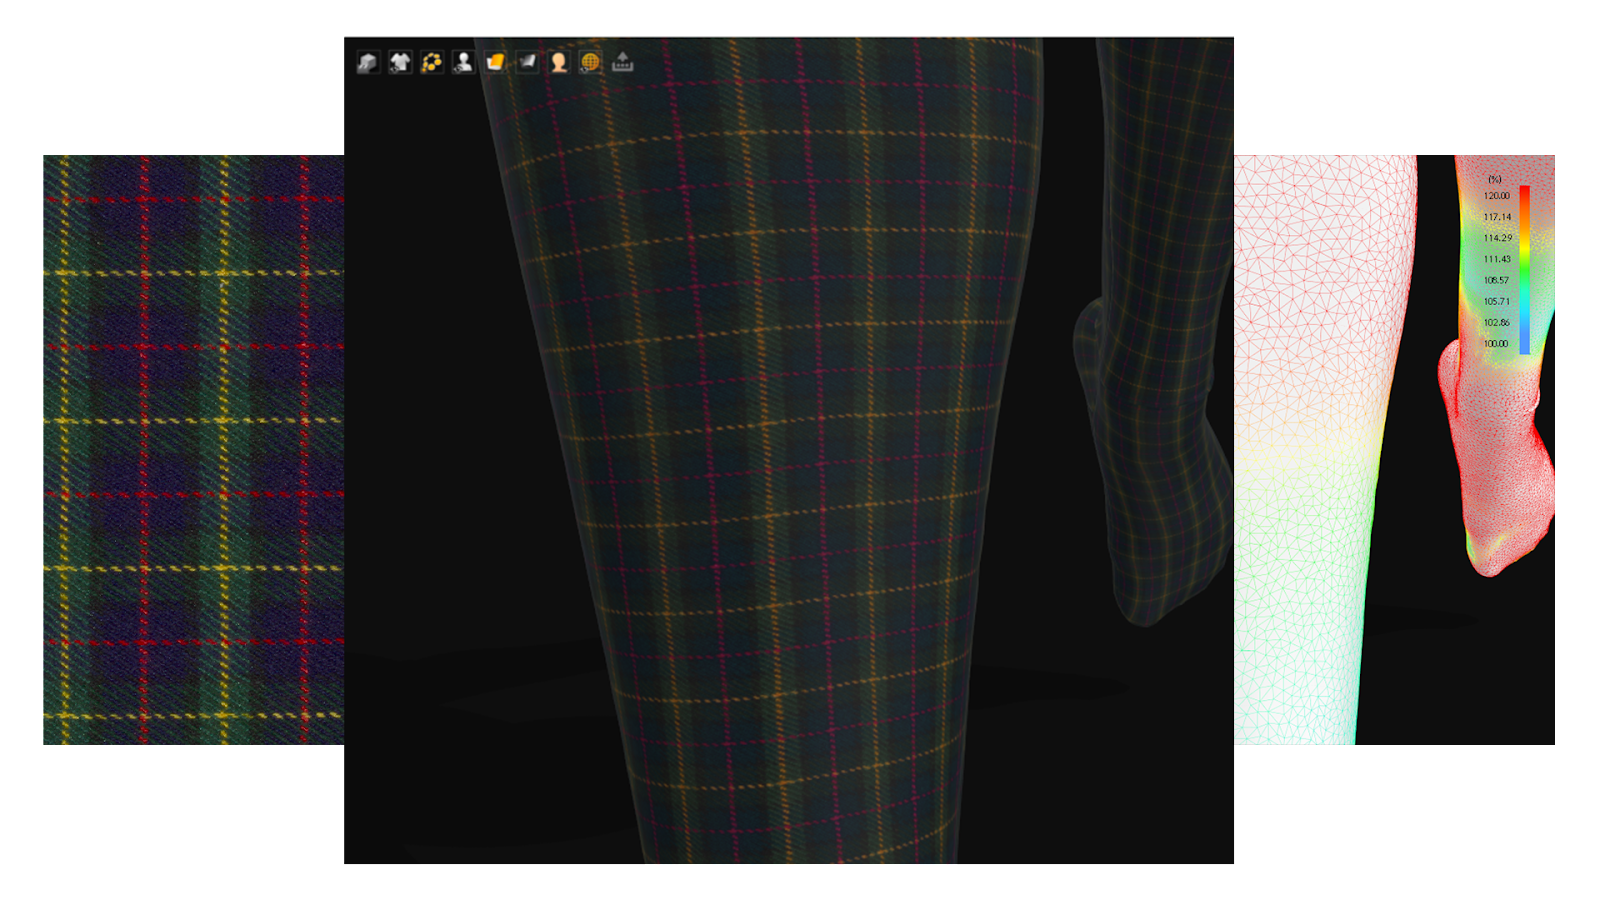
Adjust the pattern until it fits and drapes how you want.
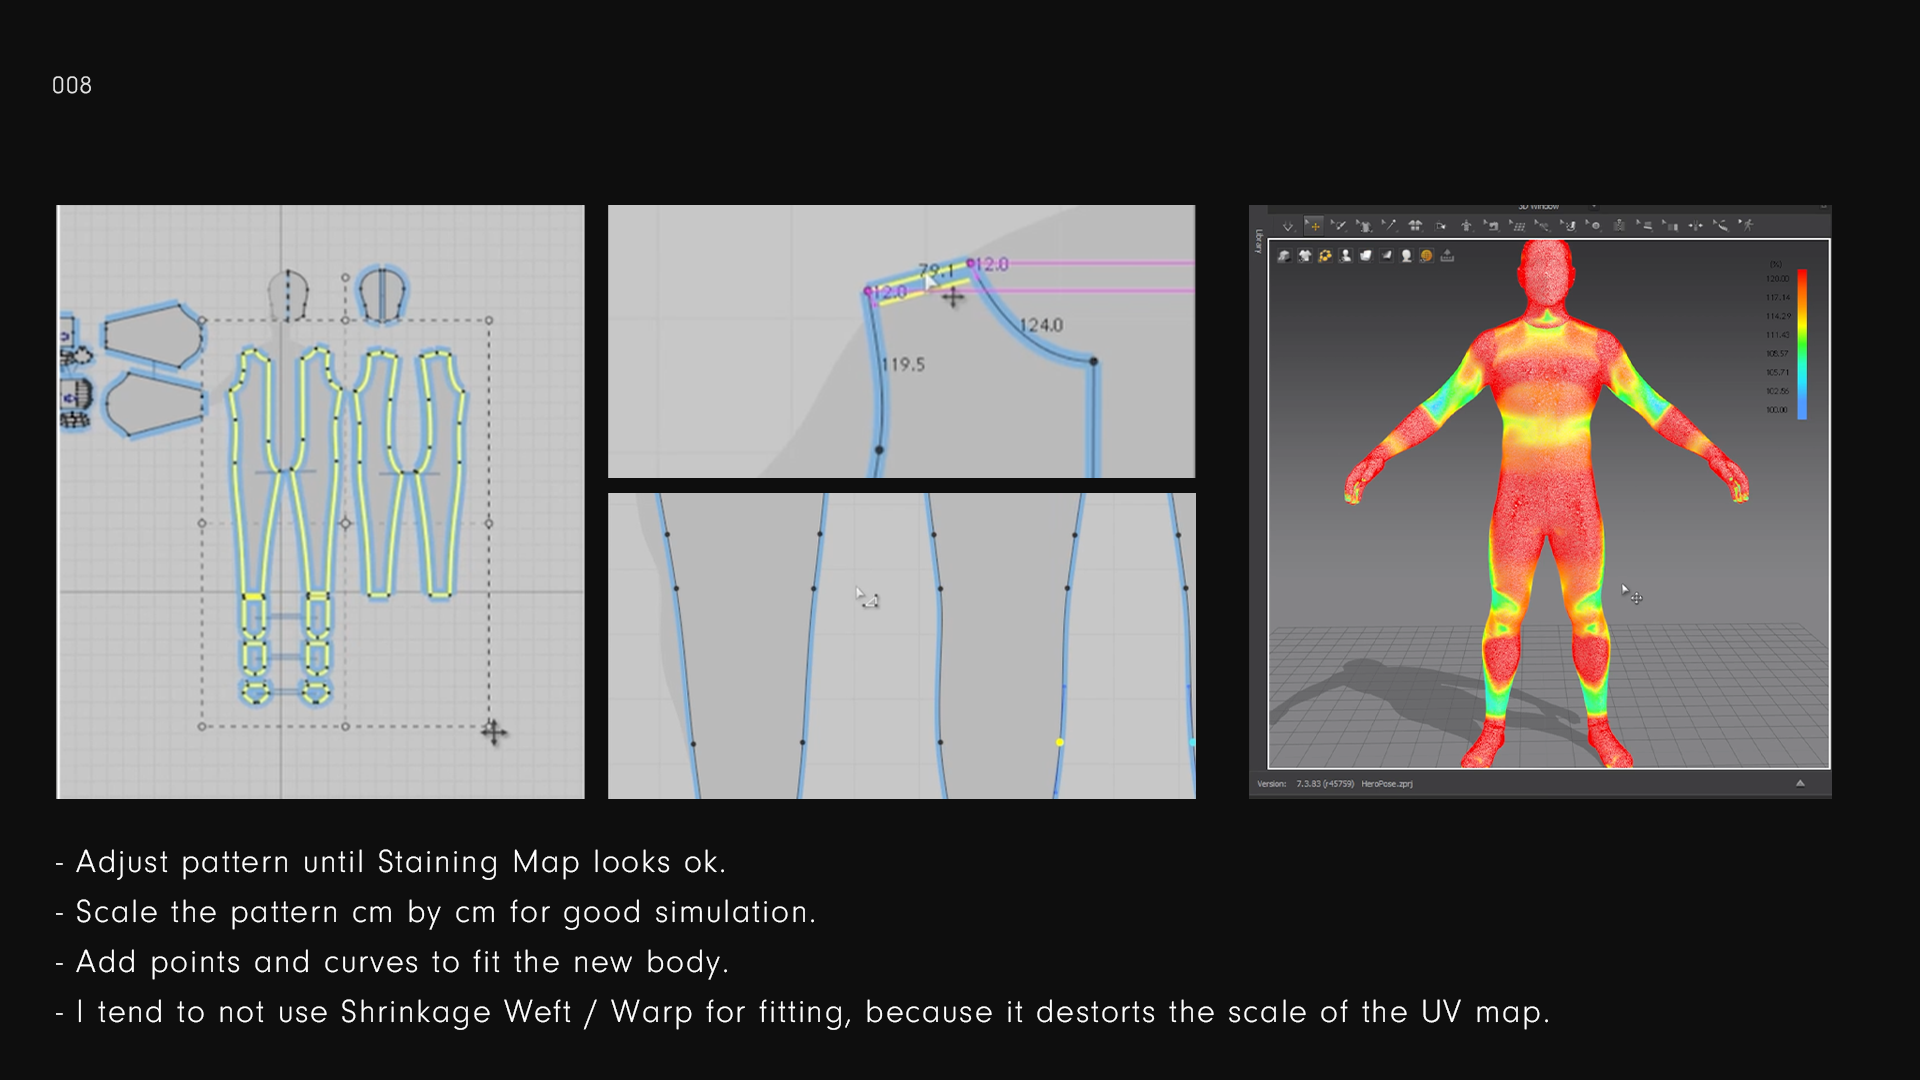
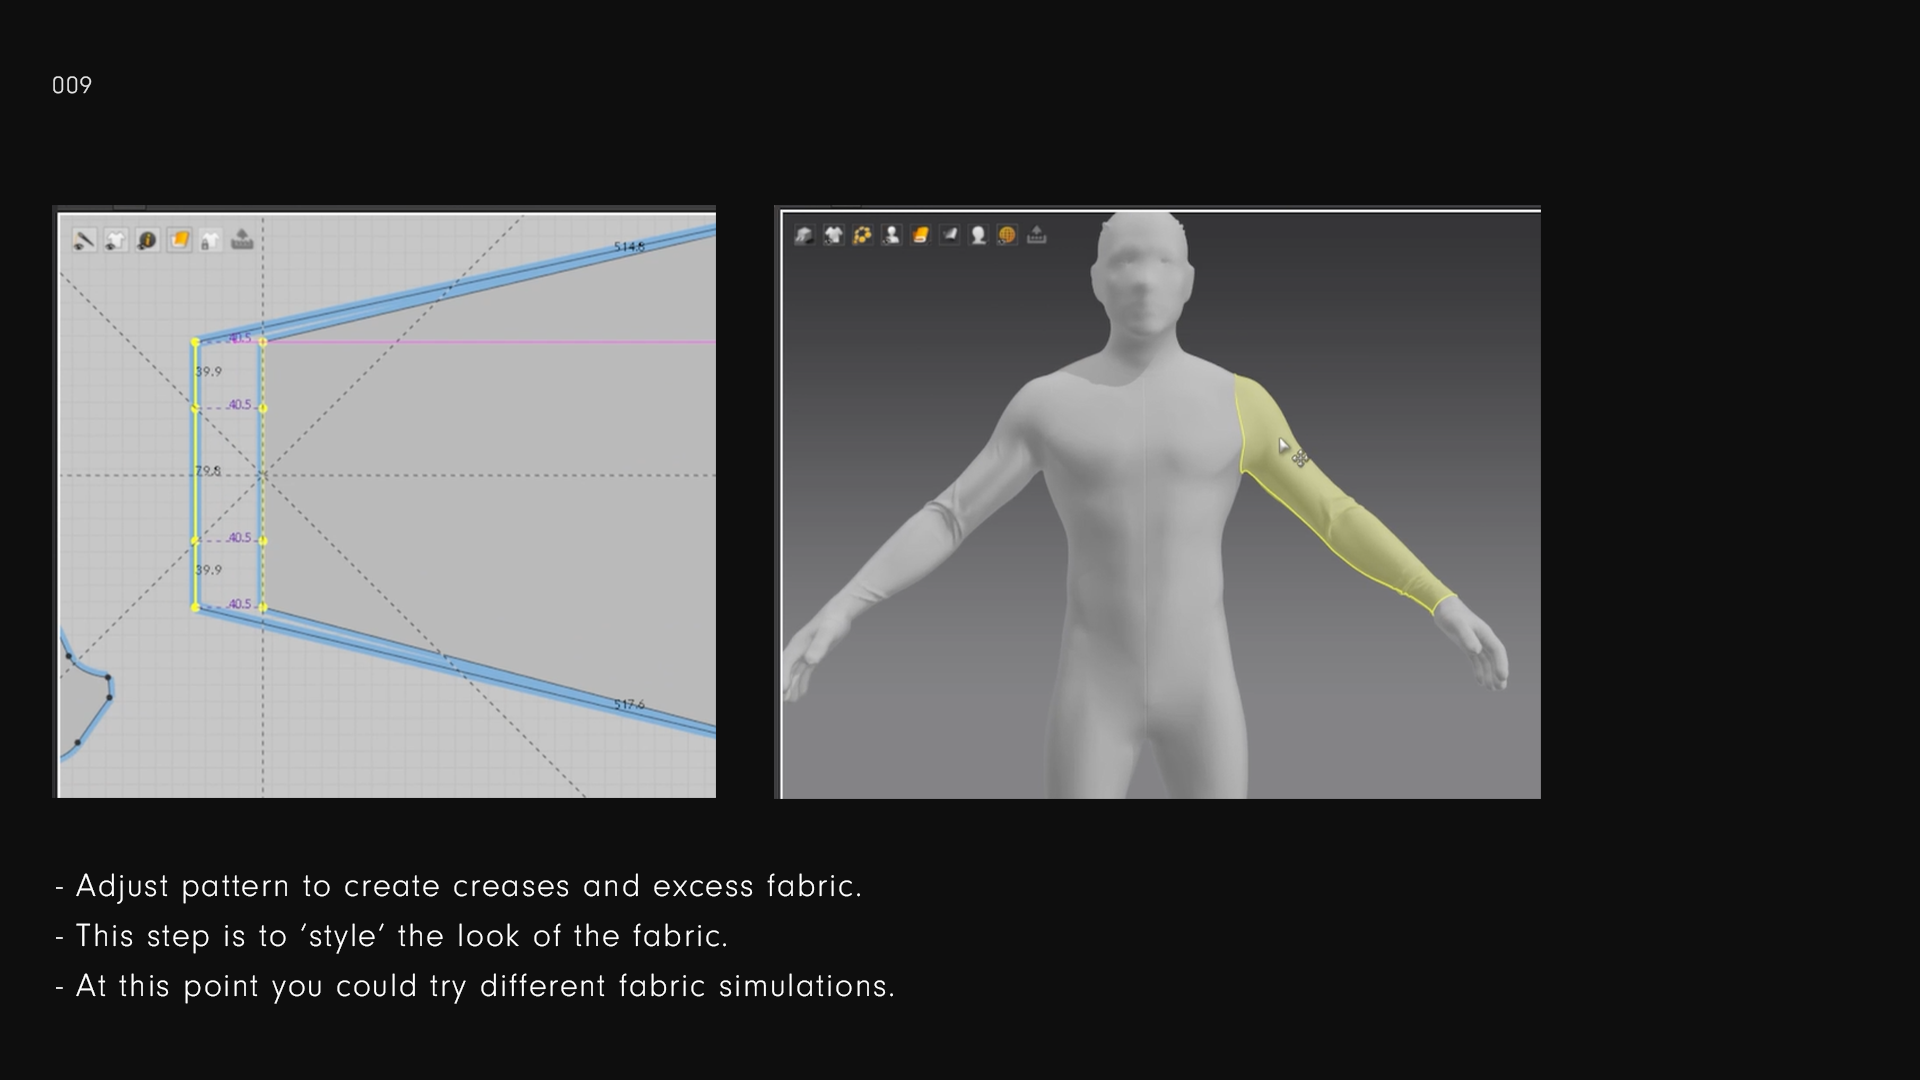
Deciding the drape of the material has a lot to do with the texture your Morph-Suit will be.
All materials in Marvelous Designer have different properties. Play around with the settings to find what you are looking for.
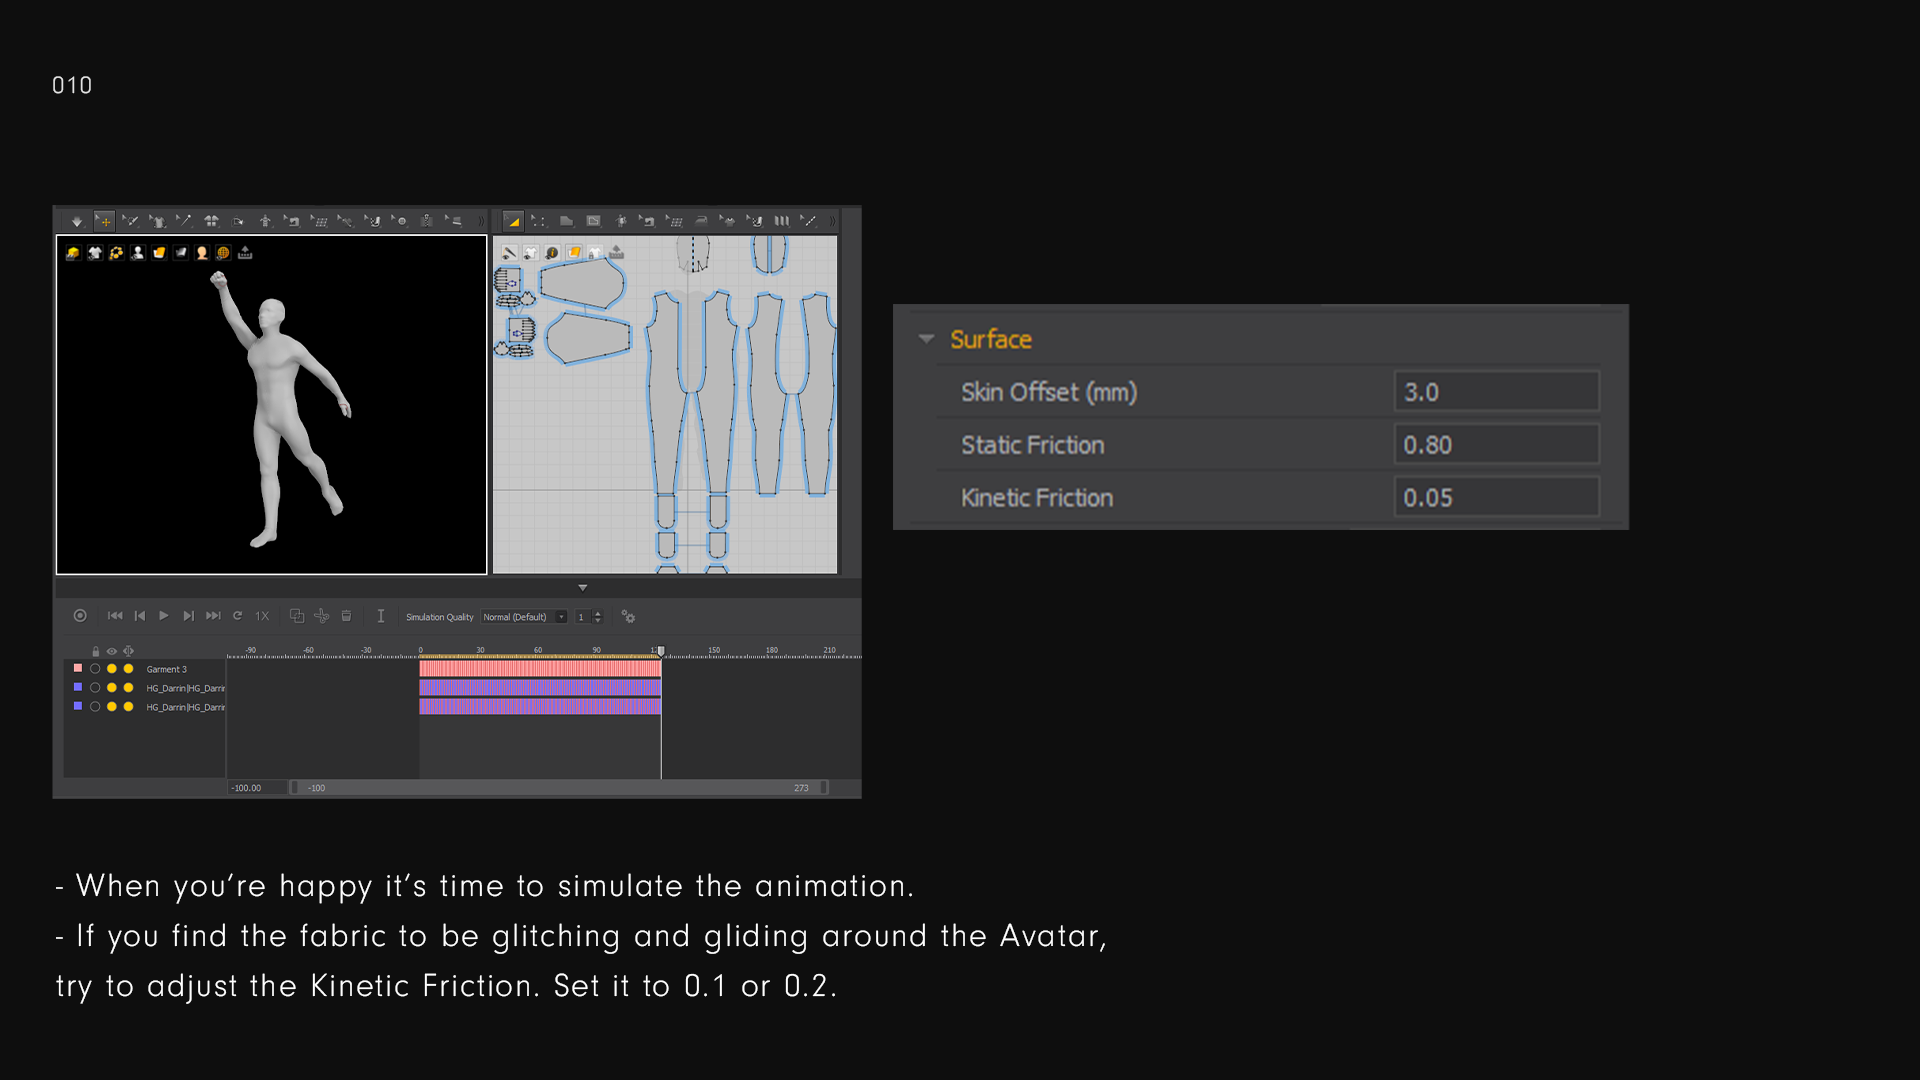
Posing
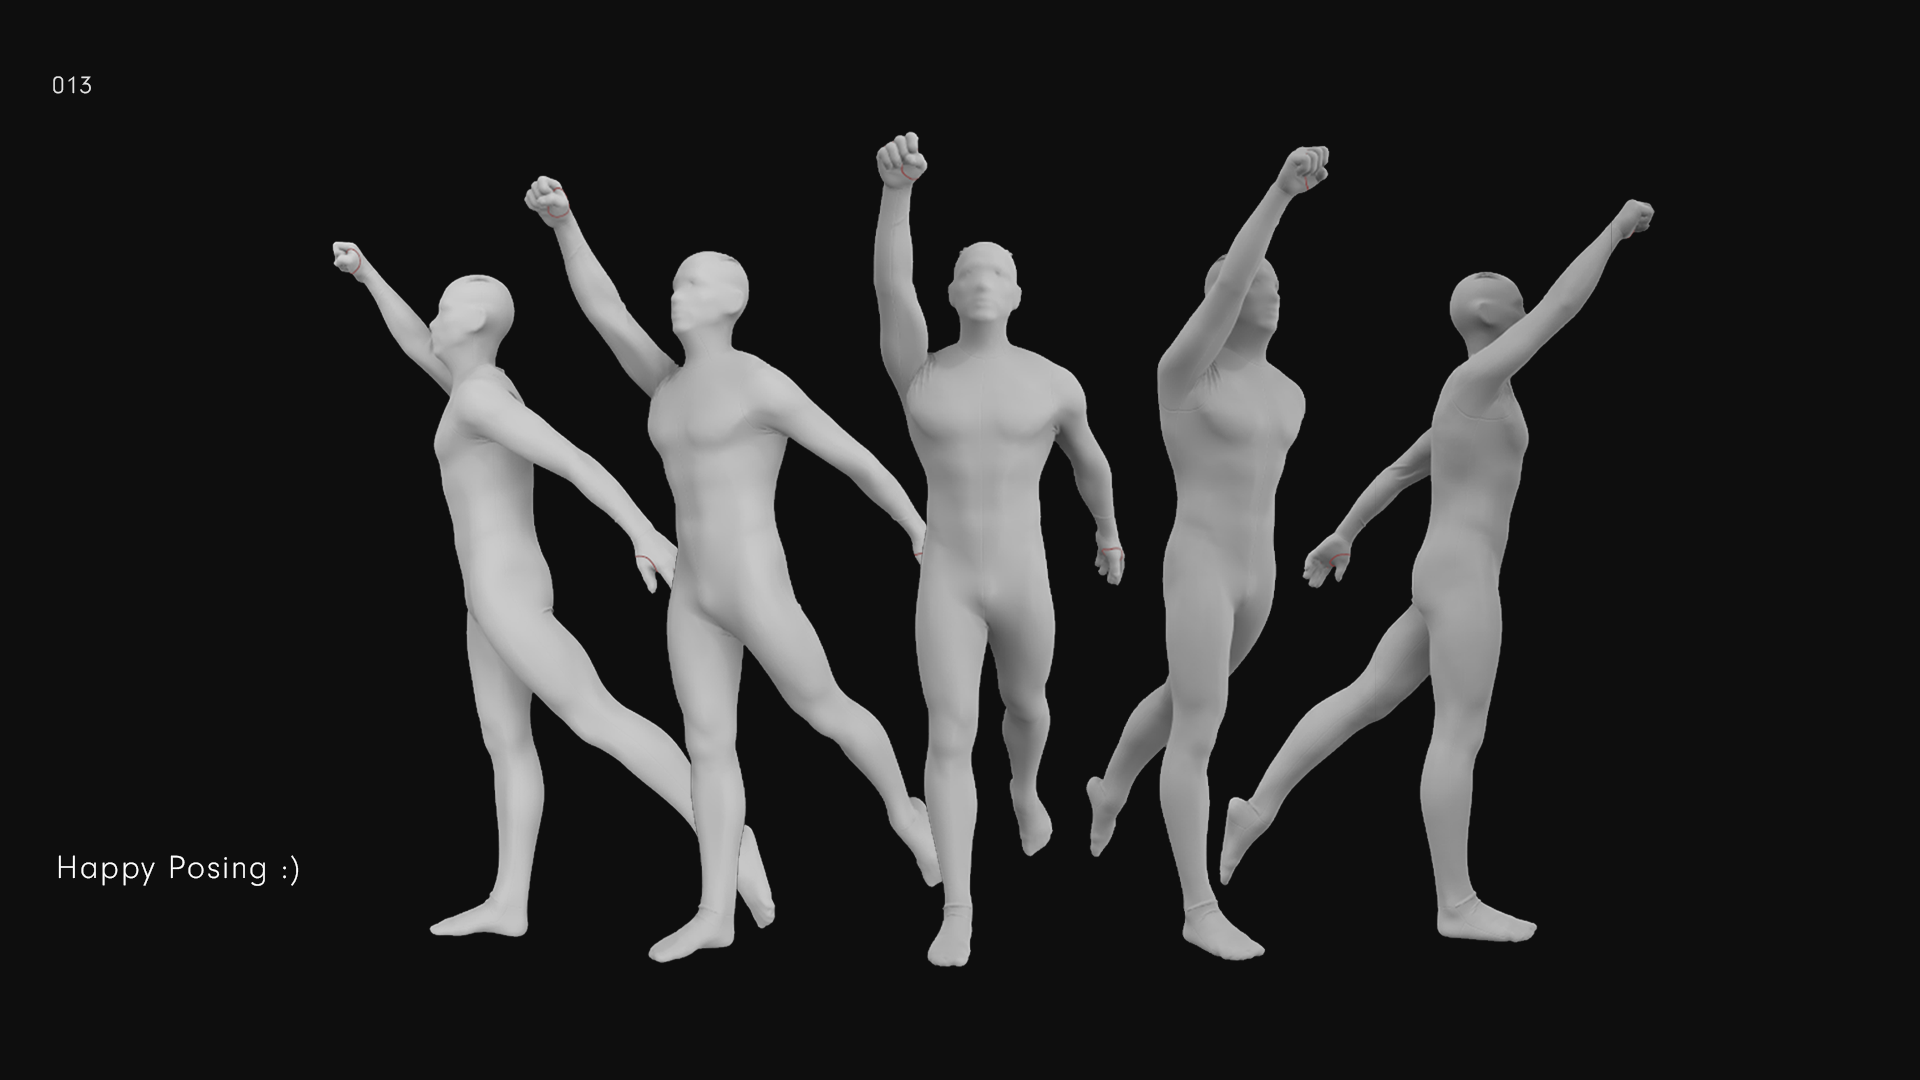
After fitting, you can pose the character.
Try to keep an eye on ‘problem areas’ as the simulation runs. In this case that would be the right hand curling into a fist, and the shoulder where the mesh can intersect in its rotation upwards.
Other issues could occur when the cloth mesh wants to glide over the Avatar’s surface. In this case increasing the Kinetic Friction could help to prevent sliding.
The Kinetic Friction goes up to 1. Increasing the friction will slow down your simulation, but with a skin-tight mesh it helps to keep the material still.
If you don’t want the entire Avatar to be sticky, only one piece of material, you could also increase the Friction in the Fabrics > Property Editor window.
Decreasing the Avatar's Skin Offset doesn’t do much magic in Morph-Man’s case. It can actually increase collisions.
Skin Offset is something to keep in mind when posing your Avatar. Leaving a little space between the fingers will help you a lot.
Creating the UV Map
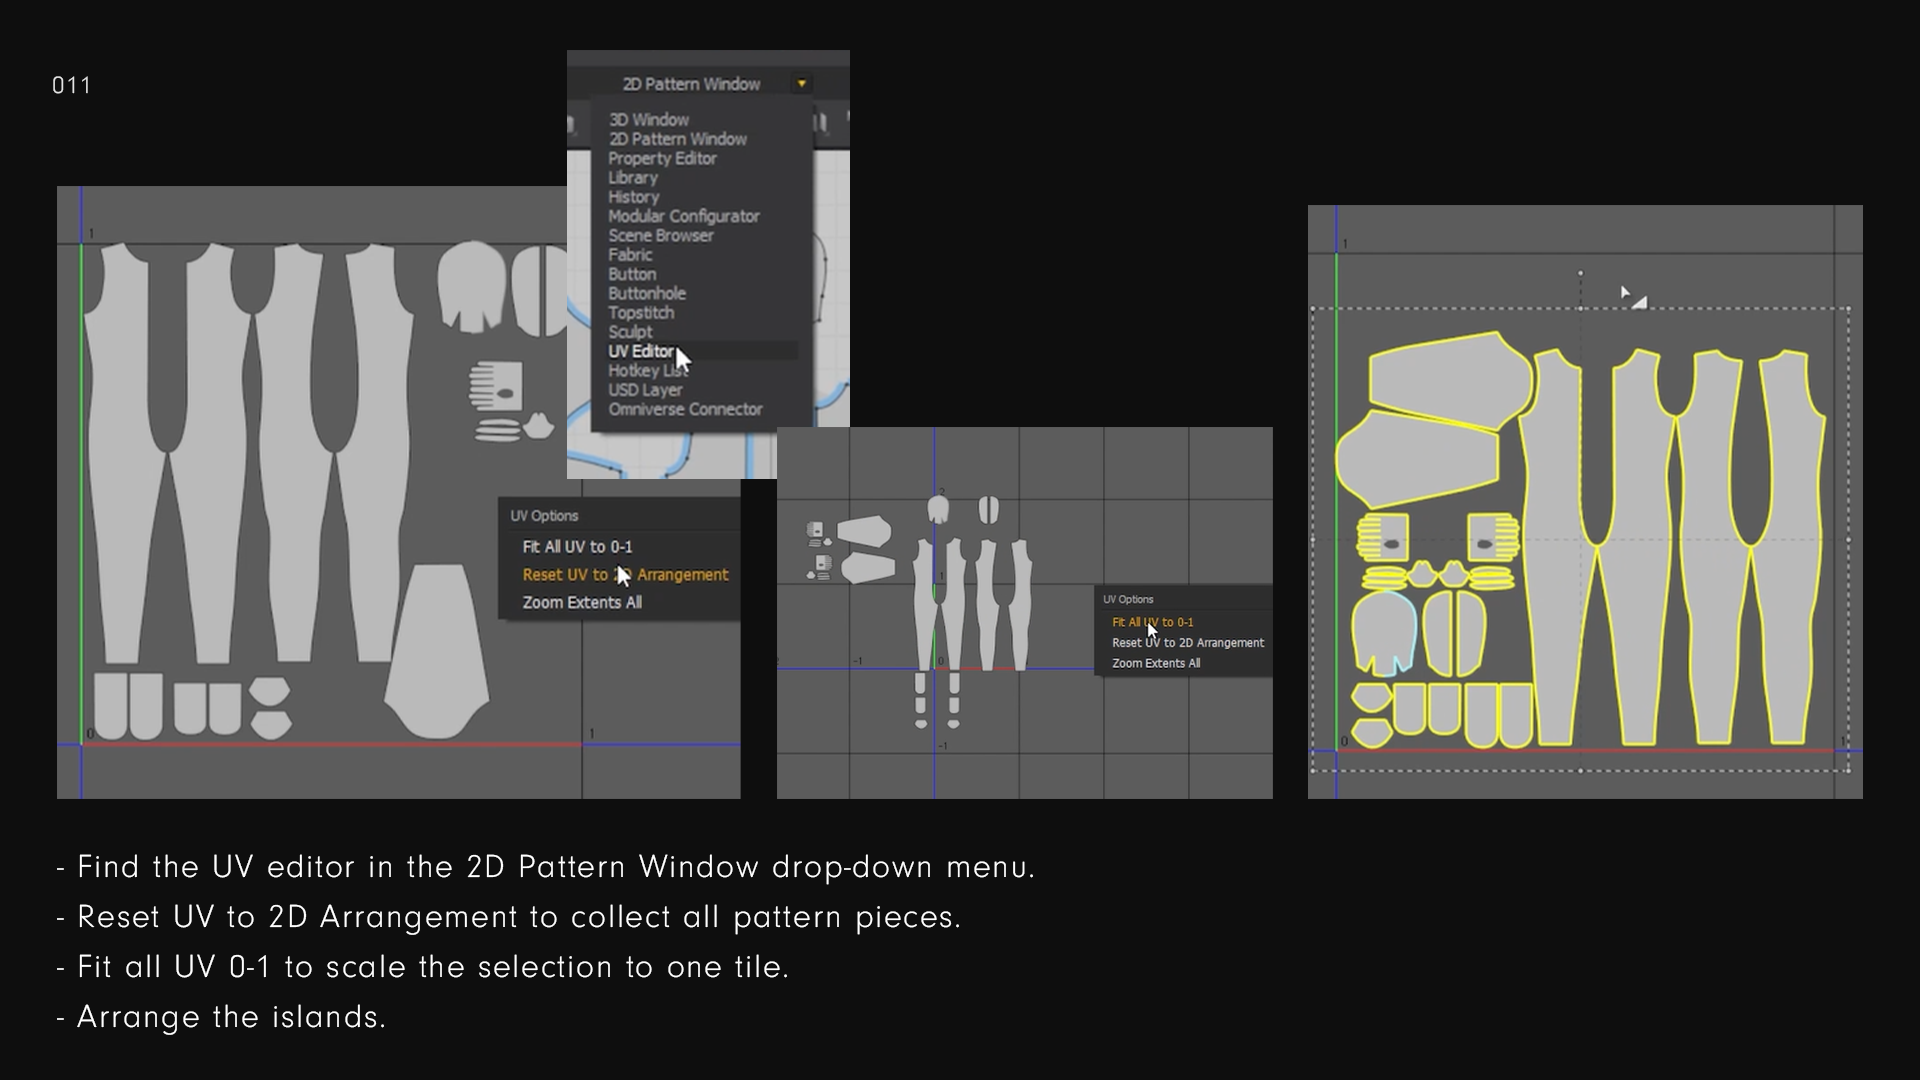
The UV Editor is found in the 2D Pattern Window drop-down menu.
Reset the UV to its 2D arrangement to collect all pattern pieces that might have flown off-screen.
I fit Morph-Man into one UV-tile, but if you’re looking for higher resolution meshes, distribute the pattern pieces over multiple UV tiles. If the resolution is really important to you, you might want to cut the torso and legs pattern into a top and bottom.
Export Settings
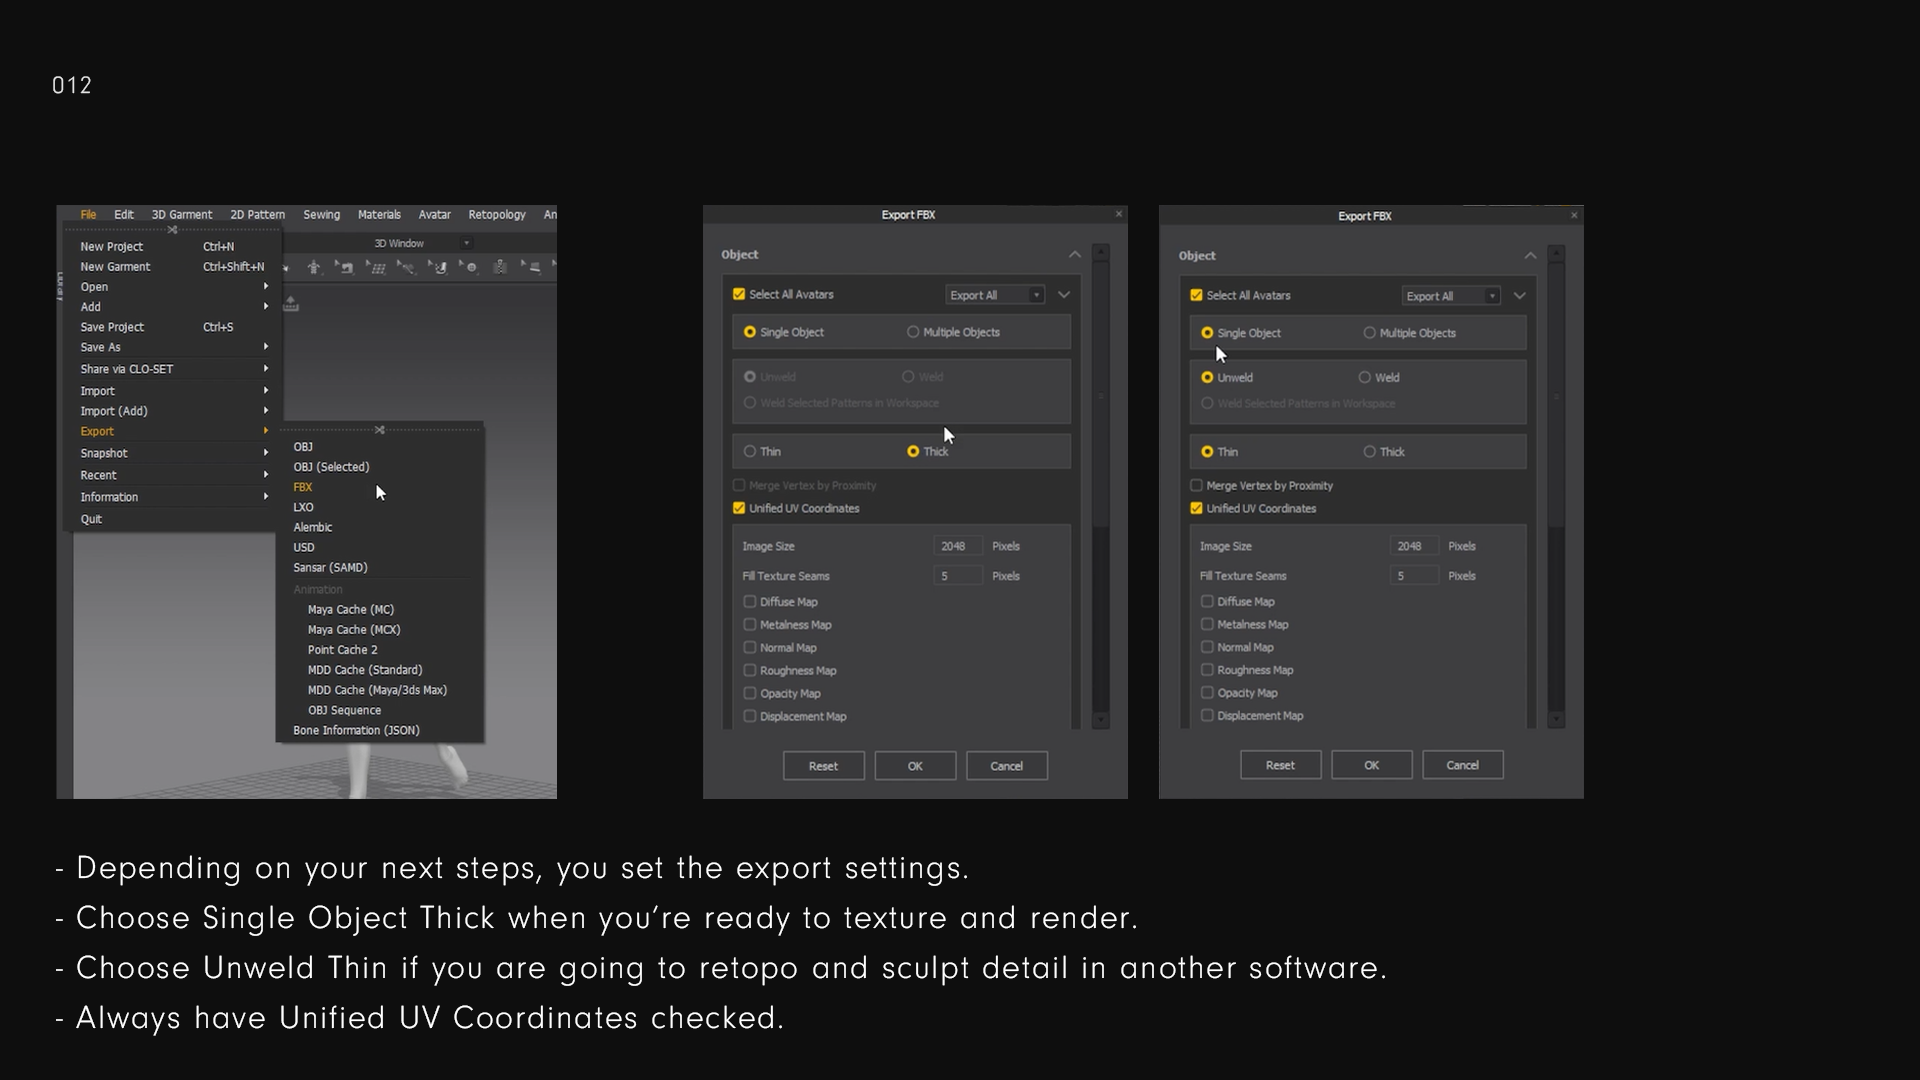
Export settings depend on your workflow.
It is hard to explain what export settings to choose. It all depends on what you need.
Un-welded Thin meshes make the MD cloth mesh a ‘thin shell’ with all pattern pieces detached from each other. You need this is you want to re-topologize the mesh and follow a low to high workflow.
Thin welded meshes have no seams, all edges have been welded together. It seems that this export setting works if you want to re-topo the mesh as one piece.
Thick meshes are not suitable for re-topo or sculpting. But it ‘finishes’ the mesh quickest.
I find that I can export the mesh like this, if I want to go straight into Substance Painter and don’t care about good topology. It retains thickness details made in Marvelous Designer.
That’s it for the Morph-Man fitting manual!
You might wonder why I didn't showcase how to use the fitting suit. The fitting suit seems like a great option, but specifically in the case of Morph-Man, I can't seem to make it work properly.
I have found that it is much more useful to know how to fit individual pattern pieces.
With that said, I hope that this manual proves to be useful to you. Not only for Morph-Man, but for any fitting you might have to do in Marvelous Designer.
Conclusion
Morph-Man is a free Blauw Films downloadable.
The product package has been updated with a Visual Manual, a Video Tutorial and 6 PBR Textile Materials.
Claim the newest version of Morph-Man HERE.
Morph-Man has appeared in a campaign for the launch of Bakermat's Virtual Material Library.
You can read about the process and Bakermat in this blog.
Reading List
References
- The ultimate digital cloth creation tool — Marvelous Designer
- Blender — Blender
- Topogun — Topogun
- Adobe Substance Painter — Adobe
- Virtual Fabric Library — Bakermat


.jpg)


%20by%20Ivan%20Aivazovsky.jpg)




.jpg)


.jpg)


0 Comments