Achieve a Realistic Lens Flare in your 3D Renders
Bloom and Glare in Chaos Corona C4D
Blauw Films
When we’re shooting through a lens we will always run into a variety of optical phenomena. From depth of field creating bokeh (also known as blur disks) to lens flares, each optical phenomena is a direct result of the lens you’re using. And together they make up the personality of the lens. Expressing a feeling beyond the subject on camera.
But how about 3D rendering?

When we’re looking at computer graphics, we want to add realism by processing the image with a variety of imperfections. If you would like to read about bokeh, give the following blog: Creating Realistic Depth of Field a read and then come back to this one :)
However, in this one I’d like to cover lens flares. And specifically how to achieve any flare you want in Chaos Corona using the Bloom and Glare settings.
How to use Bloom and Glare
Bloom and Glare is a post-processing effect in Chaos Corona. The beauty of it being a post-processing effect is that it can be adjusted in real-time as you are previewing your render.
You can enable it in a few places:
- In your Render Settings (under Camera - Exposure - Tone Mapping)
- In your Cinema 4D Picture Viewer (under Corona - Post processing)
- In your Corona VFB/Interactive Renderer (under Post)
- In your Corona Camera Tag
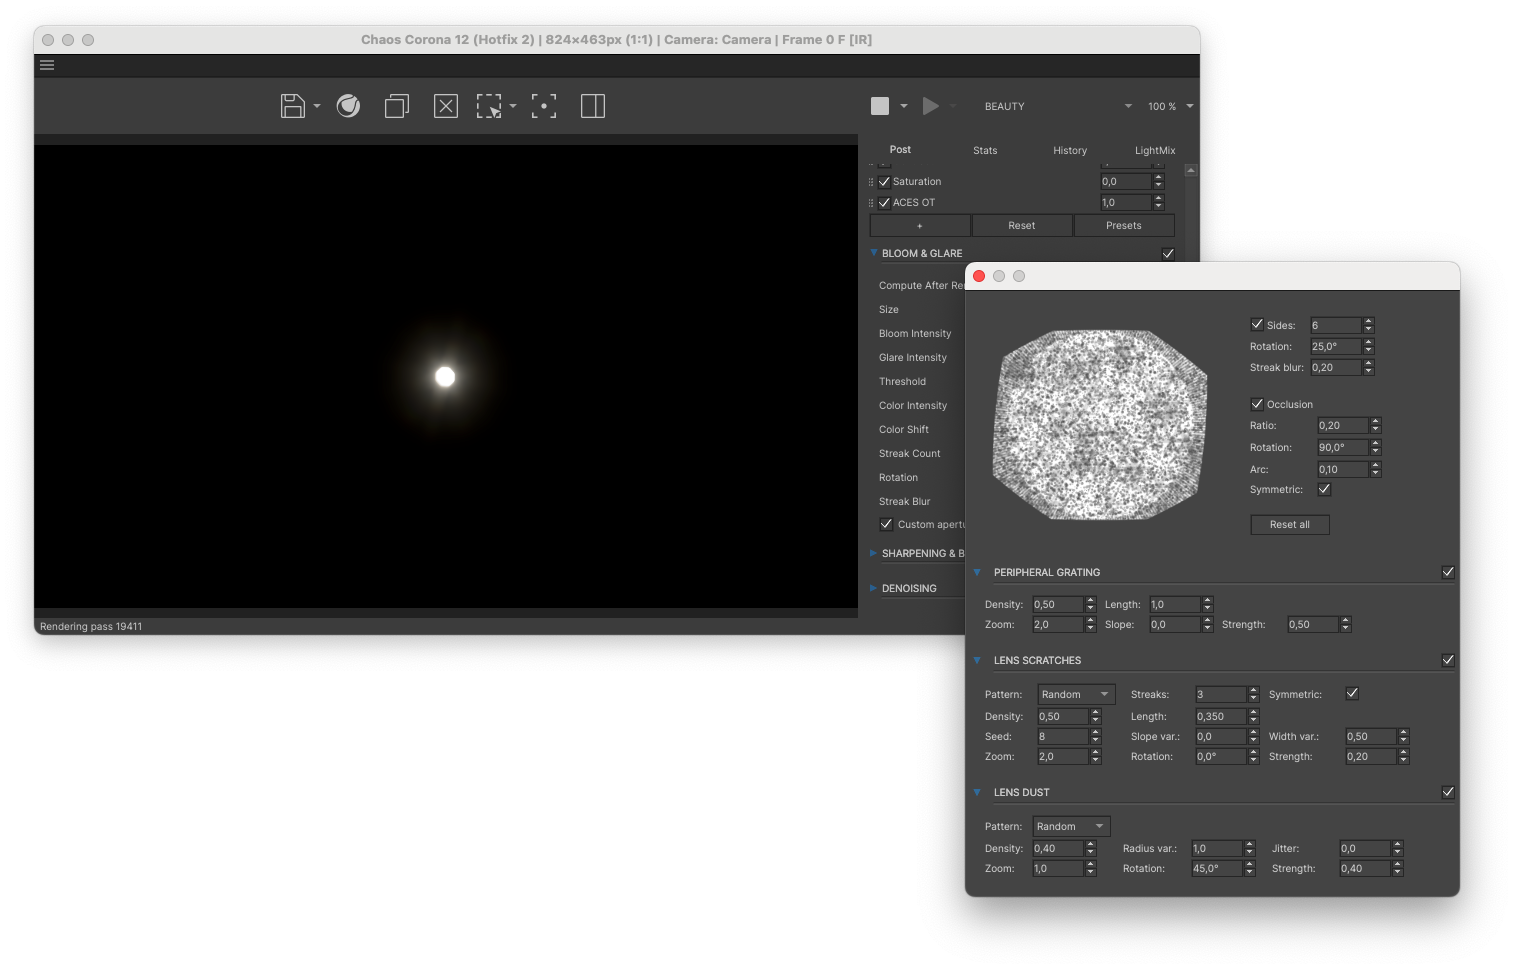
However, before we start let’s add a Corona Light to the scene and face it towards the camera. To add a bit of variation to the light I’m setting the Color Mode to Shader and importing a 32-bit .exr light texture. I’m using a Free light texture from HDR Light Studio.
As you can see there is no Bloom and Glare turned on. The light renders out sharp around the edges.
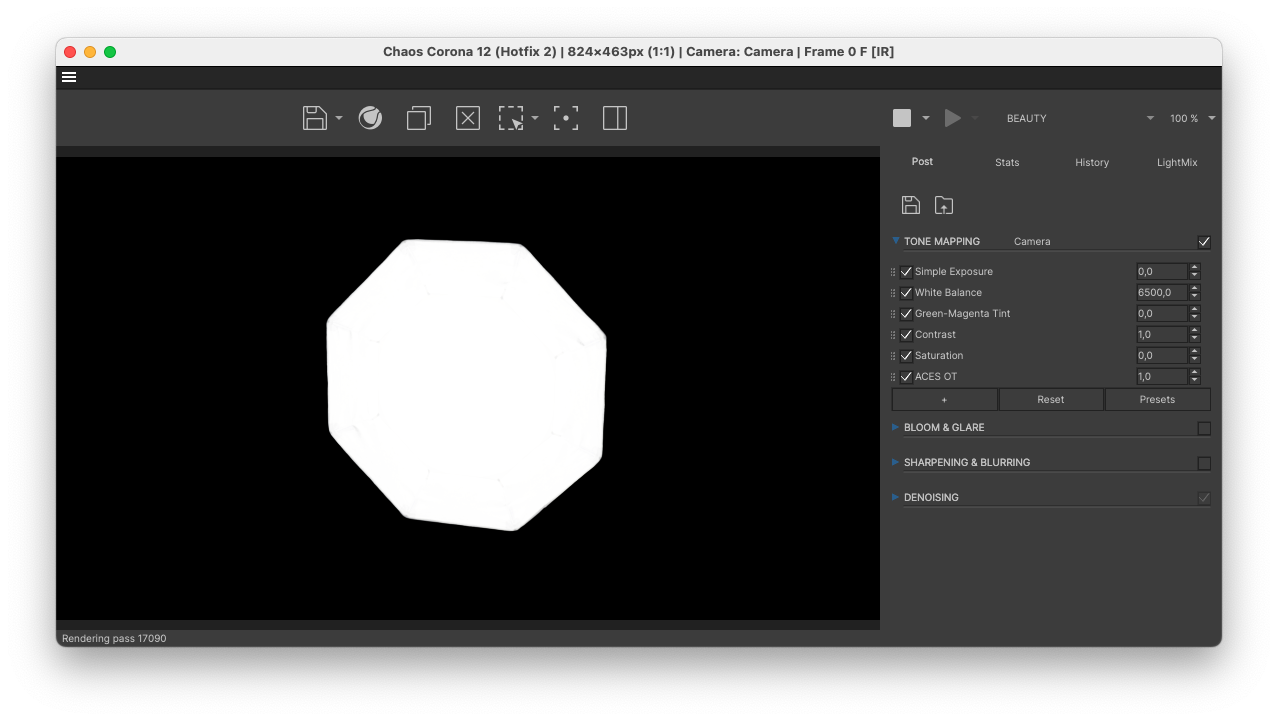
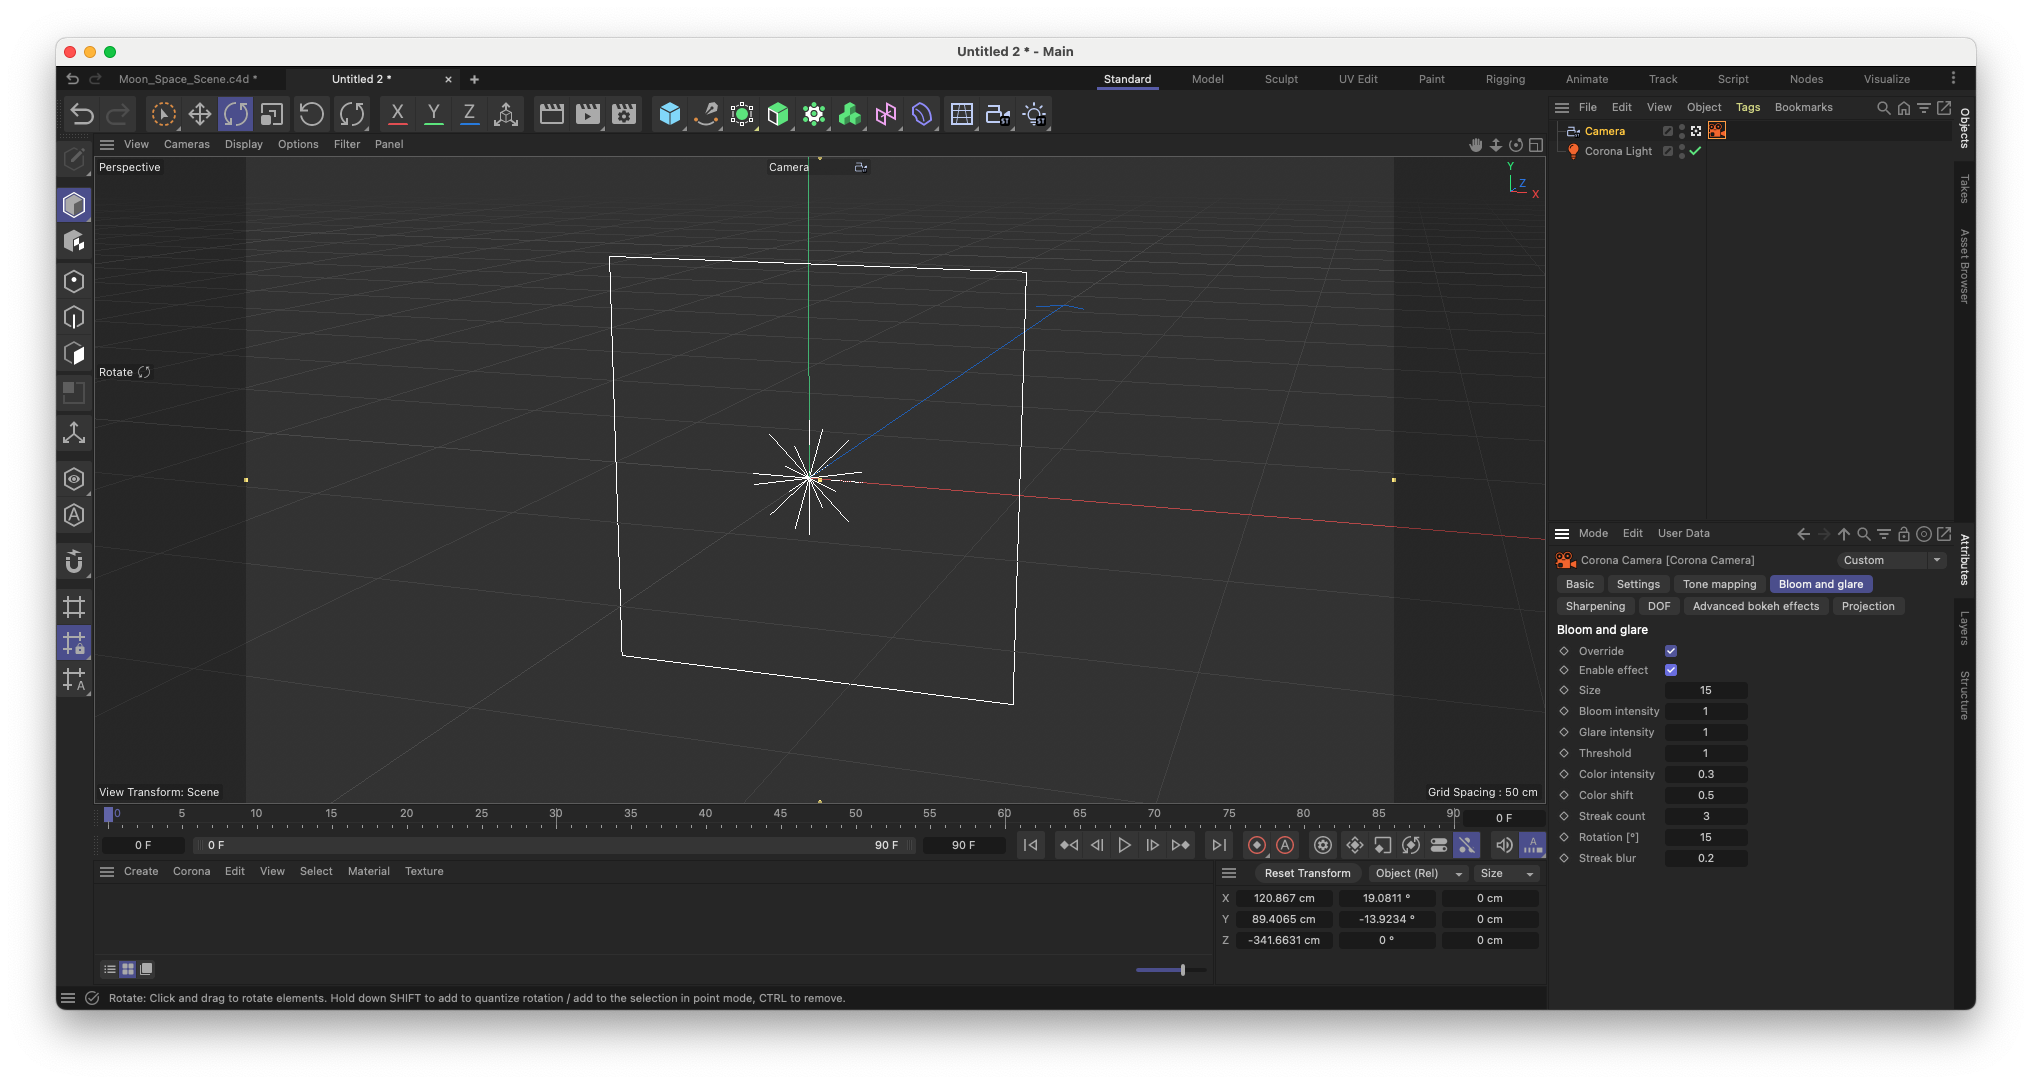
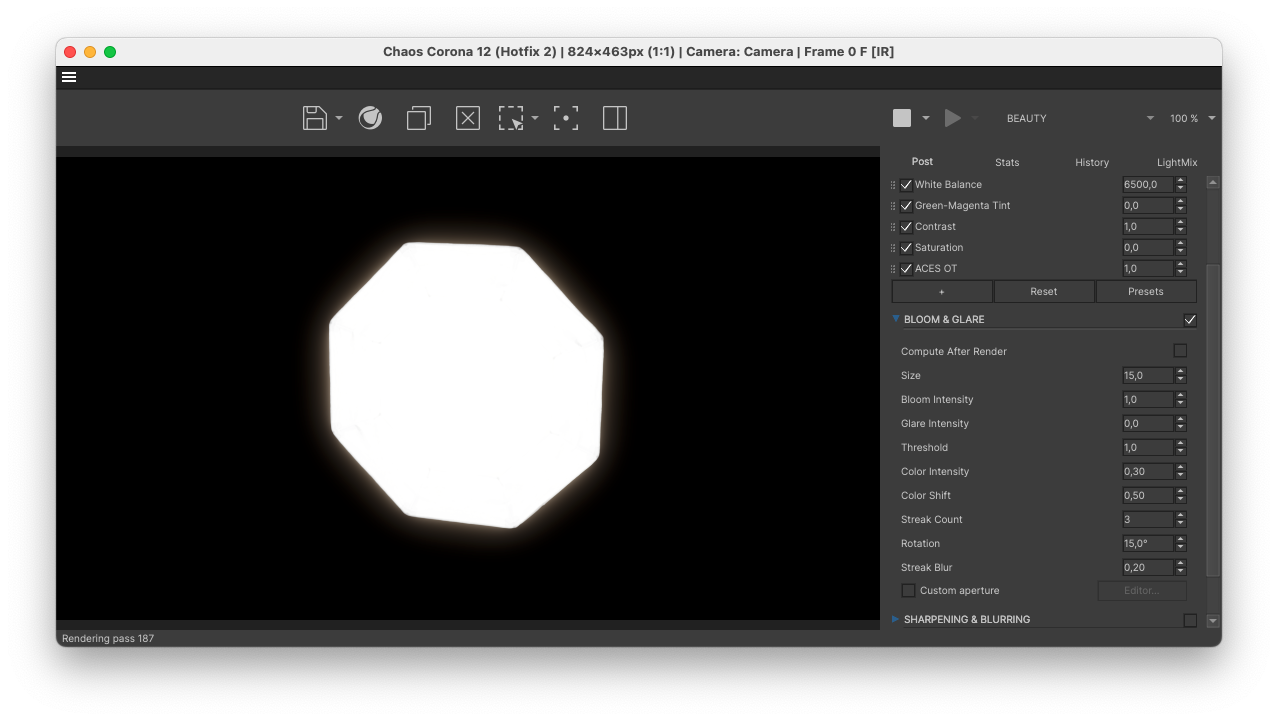
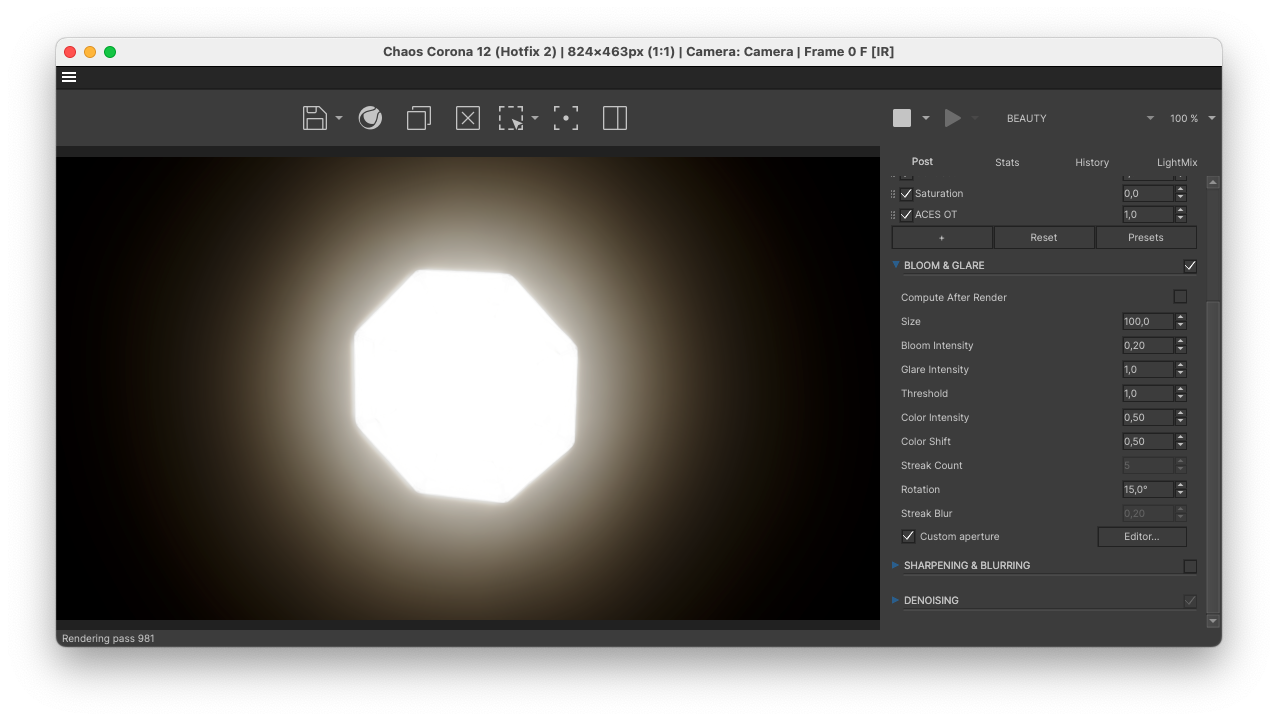
After enabling the Bloom and Glare through the Corona Camera Tag the light looks quite different. A soft falloff is glowing around the light.
The effect has two major categories. Bloom, which creates a soft glow around the bright parts of the image. And Glare, which creates sharper streaks or rays or light.


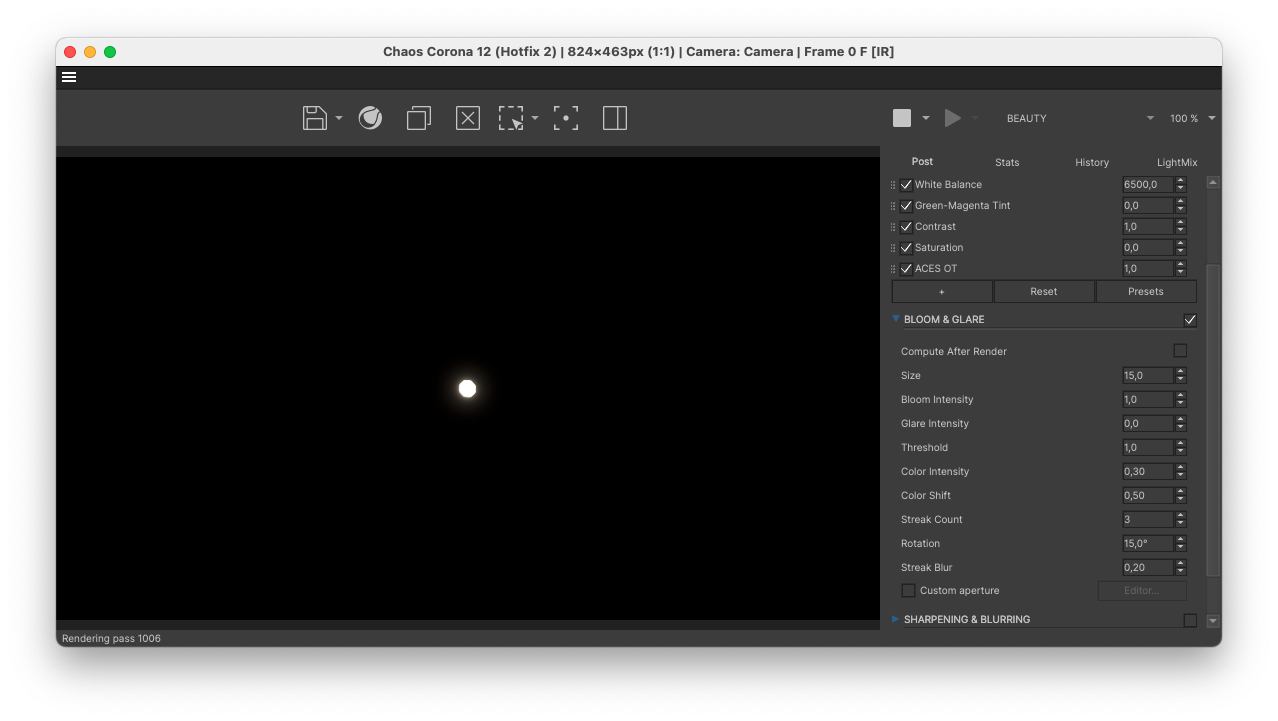
Glare becomes more visible when the light source is small on screen.
When used together you can create very impressive effects. However, how should they be used together? Let’s cover all the settings and compare their results.
Intensity
The most straightforward settings are the two intensity sliders. As you can see below, when I lower the Glare Intensity to 0,0 it disappears. We’re only left with the Bloom effect. Bringing down the intensity simply lowers the effect.
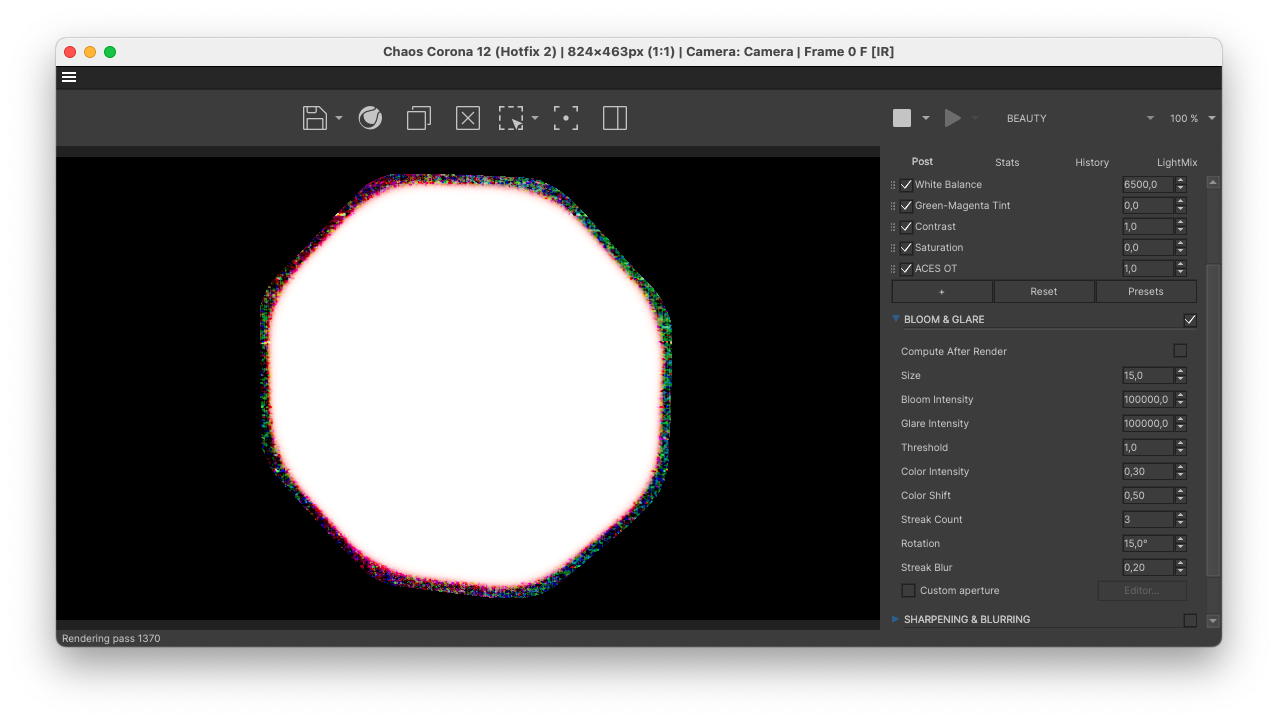
You can also increase the intensity. For the sake of argument, you can technically increase the value to 100.000,0 however it simply starts looking glitchy.
Size
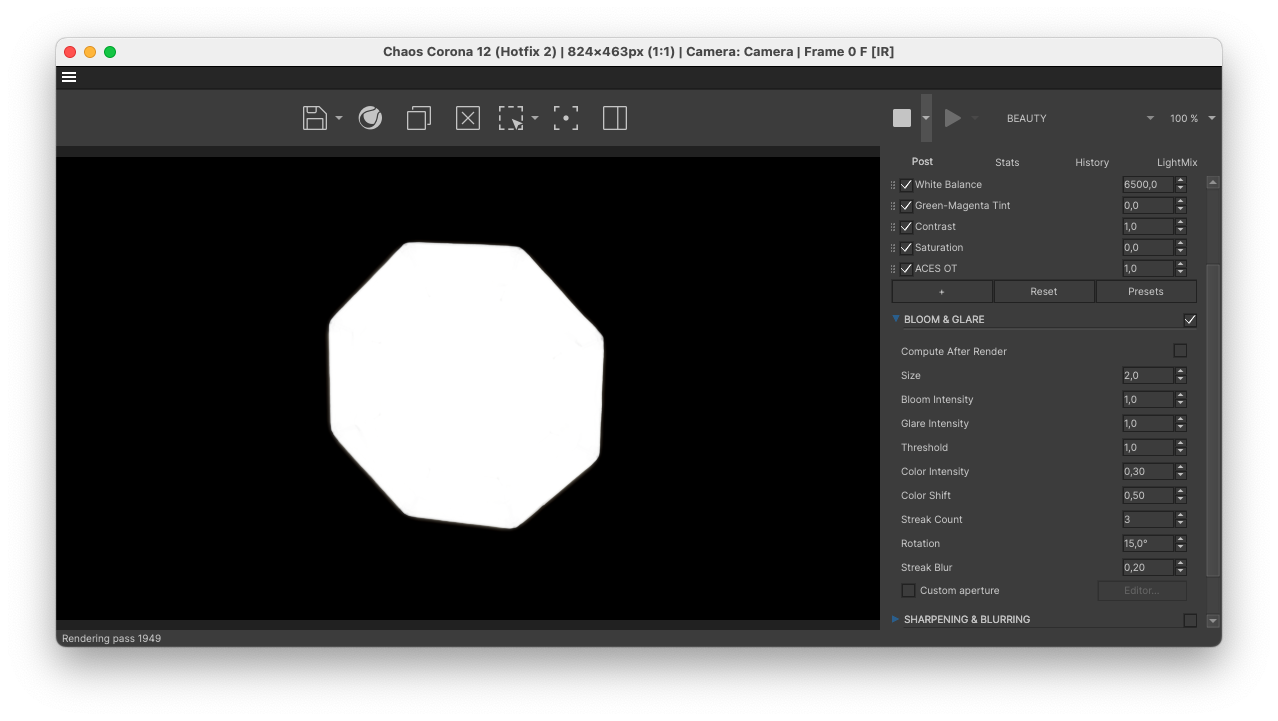
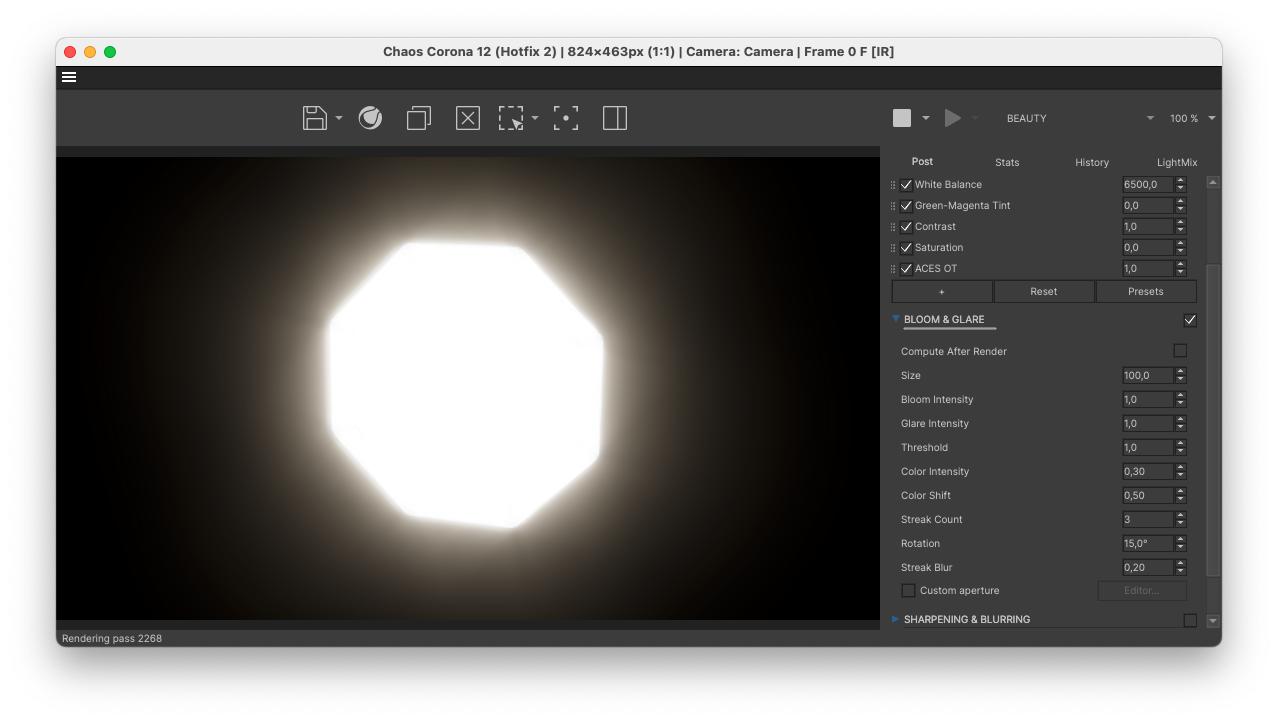
Size is an incredibly powerful setting that defines how much of the screen will be covered in Bloom and Glare. This has a range from 0,0 to 100,0. To showcase the two extremes, have a look at the difference between a Size of 2,0 and 100,0.
Threshold
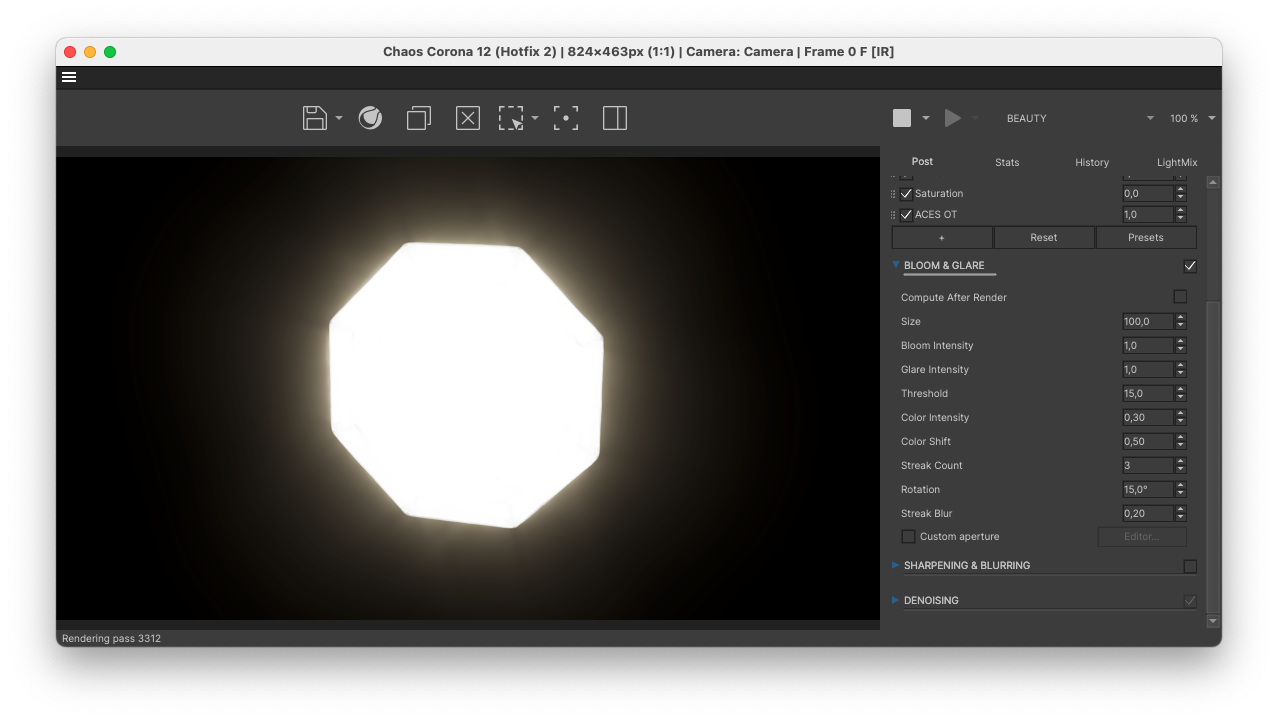
Threshold is a slider that helps you define how much light is necessary for the Bloom and Glare effect to take place. The standard setting of 1,0 is usually good. However, by lowering the value less light is needed resulting in a stronger Bloom and Glare. While increasing the value means more light is needed resulting in a weaker effect.

Color Intensity
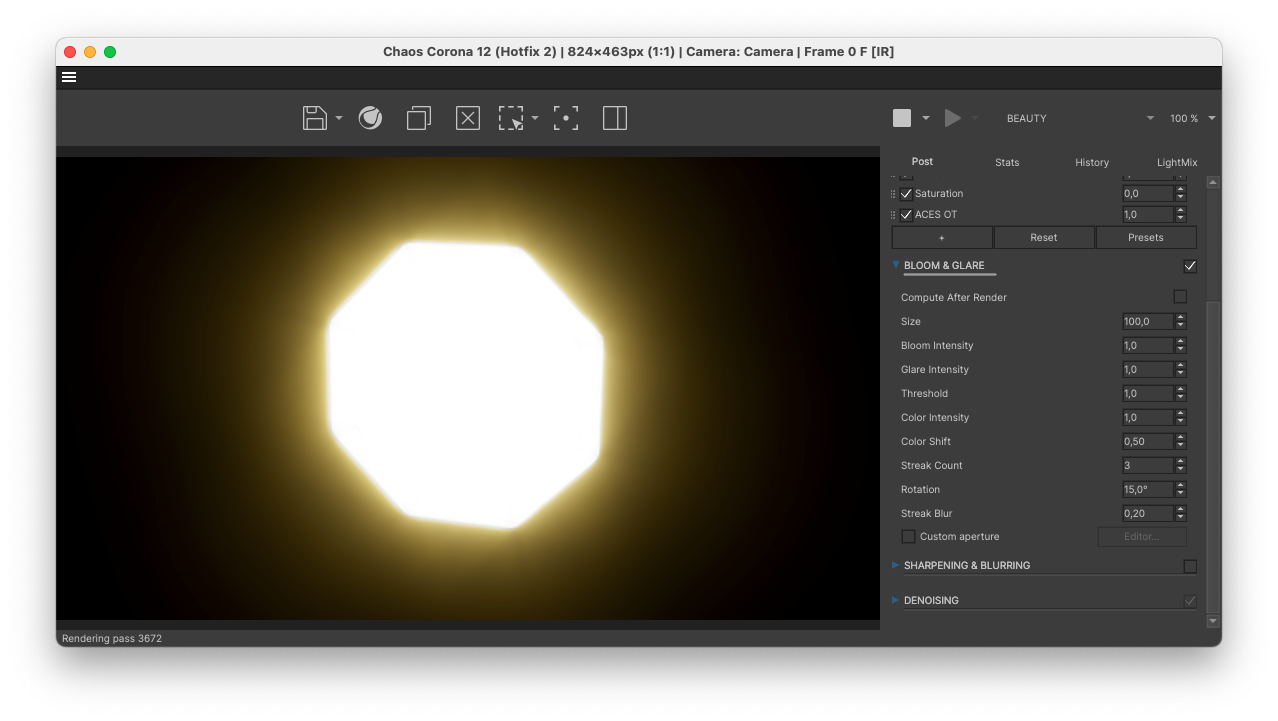
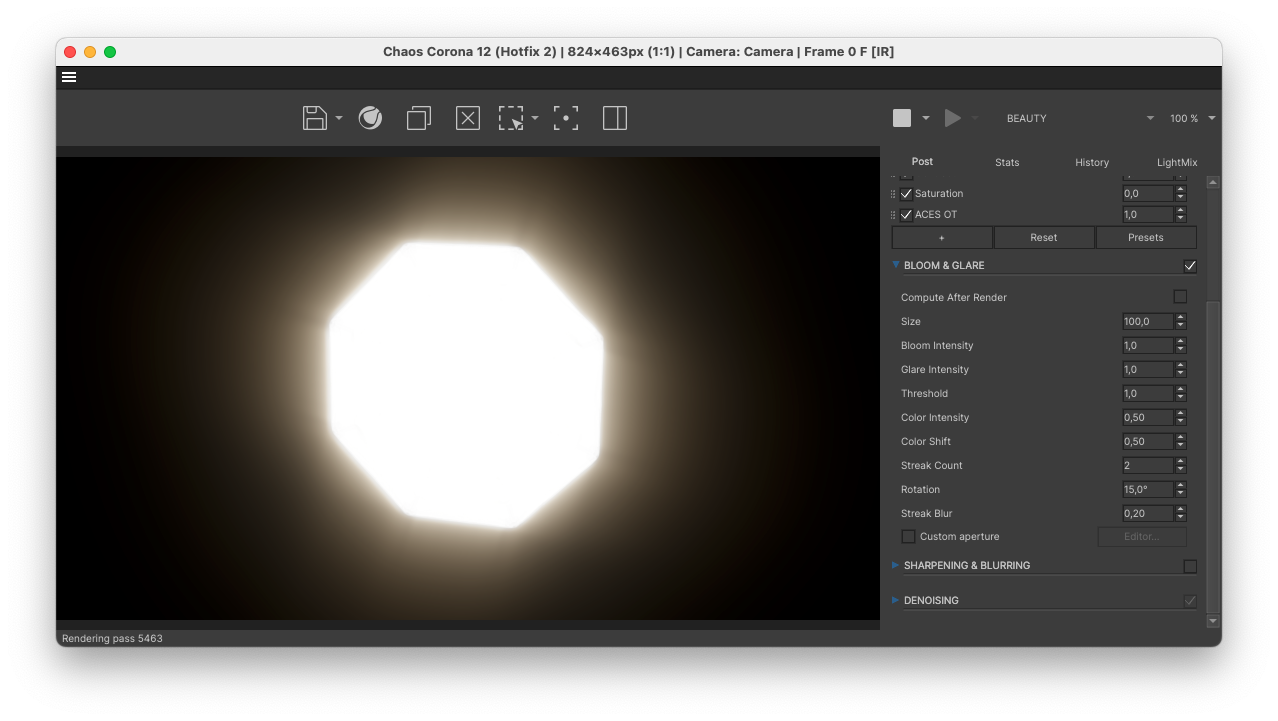
Color Intensity is simply a Saturation slider that exclusively affects the values of the Bloom and Glare effect. By increasing or decreasing this value you will simply change the saturation.
Color Shift
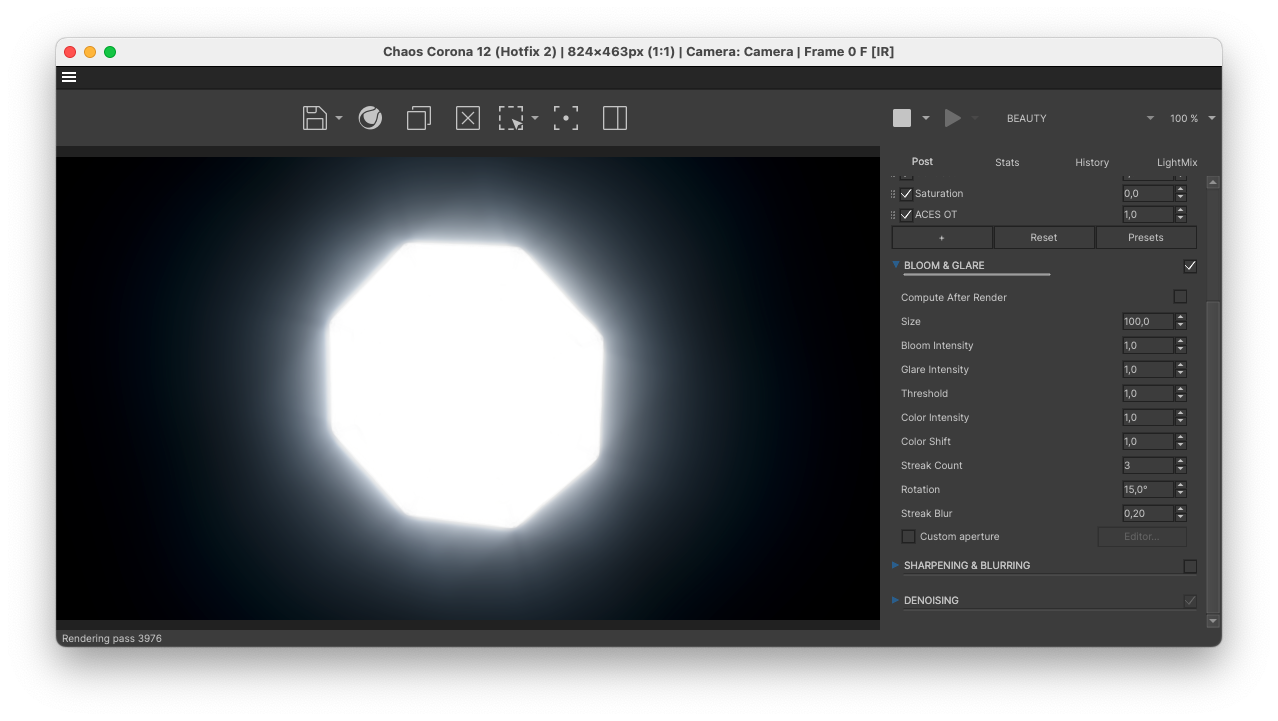
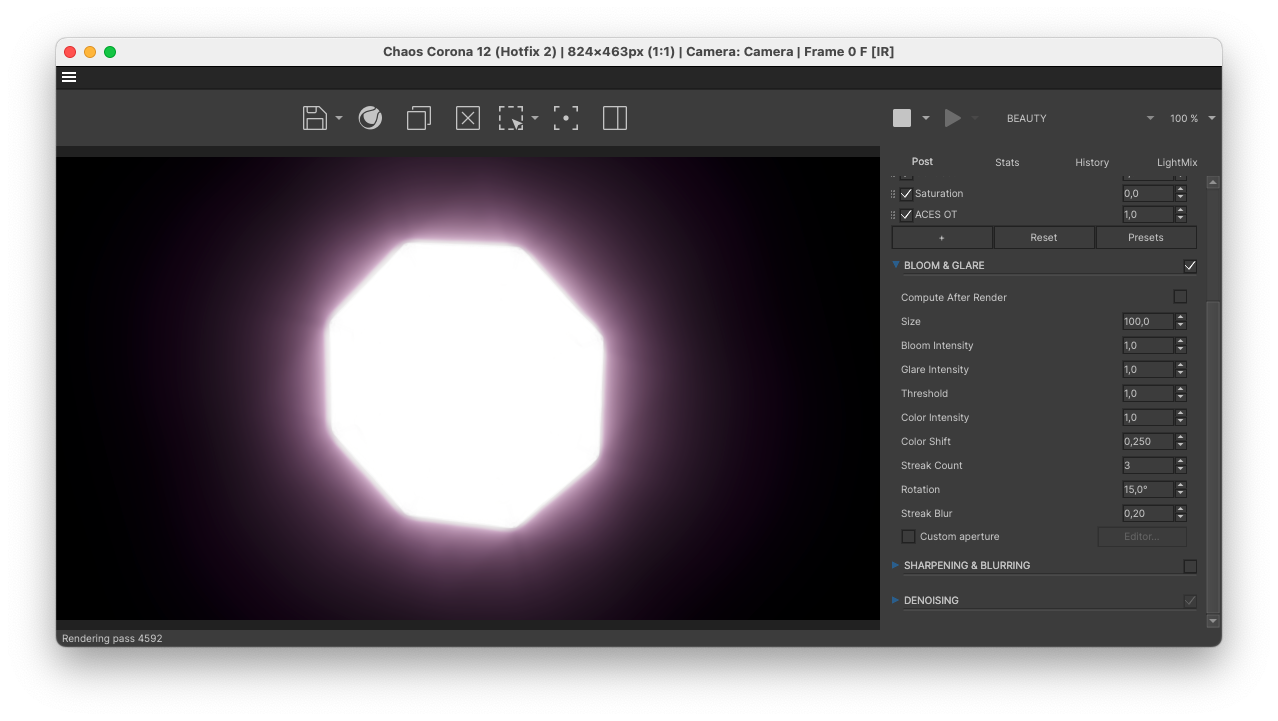
Color Shift is simply a Hue slider that affects the Bloom and Glare effect. It is a looping slider that shifts the current color (set to value 0,5) to its nearest color by moving the slider towards 1,0 or back down towards 0,0.
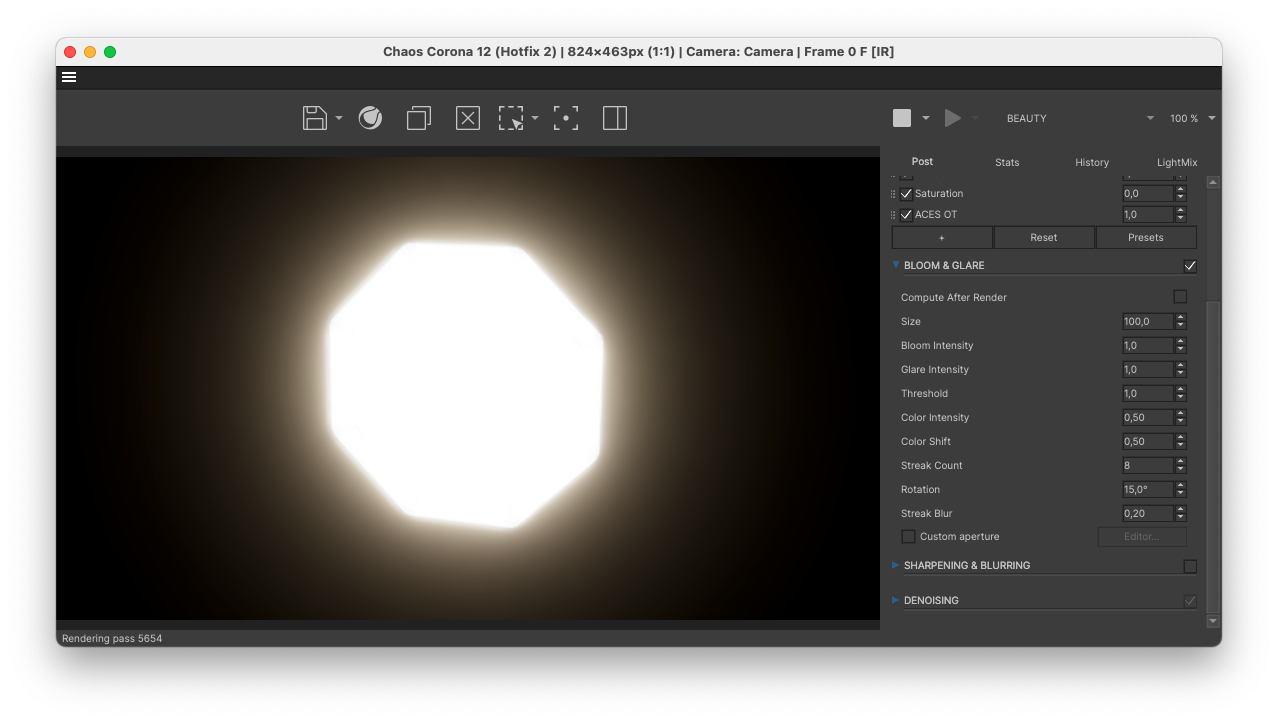
Streak Count
Streak Count directly affects the amount of Glare streaks that are visible. This setting can also be changed inside the Custom Aperture settings. However, if you simply want to change it here you can. As Glare effects become more visible on small points of brightness, we won’t be seeing much difference in these close-ups.
Rotation
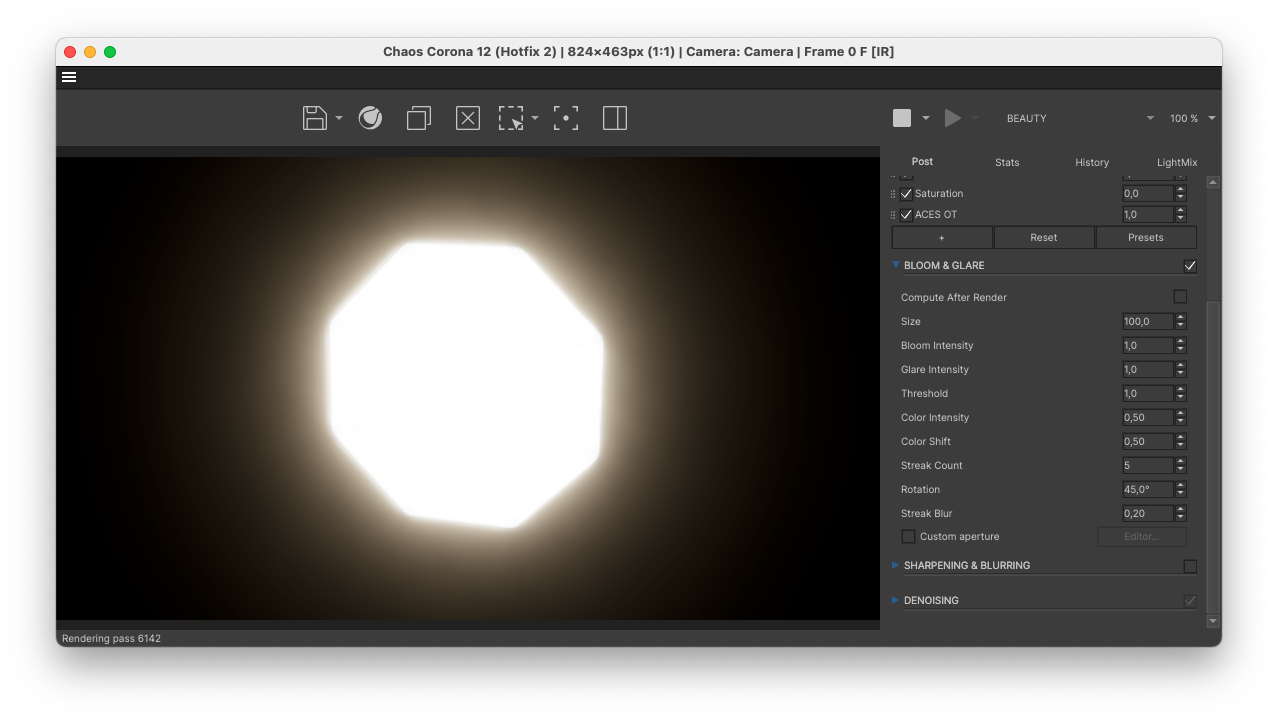
Rotation also directly affects the Glare streaks by rotating them around their own axis. This can also be changed inside the Custom Aperture.
As you start changing the value you’ll see the Glare rotating.
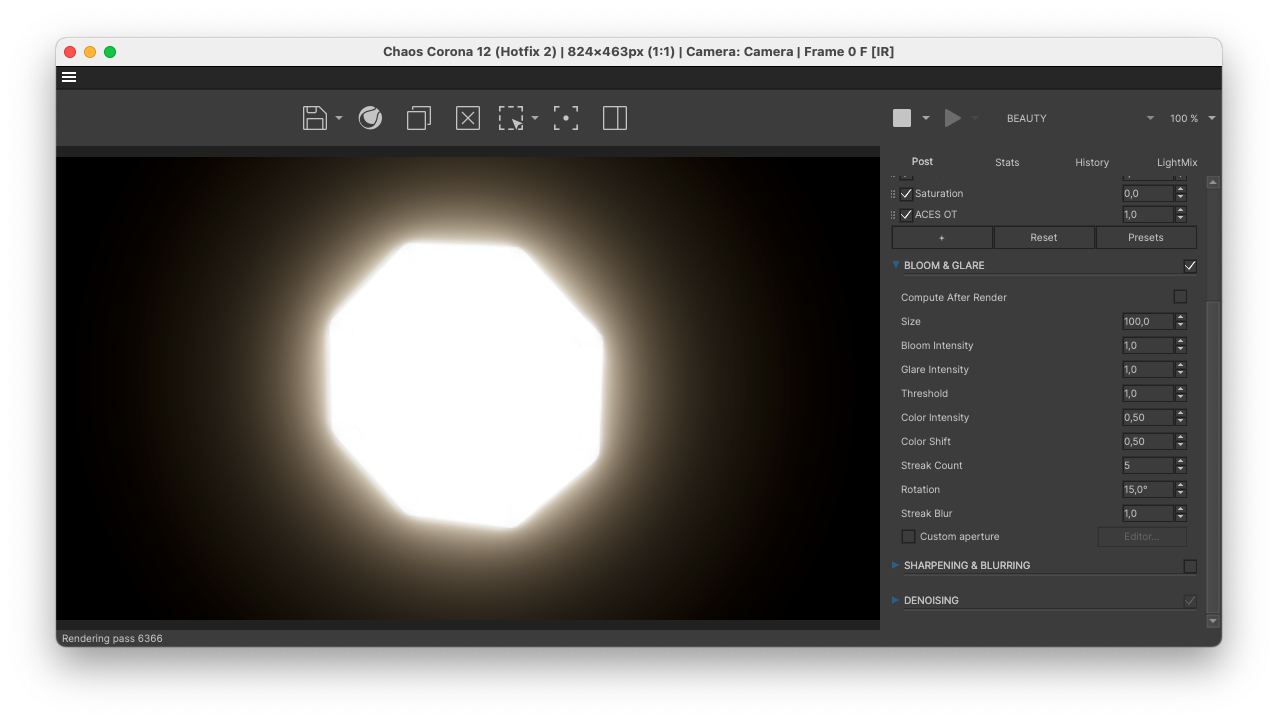
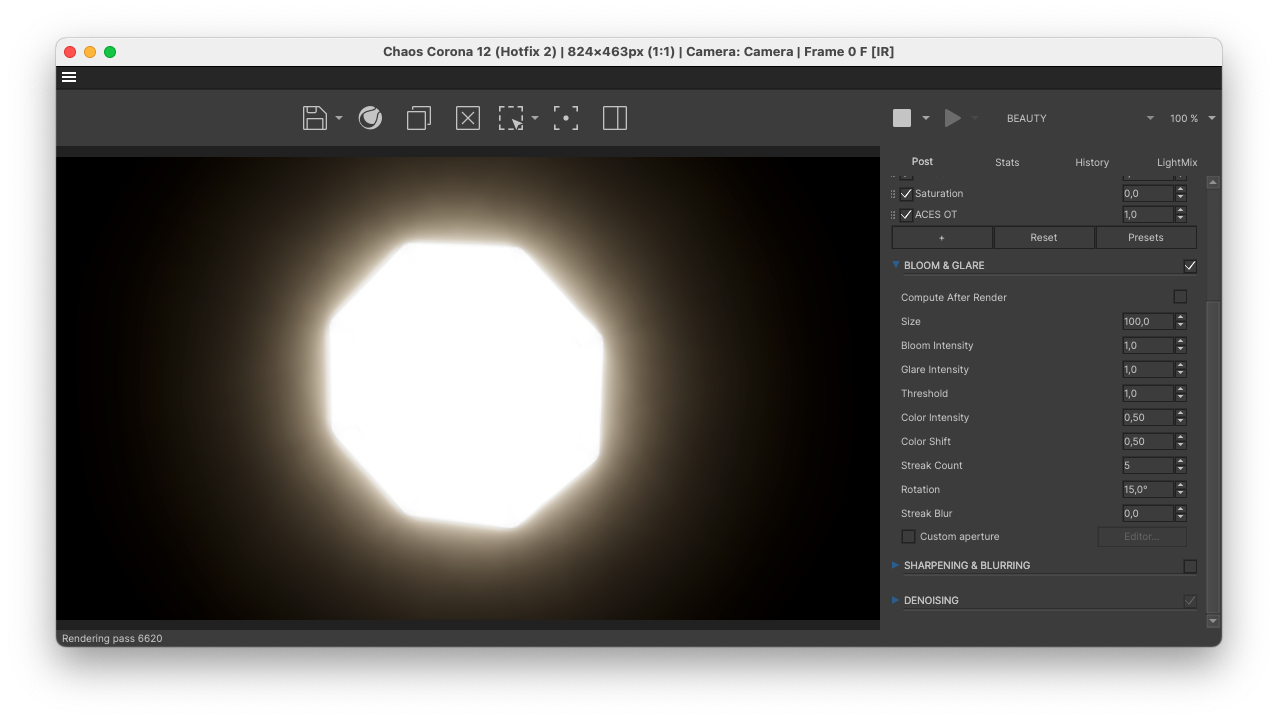
Streak Blur
Streak Blur is a smoothing effect for the Glare streaks. The higher the value, the less defined the rays of light become.
The lower the value, the less smoothing that is applied to the Glare.
Custom Aperture Editor
If we really want to create a realistic looking Bloom and Glare effect we will have to open up the Custom Aperture Editor. Here we can affect all the settings that make up the optical imperfections of camera lenses.
In the end we want to blend and layer a variety of these settings. So let’s first have a look at what each of them does separately.
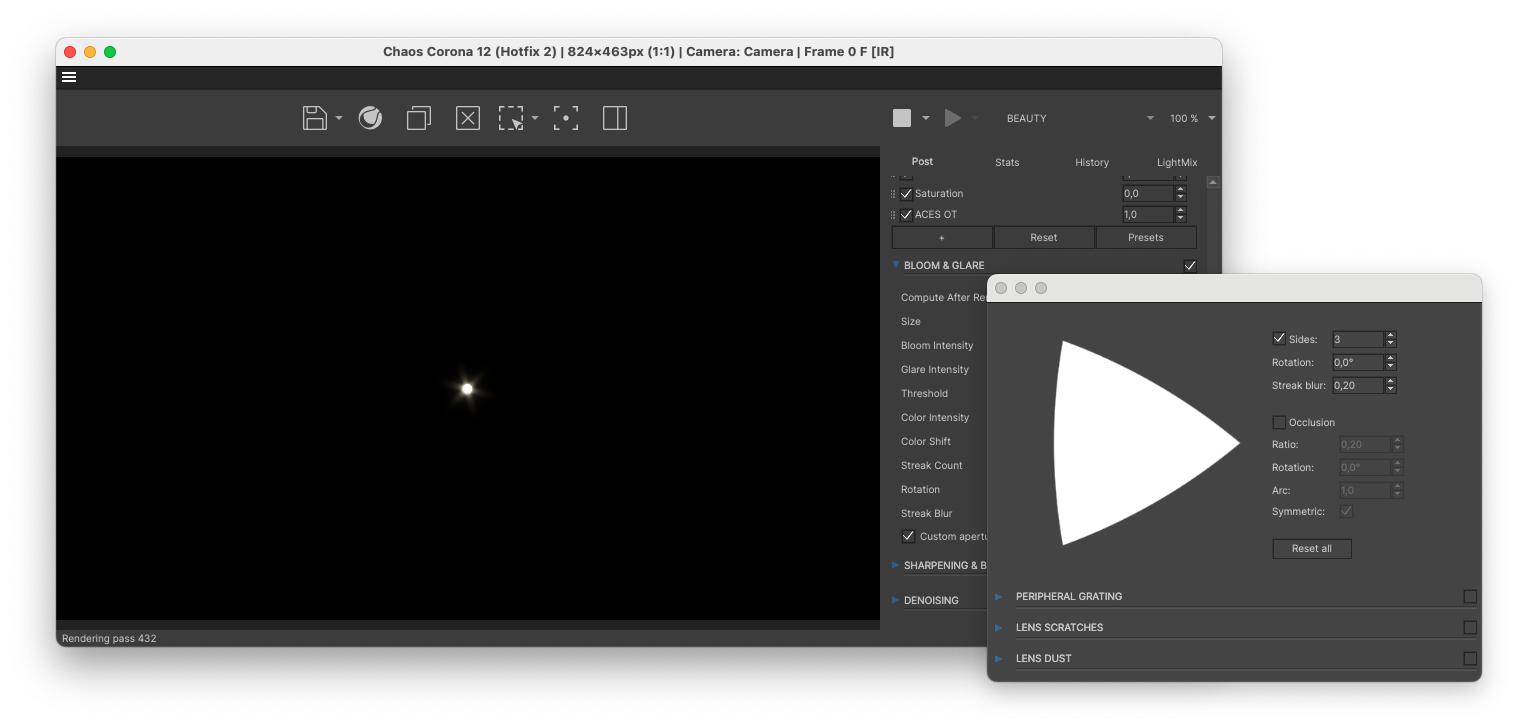
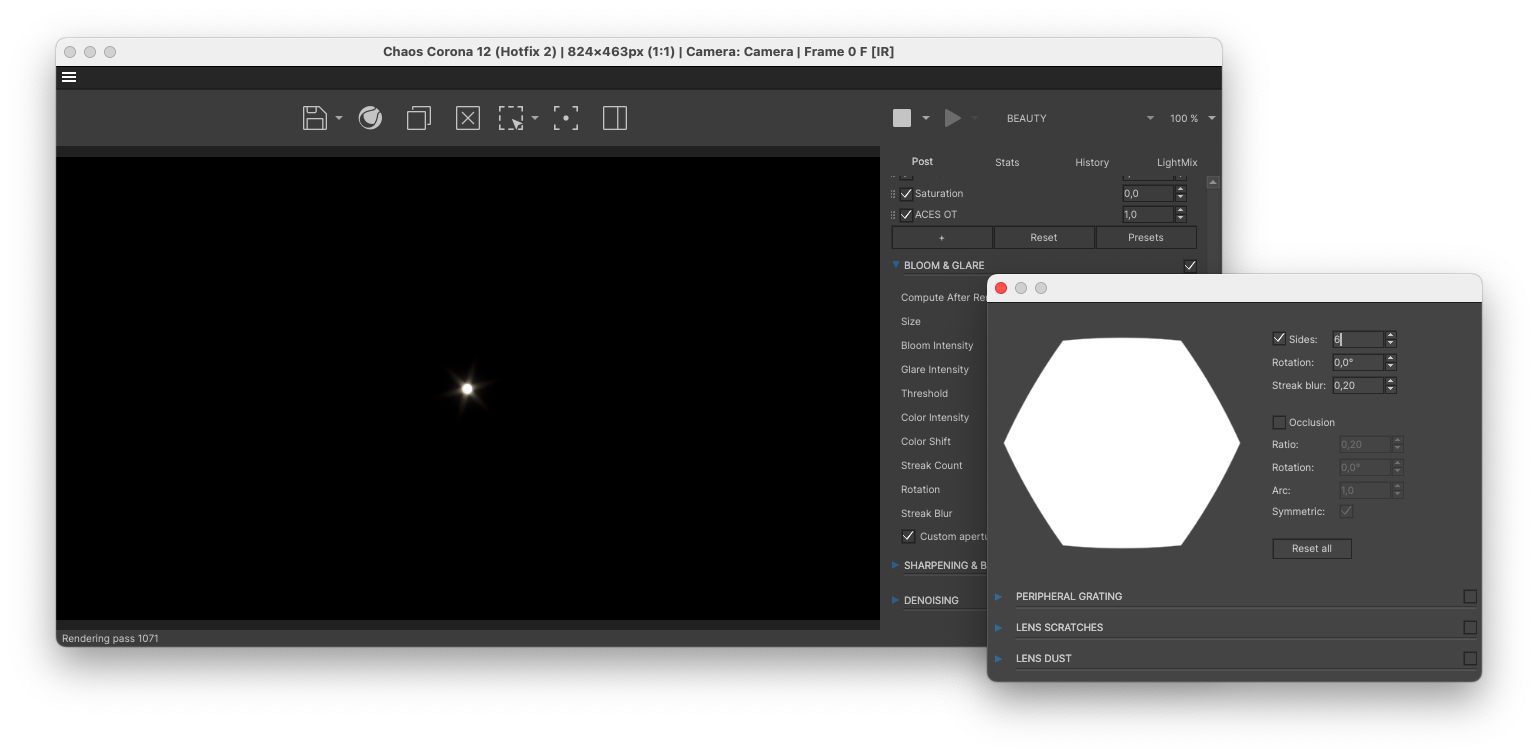
Sides
Sides allows you to change the number of aperture blades in your 3D-lens. The number of blades directly affects the amount of light streaks that are visible in your Glare. This is true in real lenses and it’s good to see that we can apply the same logic to CGI.
As you can see below an odd number of blades creates double the amount of streaks. While an even number of blades simply doubles up those rays on top of each other. Thus resulting in the same amount of streaks as you have blades.

Rotation and Streak Blur
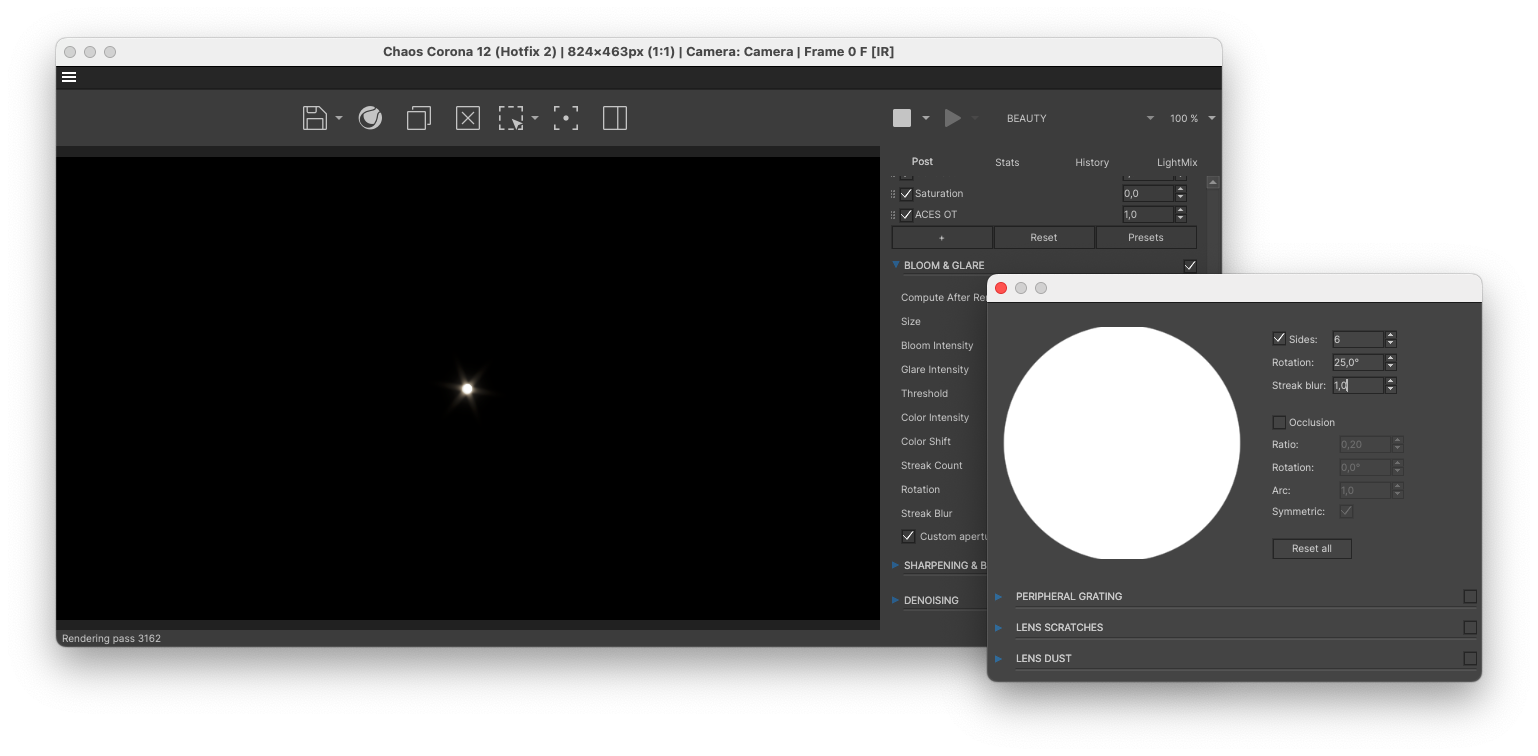
Rotation and Streak Blur do exactly the same here as they do in the main Bloom and Glare settings. However, in this case they have a direct impact on the rotation and blur of the bladed aperture you’ve defined. Below is an example in which I’ve set the Rotation to 25˚ and the Streak Blur to 1,0.
Occlusion
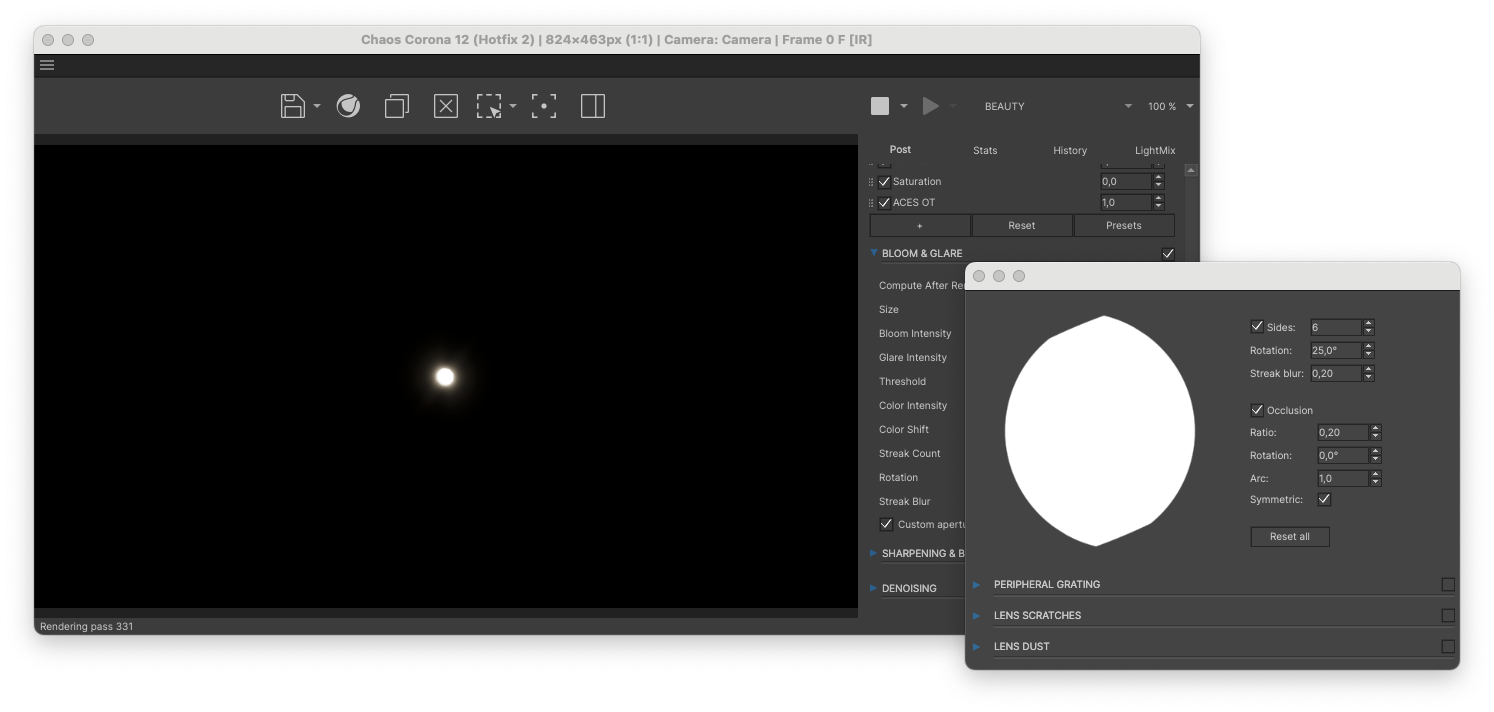
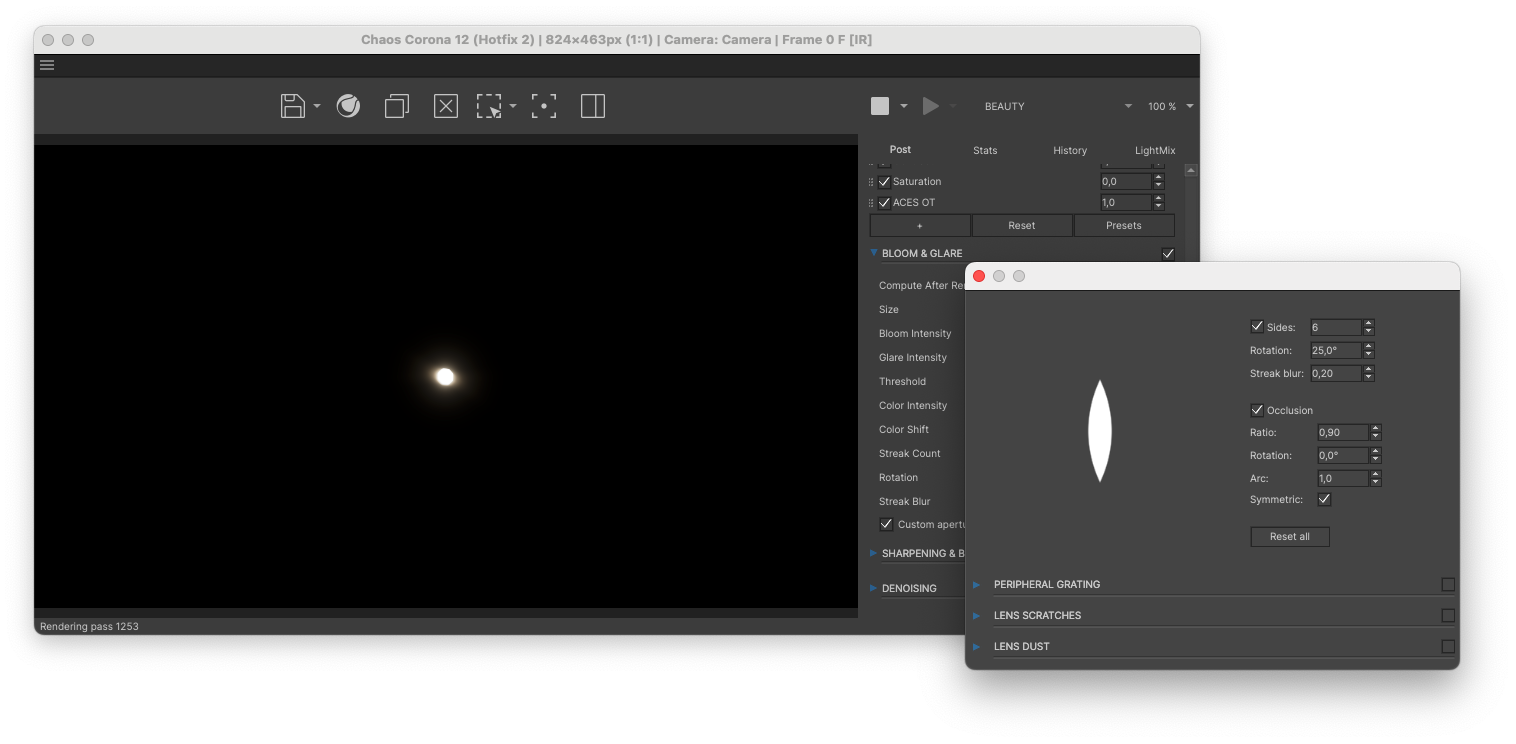
Occlusion is a very powerful setting which affects the squeeze of the light entering the lens. But again, these settings only affect the Bloom and Glare. If you’re utilizing a squeezed flare effect you should ideally be matching the Depth of Field settings with it as well.
The Occlusion values go from 0,0 to 1,0. The stronger the value, the more the lens flare is stretched into a wide streak.
Rotation and Arc
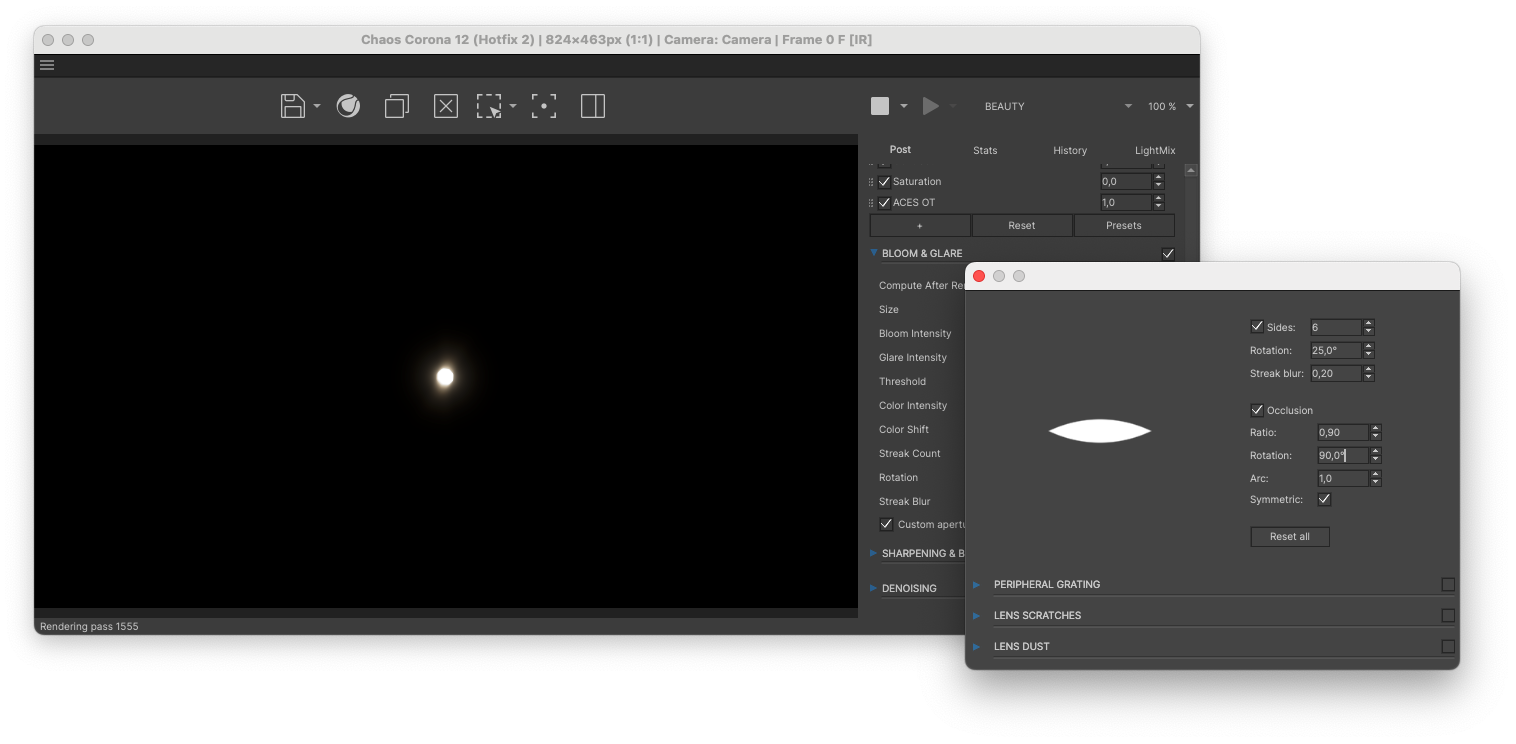
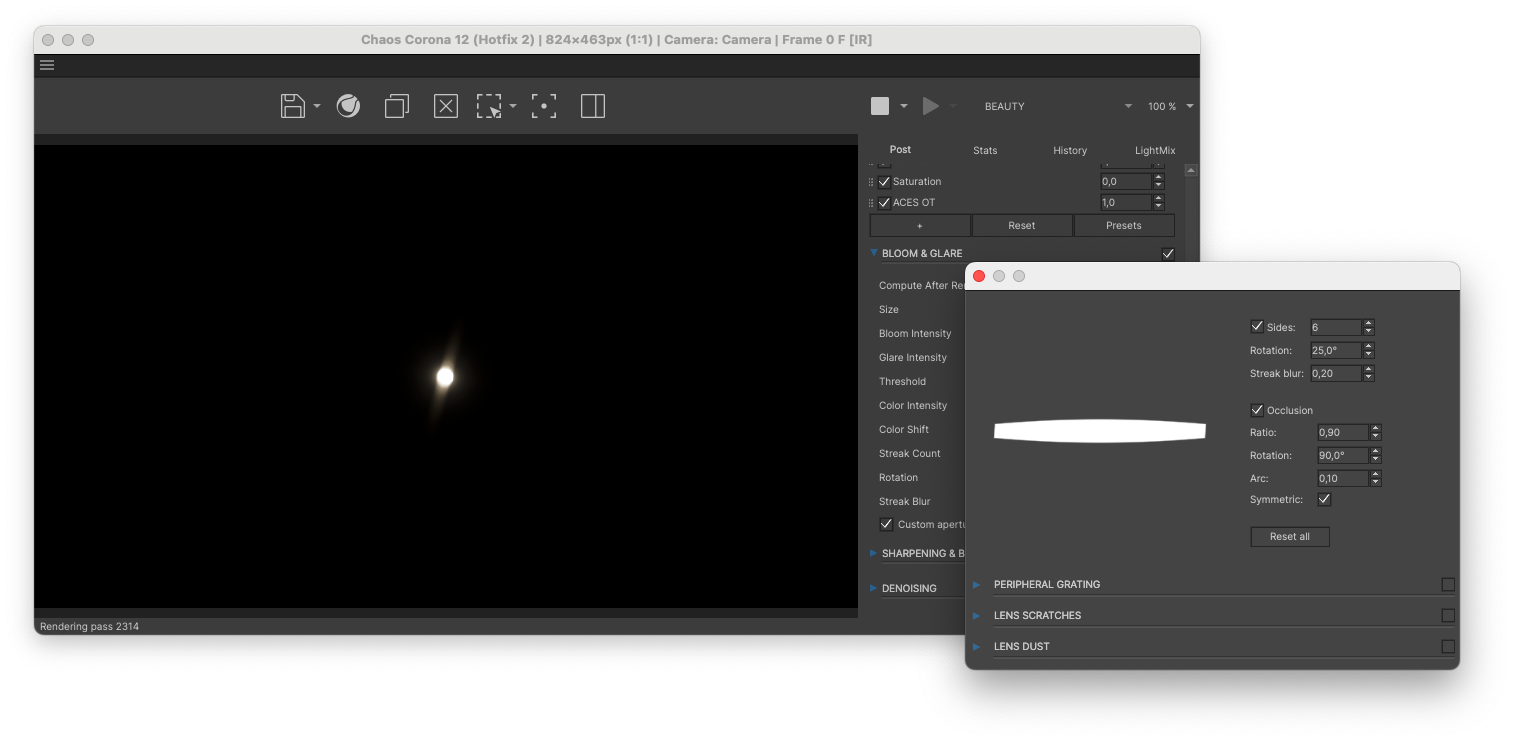
Rotation and Arc are two supplementary settings that allow you to further customize the look of your anamorphic lens flare. Rotation rotates the squeeze factor around its own axis. And Arc defines how smooth the transition is around the squeezing effect. Have a look at the examples below to better understand what it does to your Bloom and Glare.
Symmetric
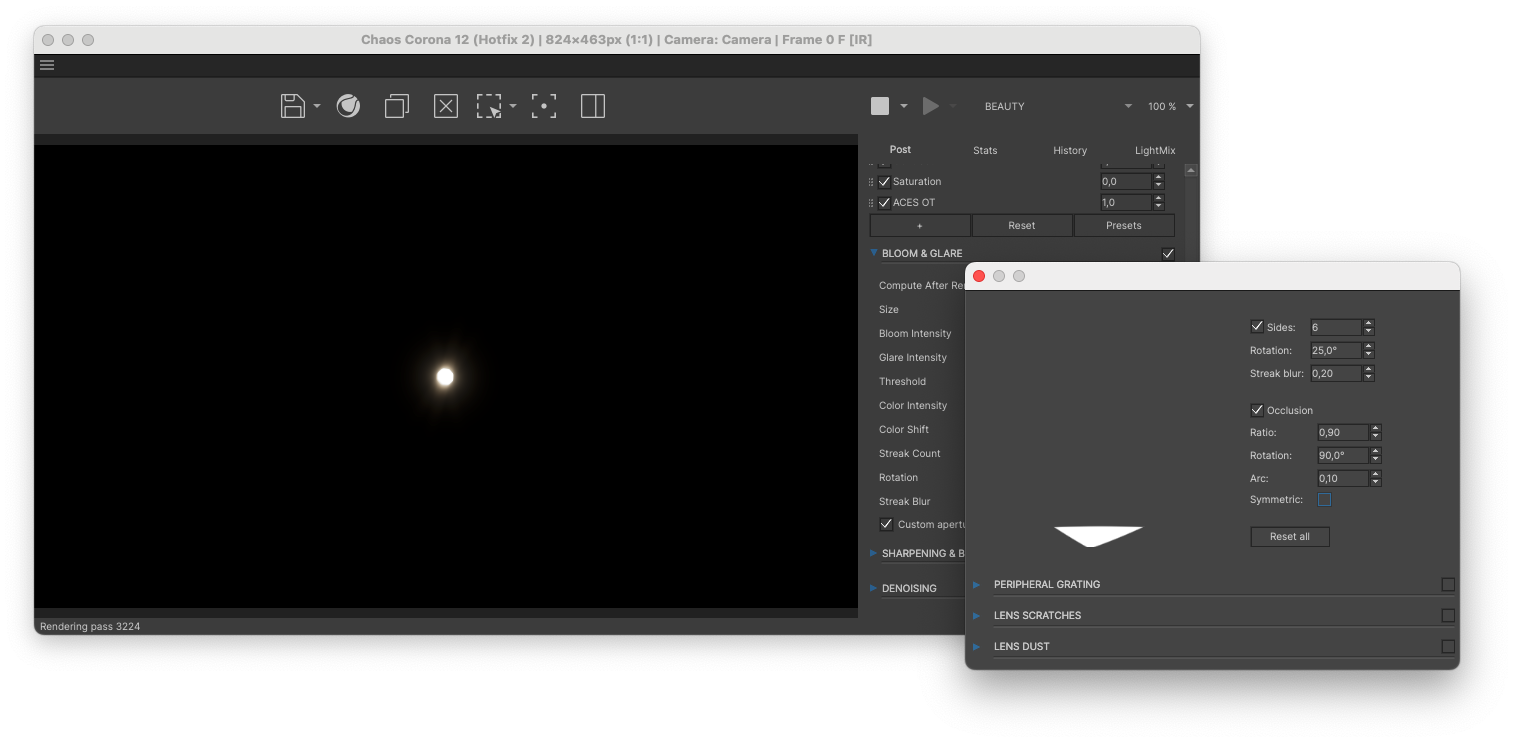
Symmetric gets rid of the two way streak that affects both sides equally. As you can see below, the occlusion starts happening all over the aperture, thus almost completely removing the effect. I will continue research on this setting to truly understand what are its best use cases.
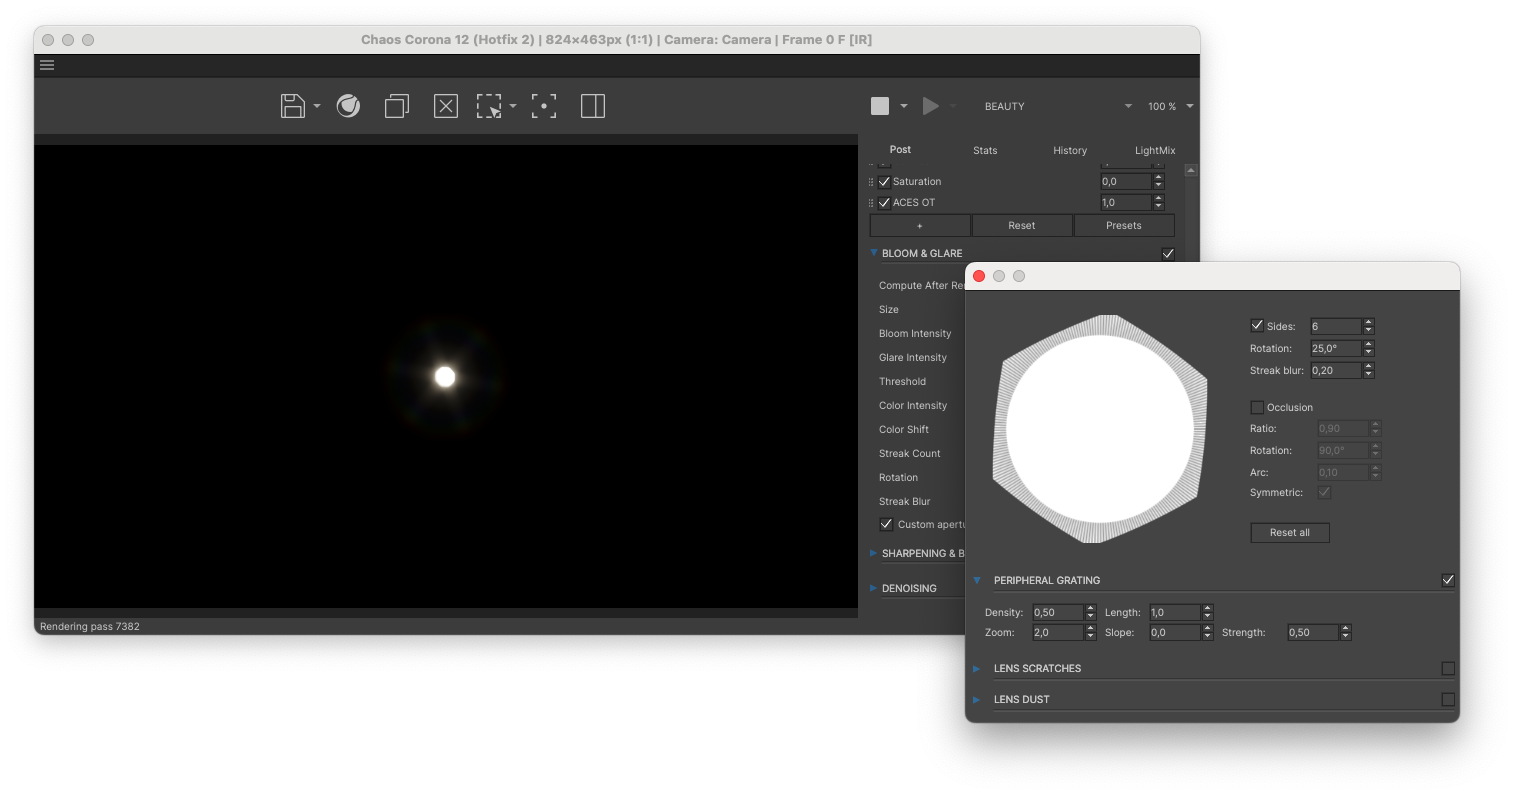
Peripheral Grating
Peripheral Grating is a type of lens aberration that introduces micro grooves around the edges of the aperture. This creates a Halo effect around your flare.
Increasing the Density creates a smooth halo around the light. While decreasing the Density creates less of a halo effect altogether.
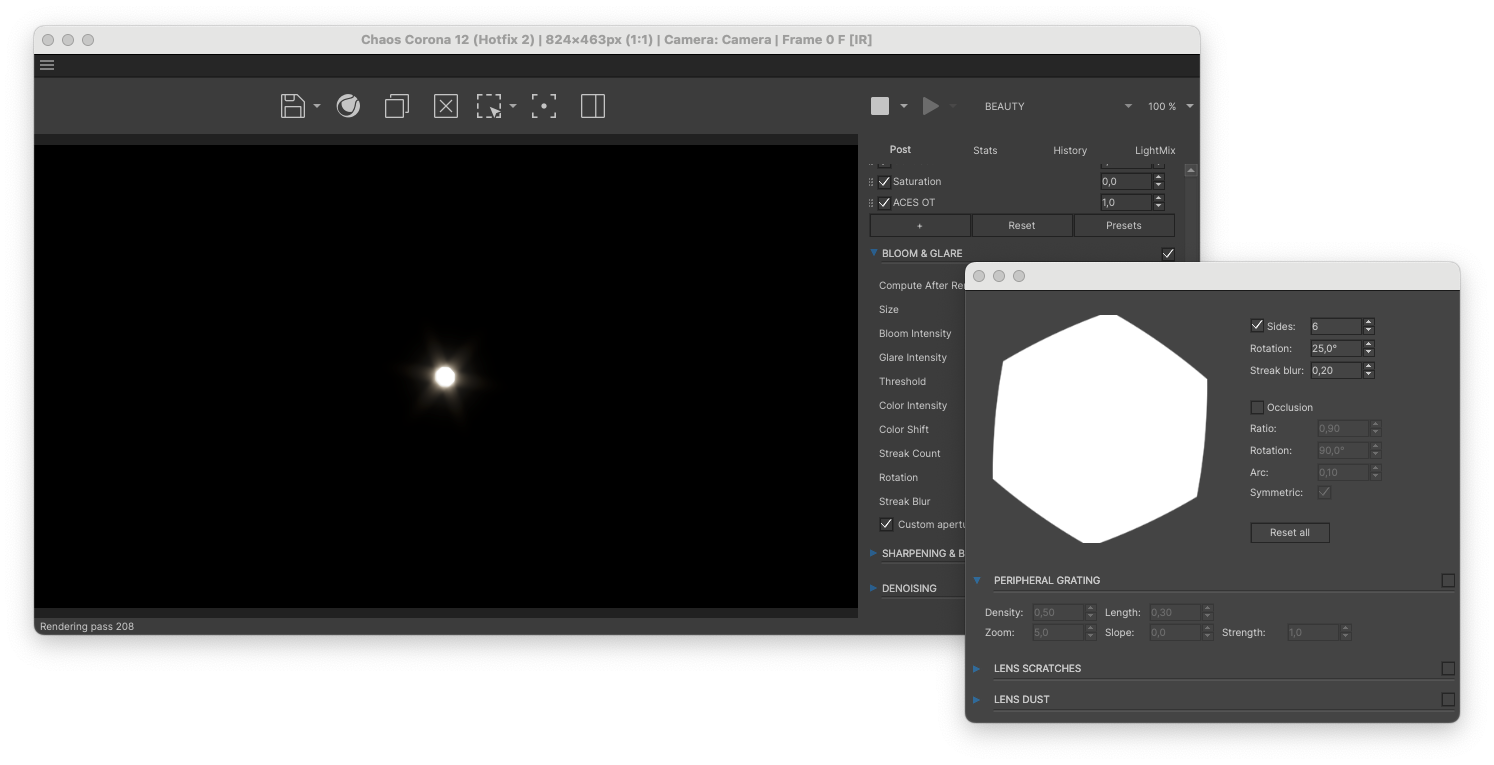
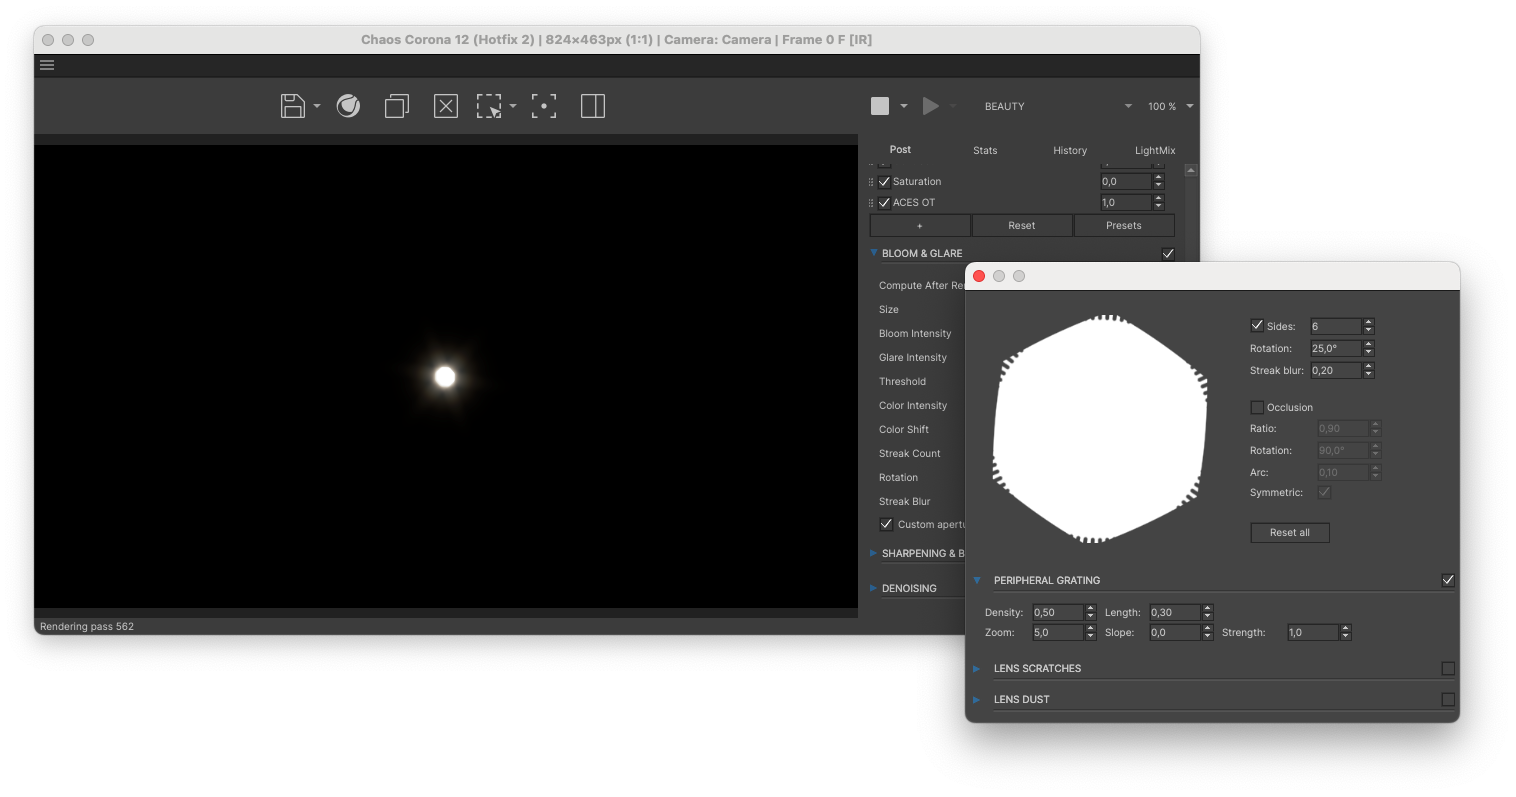
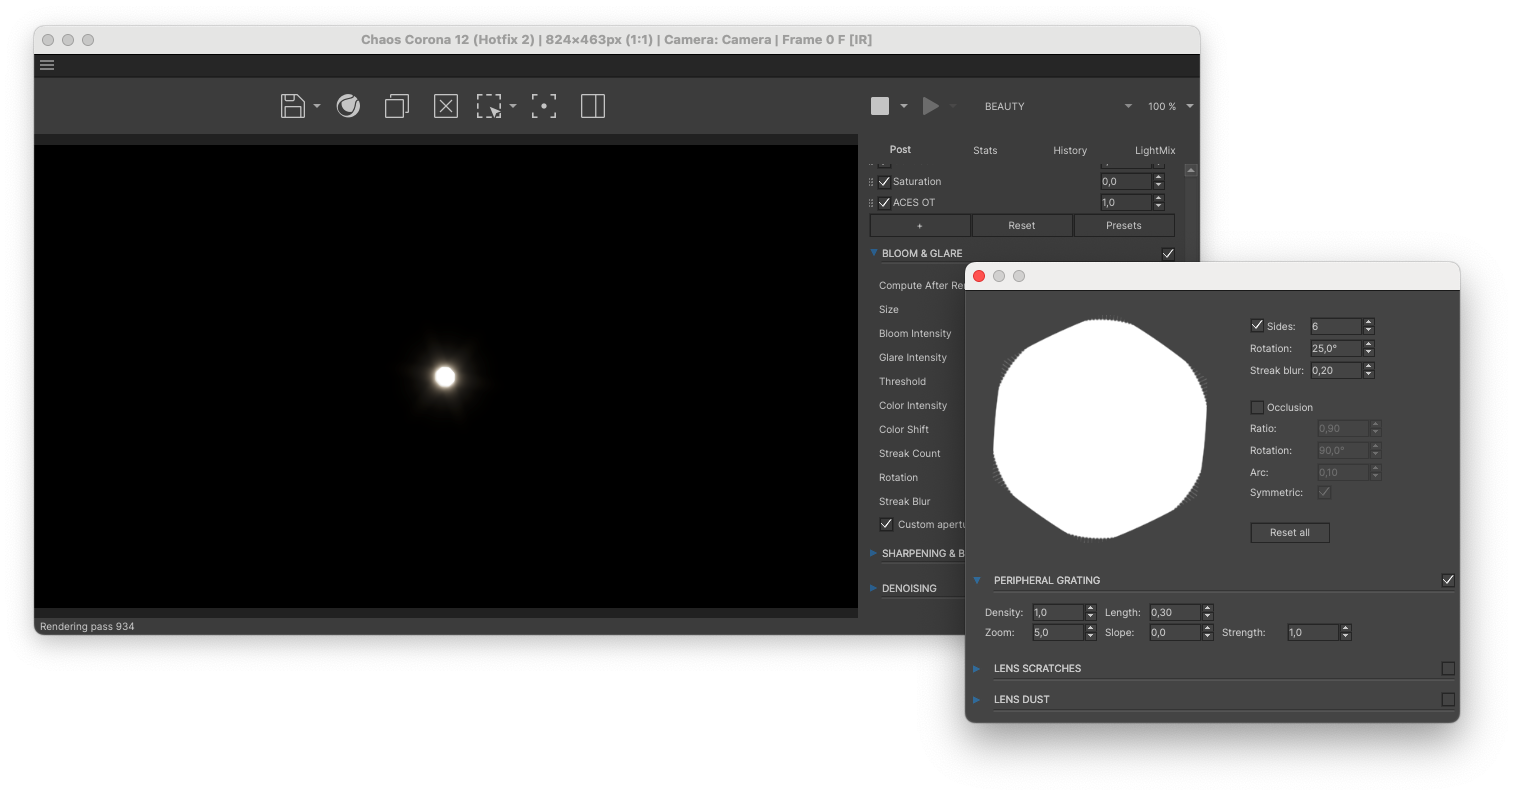
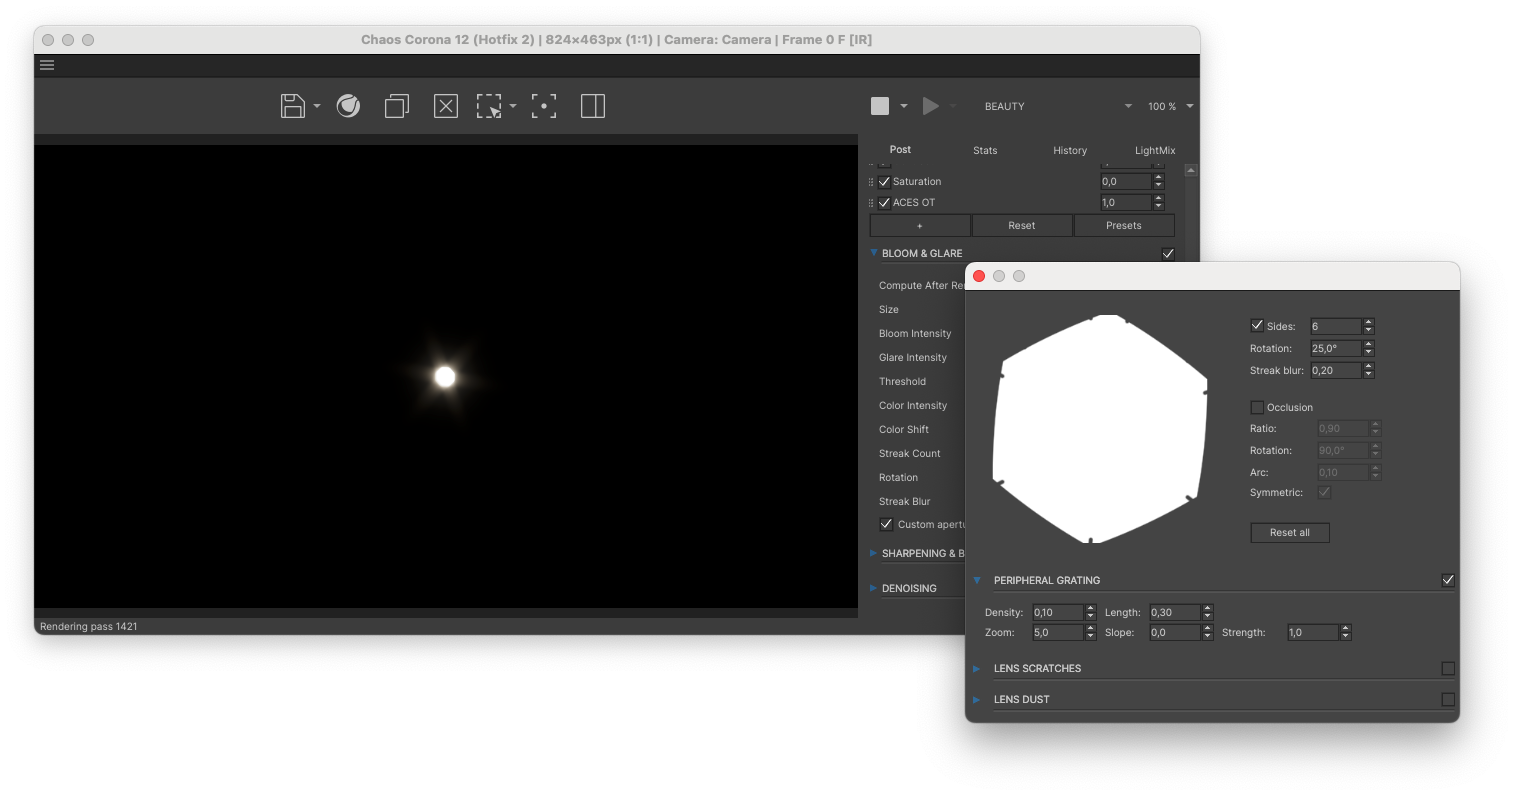
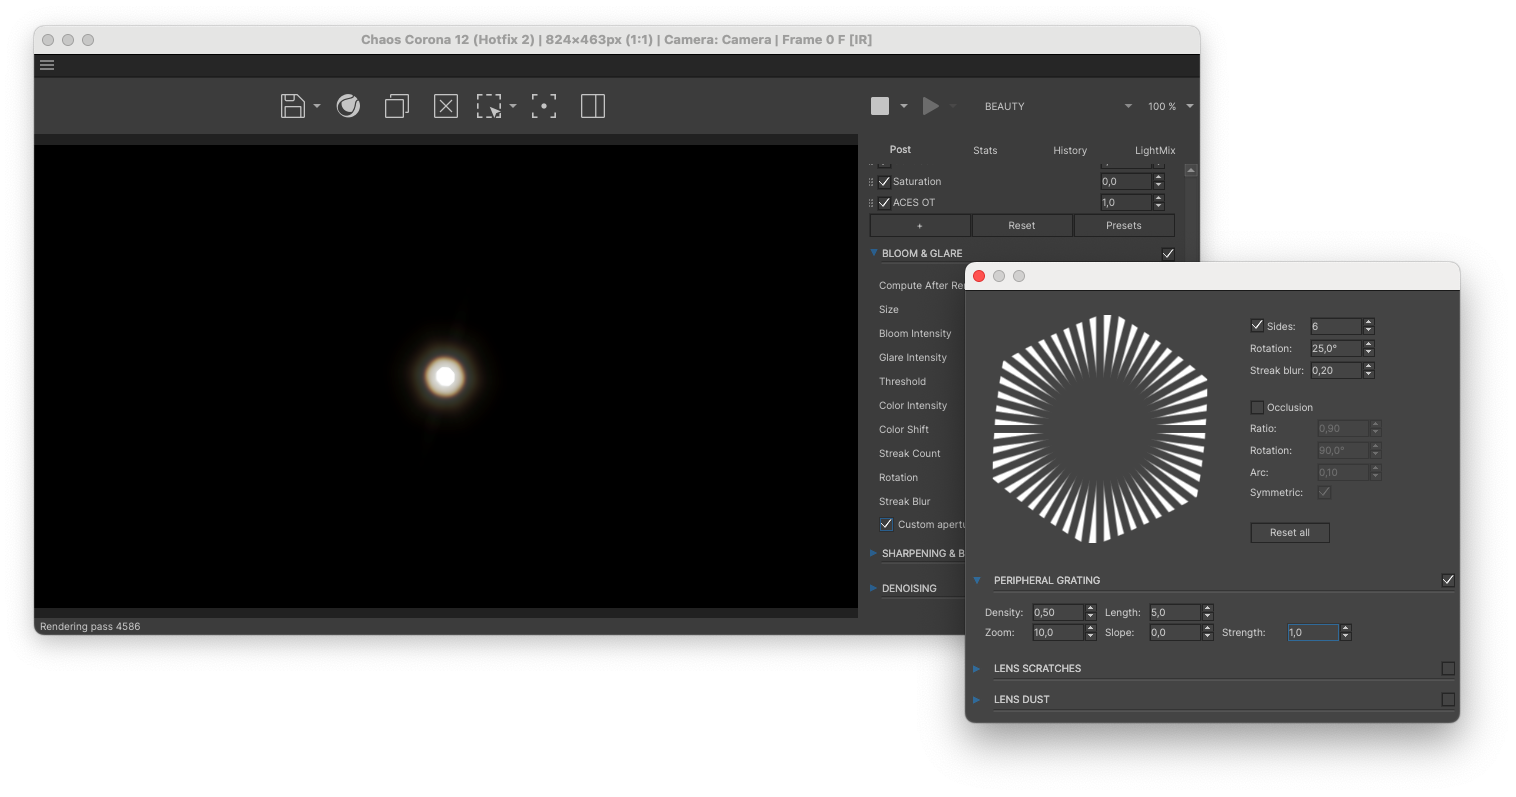
Increasing the Length creates a stronger effect all the way to the core of the light.
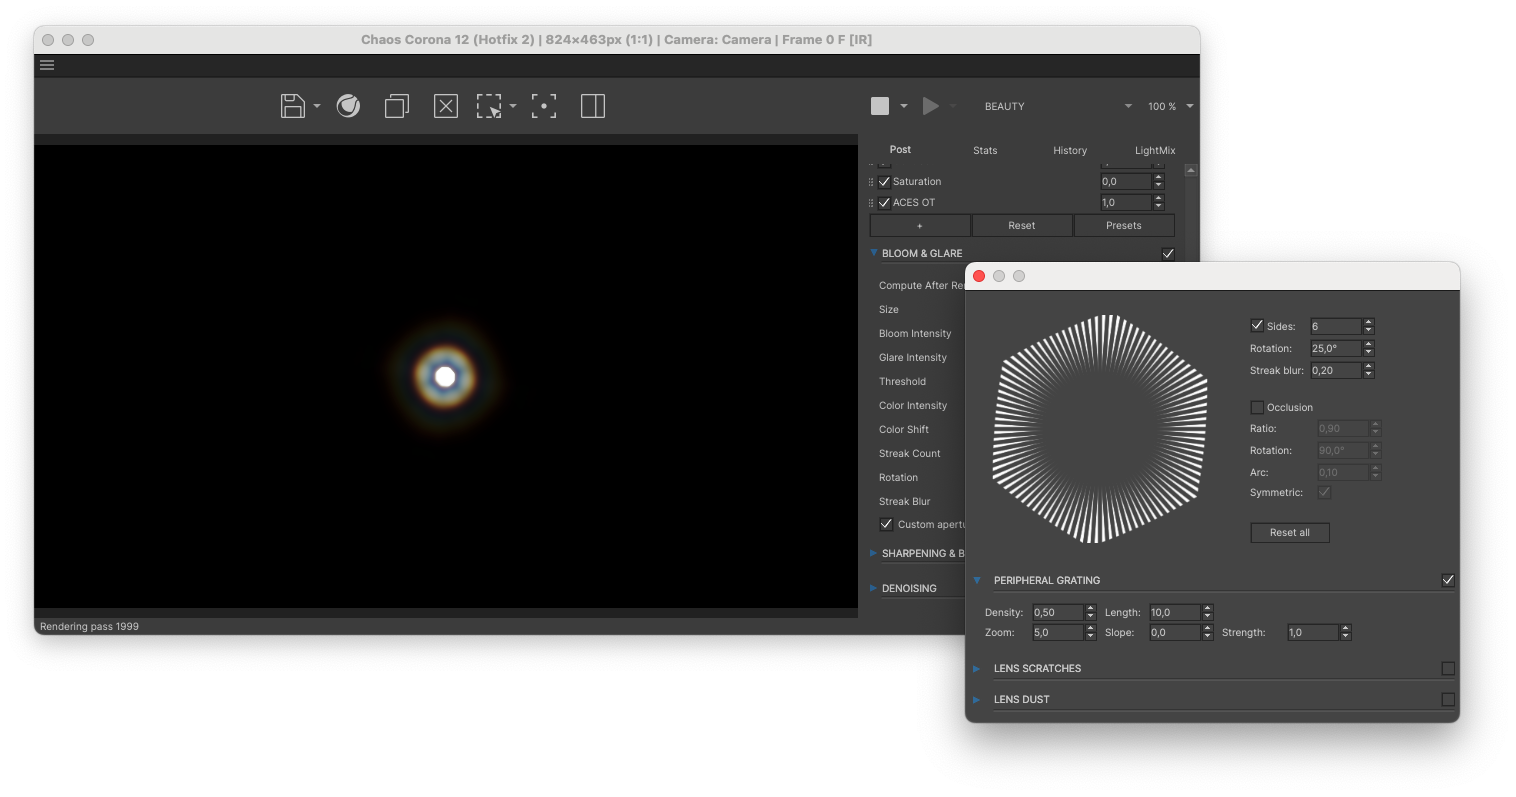
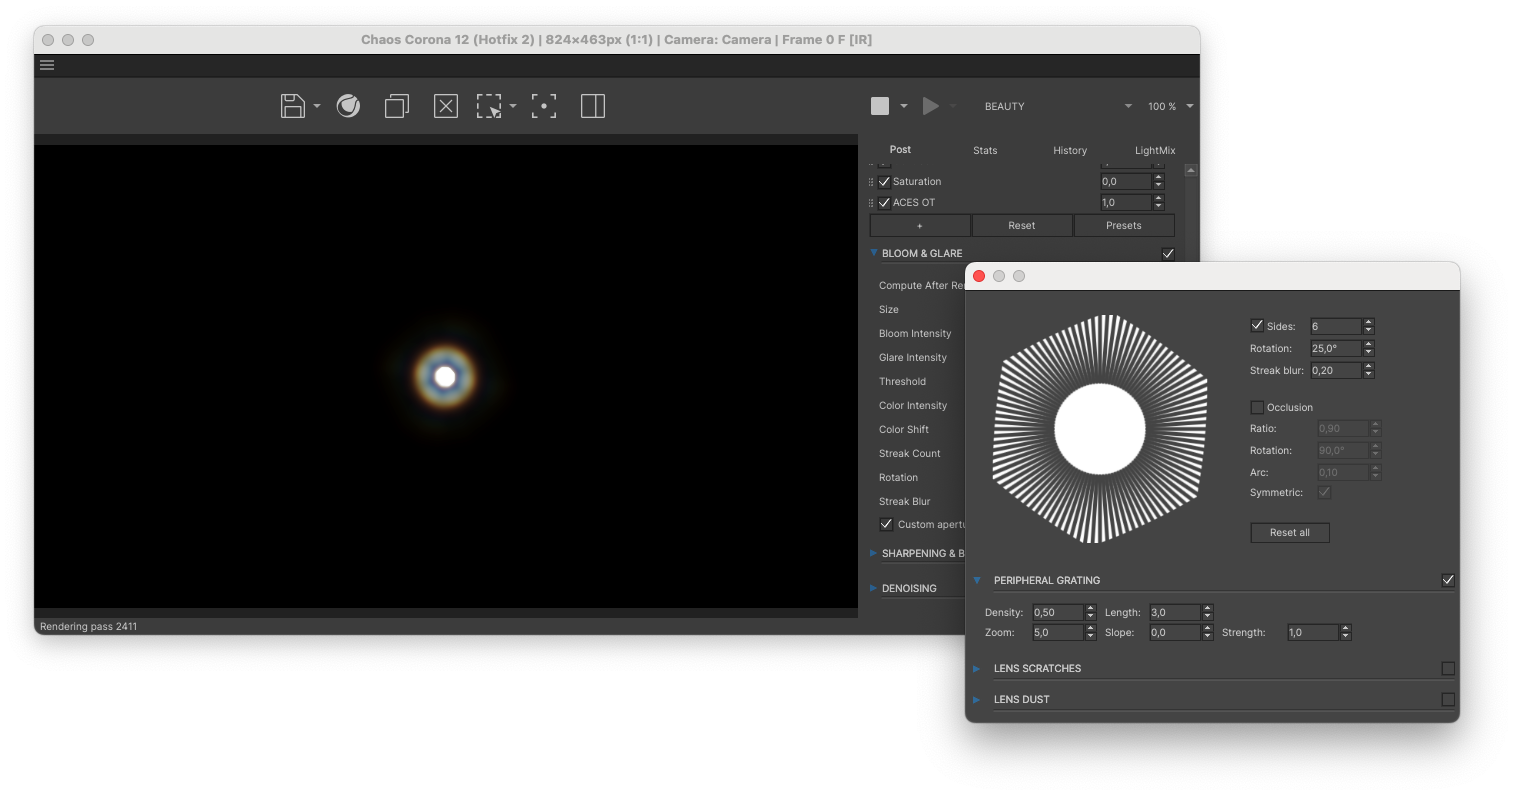
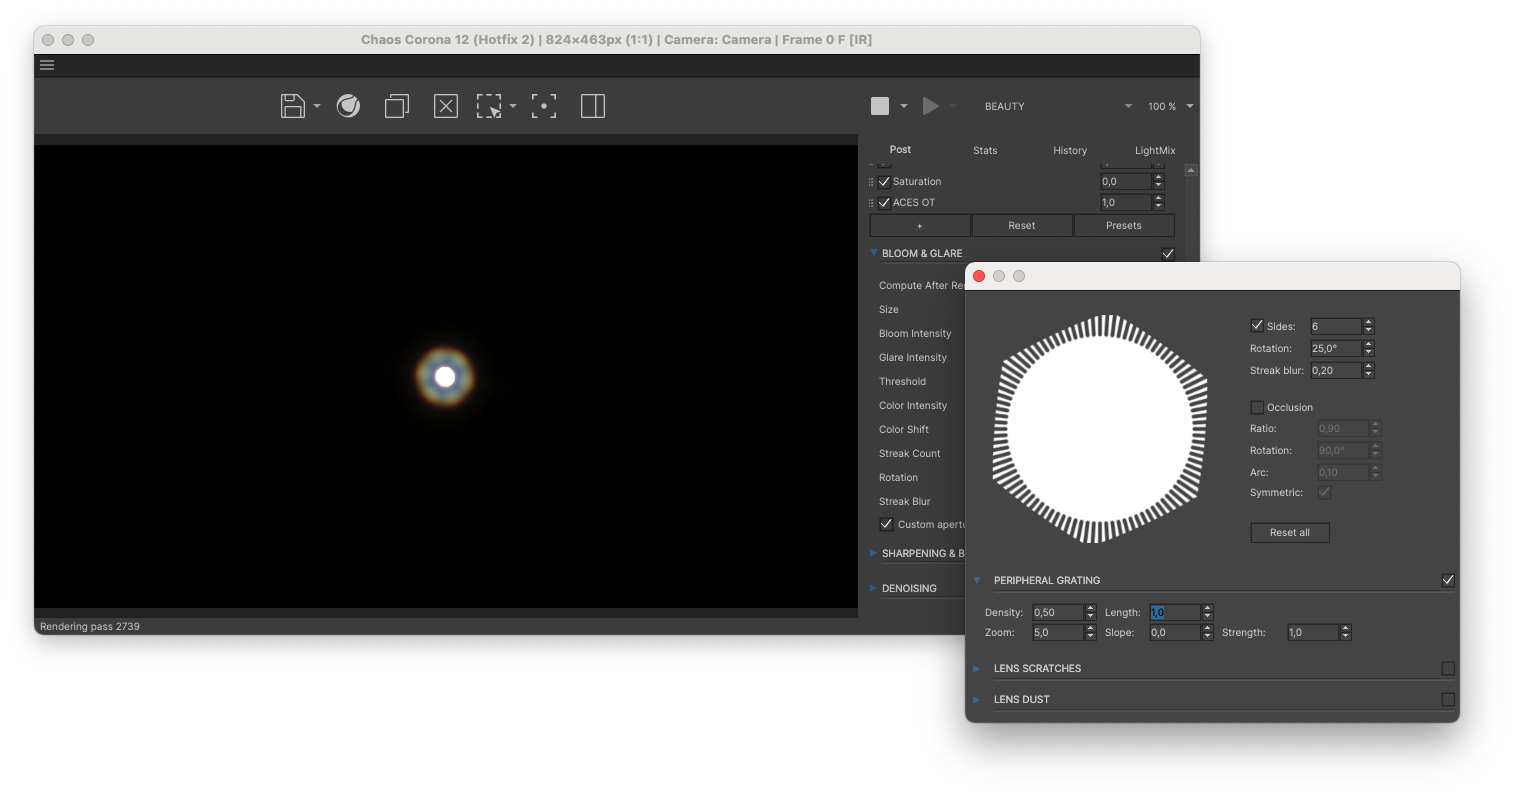

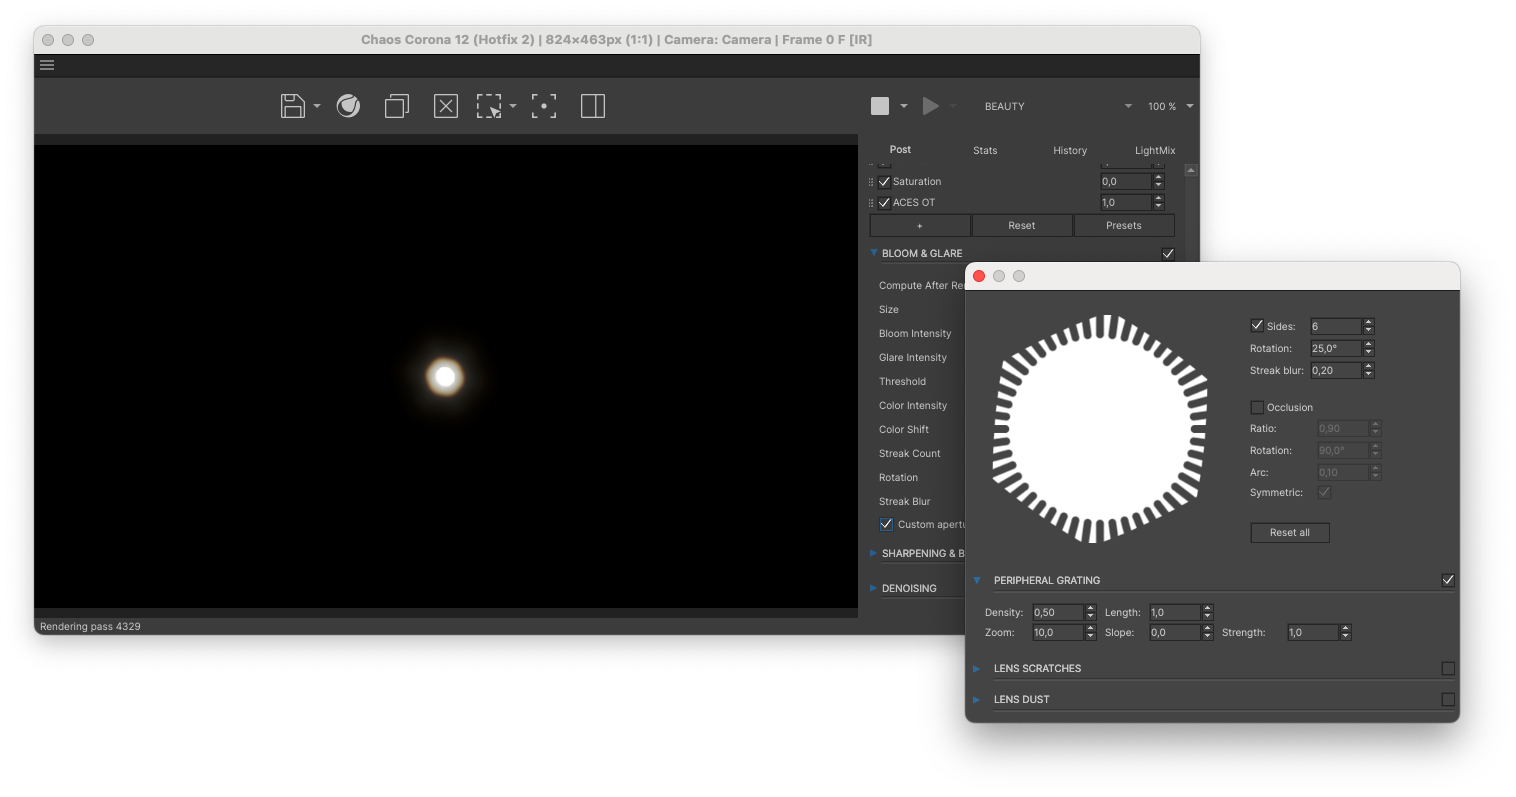
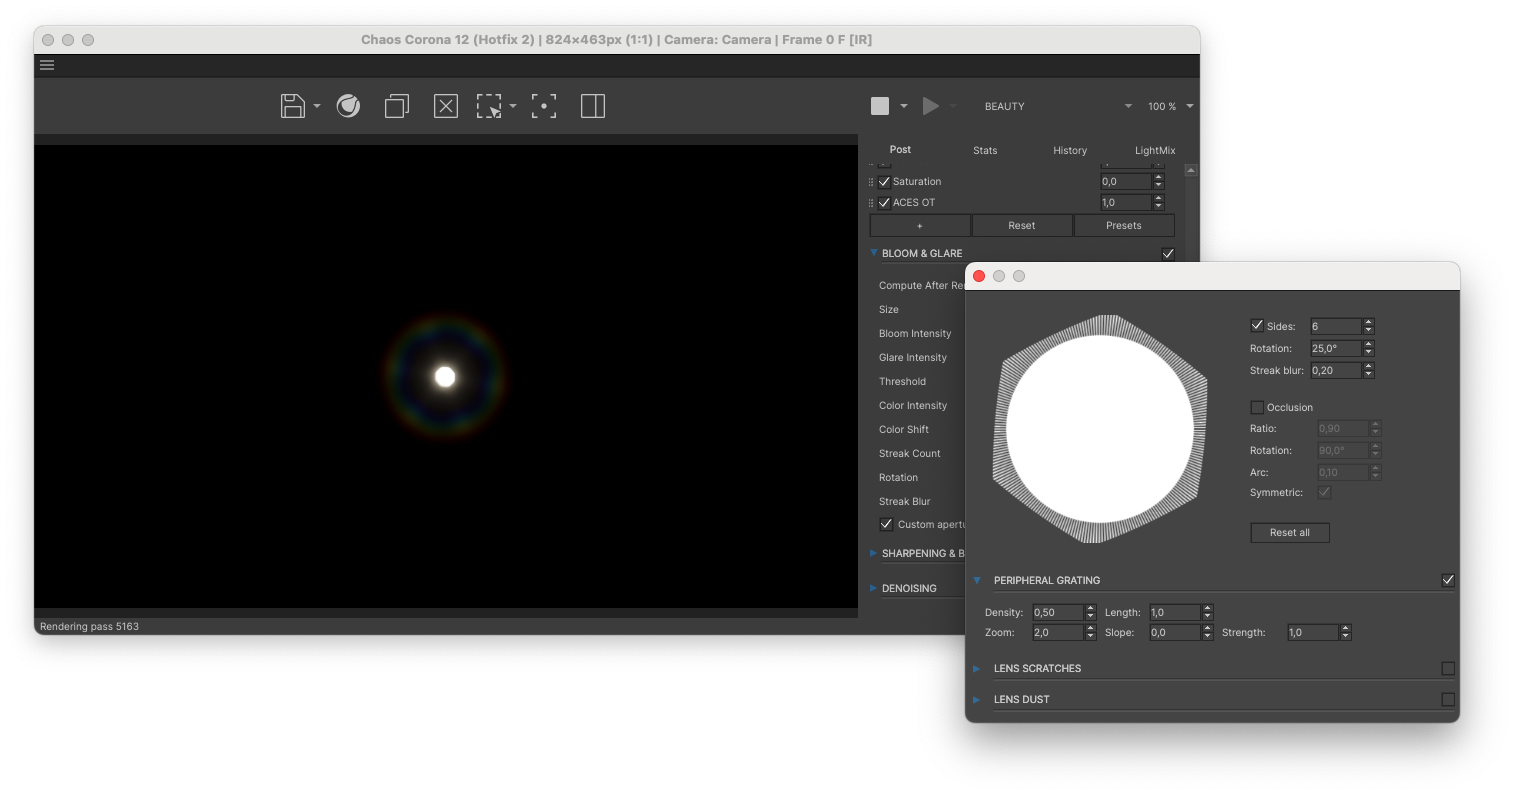
Decreasing the Zoom pushes the halo further away from the light source. This also decreases the overall intensity of the halo.
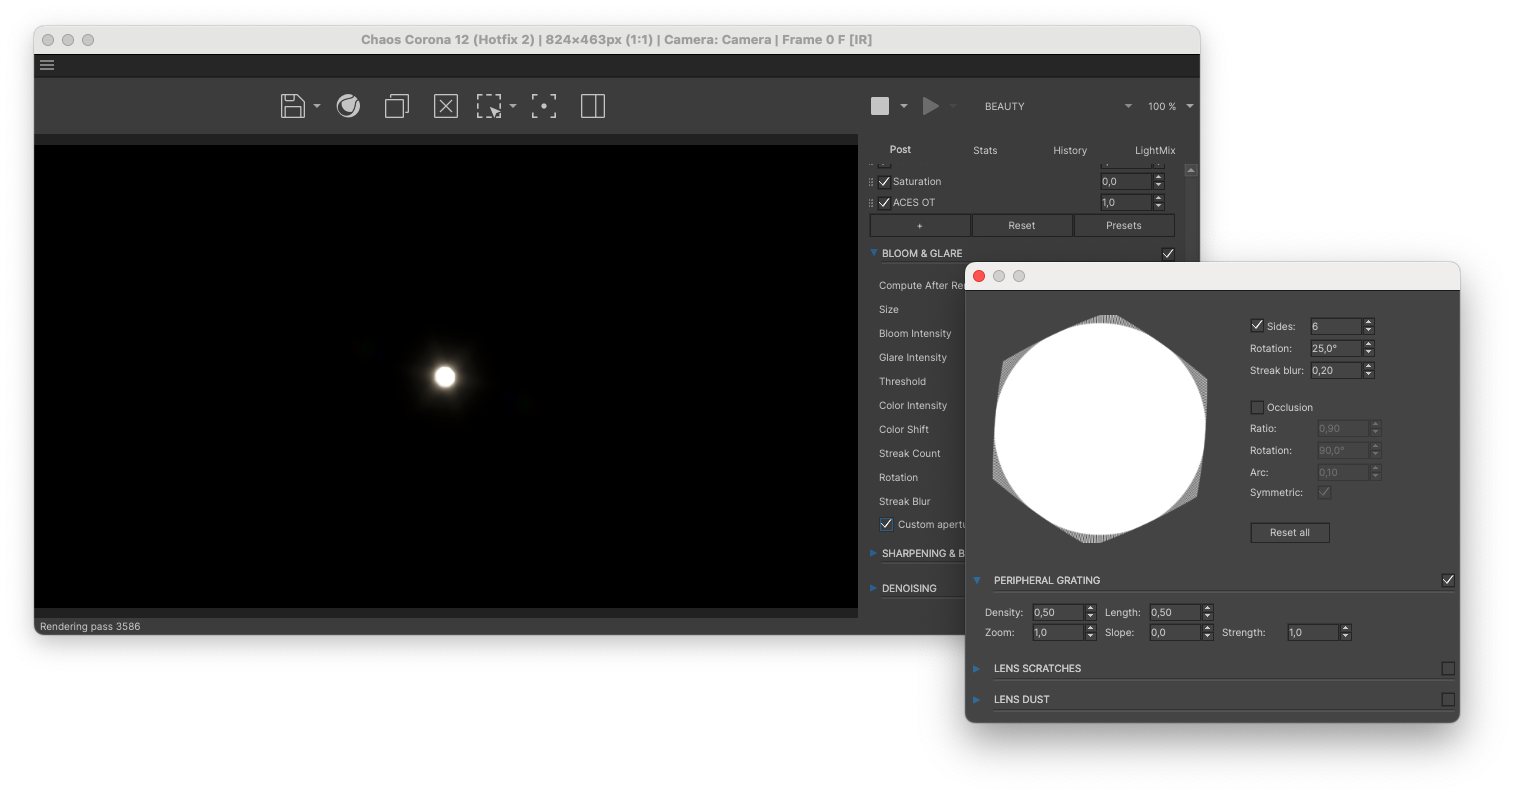
If we combine this with increasing the Length we can bring back some of that intensity.
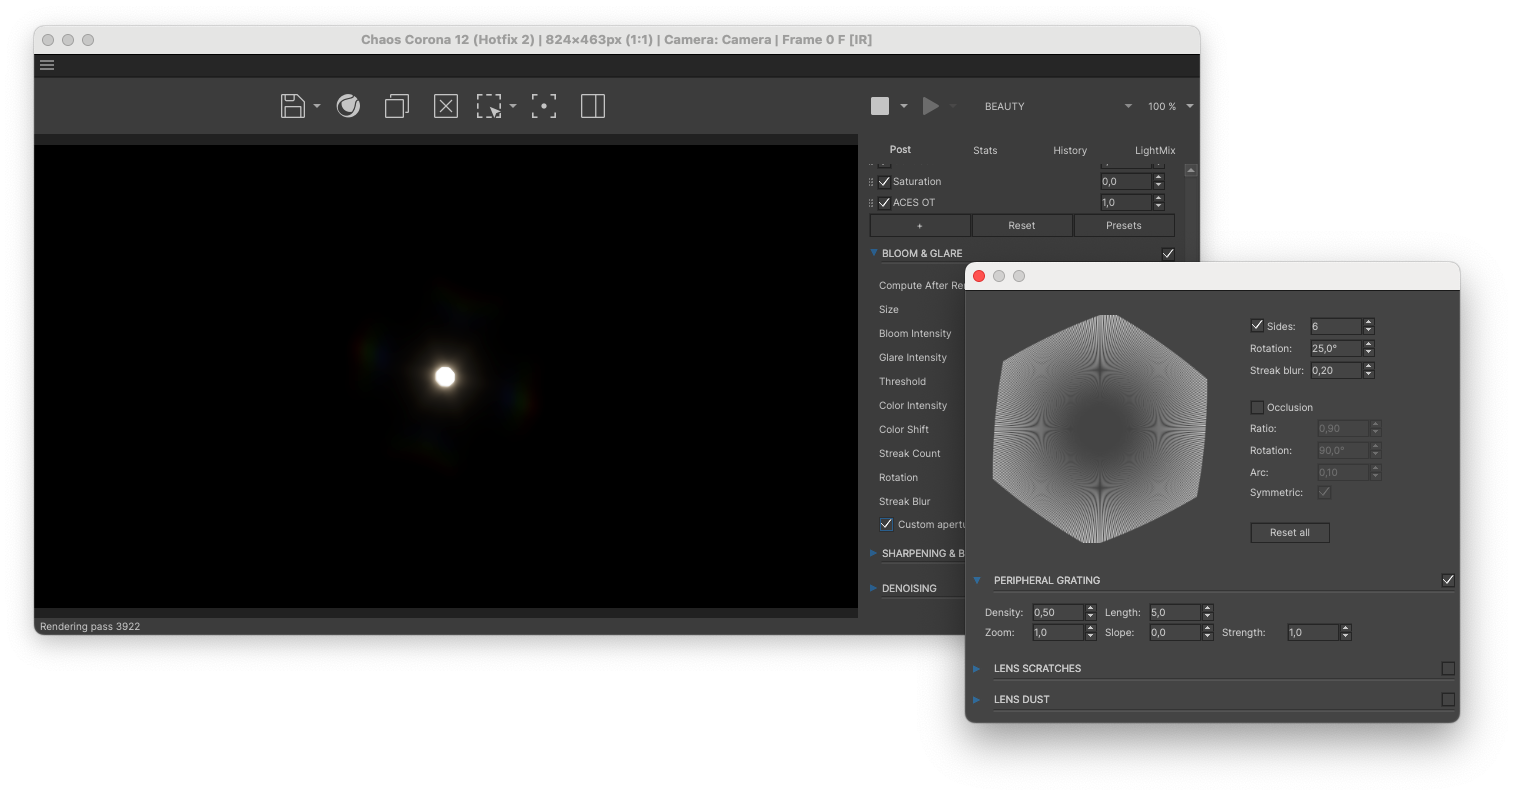
Increasing the Zoom brings the halo closer to the light source.
Slope is an interesting setting as it rotates the Peripheral Grating away from the center of the aperture. The higher the value, the more the halo rotates in on itself, both becoming lens visible while also revealing more of the Glare streaks.
Below are several examples of Slope at different increments:
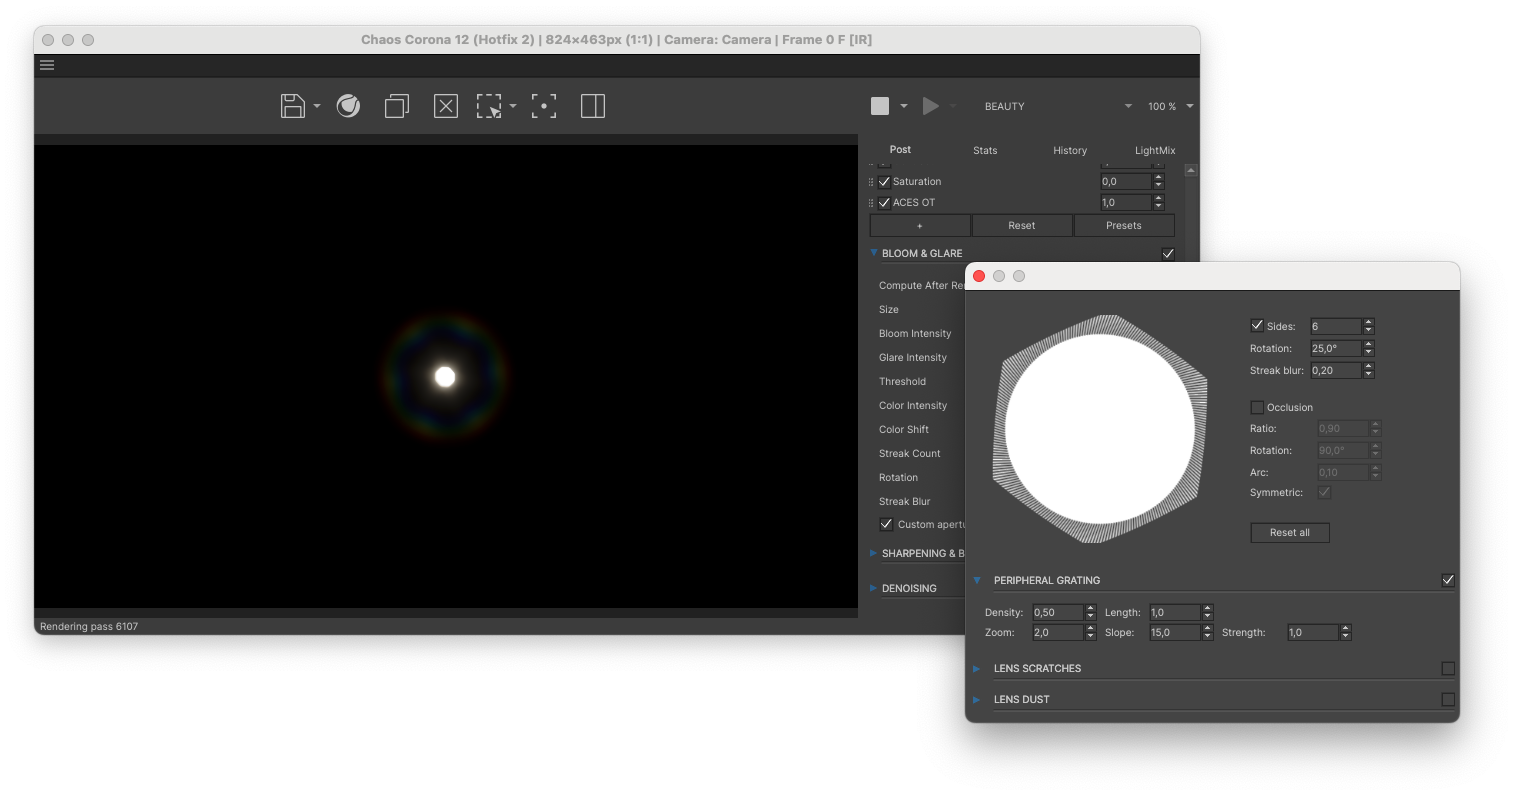
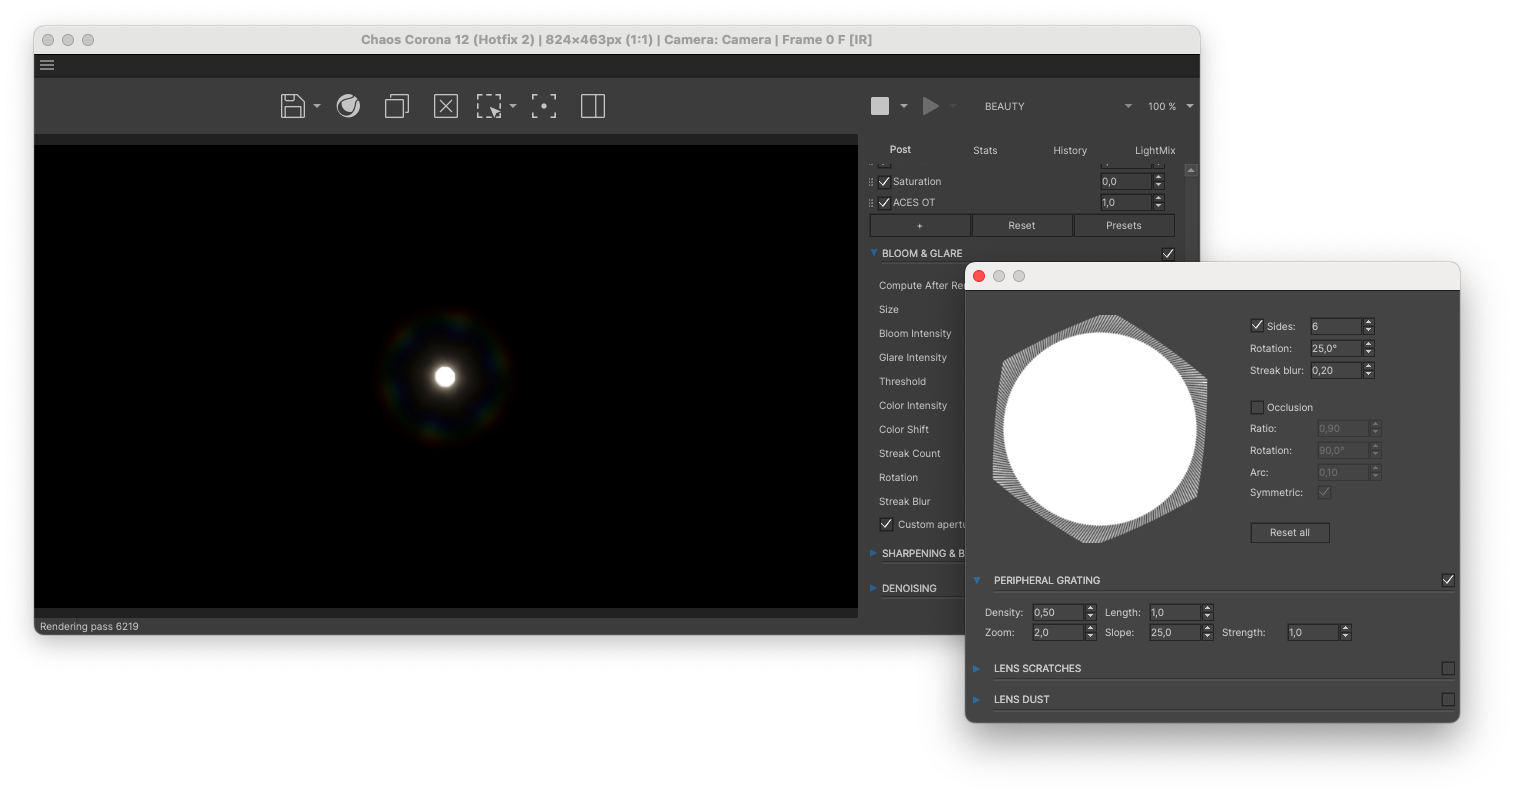
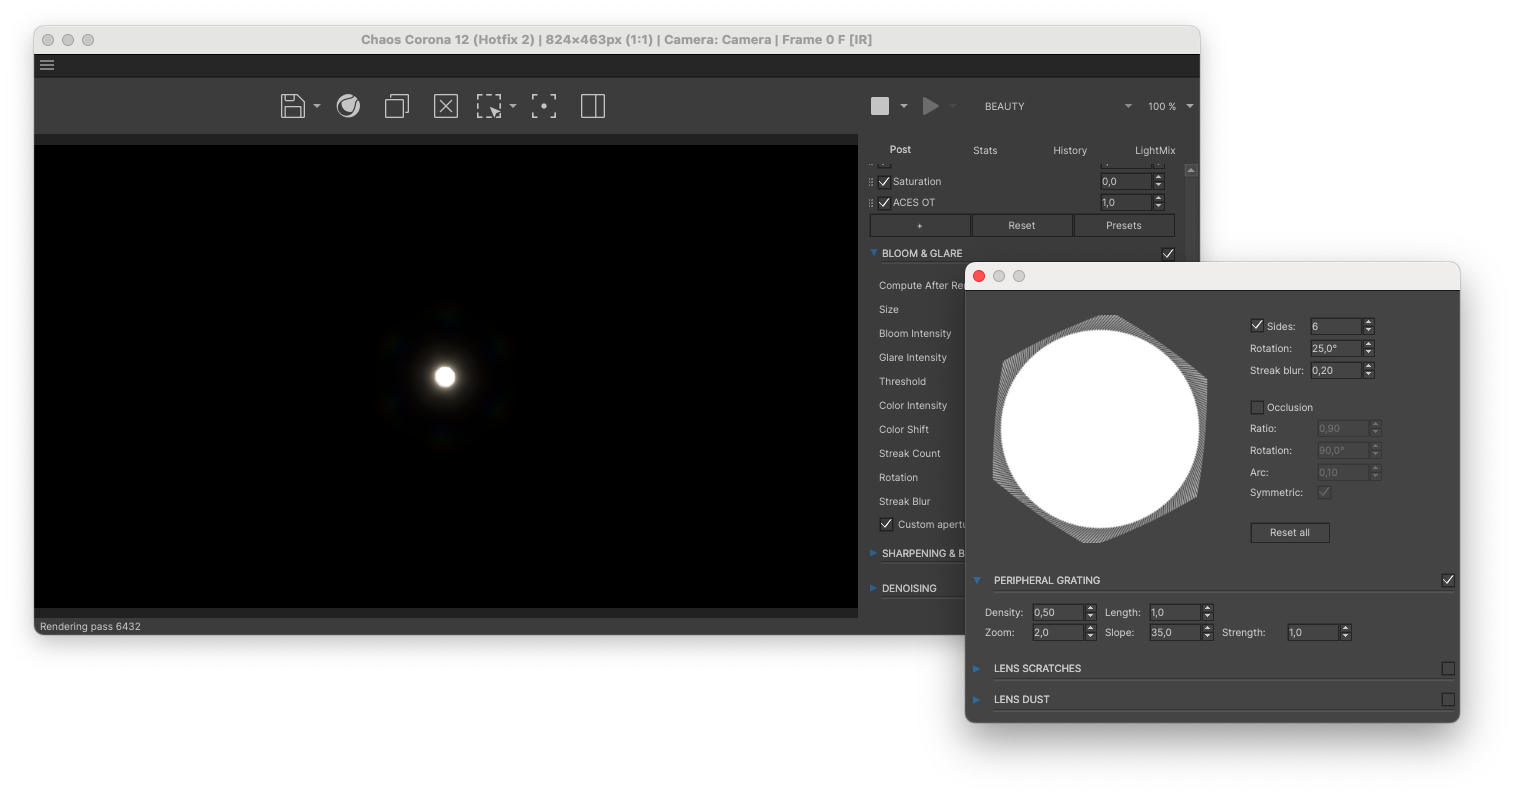
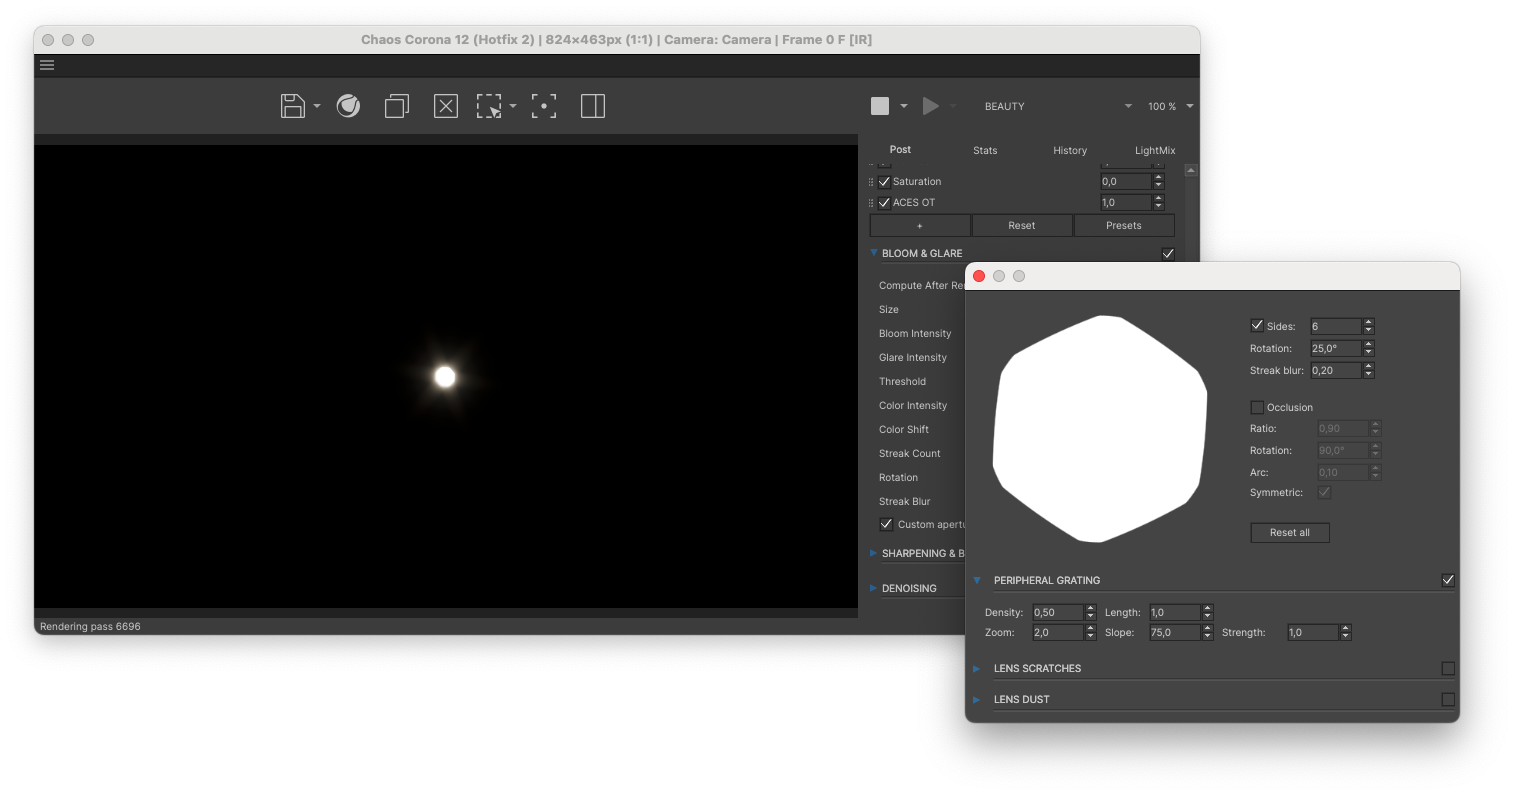
Finally there is Strength. This is simply an intensity slider that decreases or increases the effect.
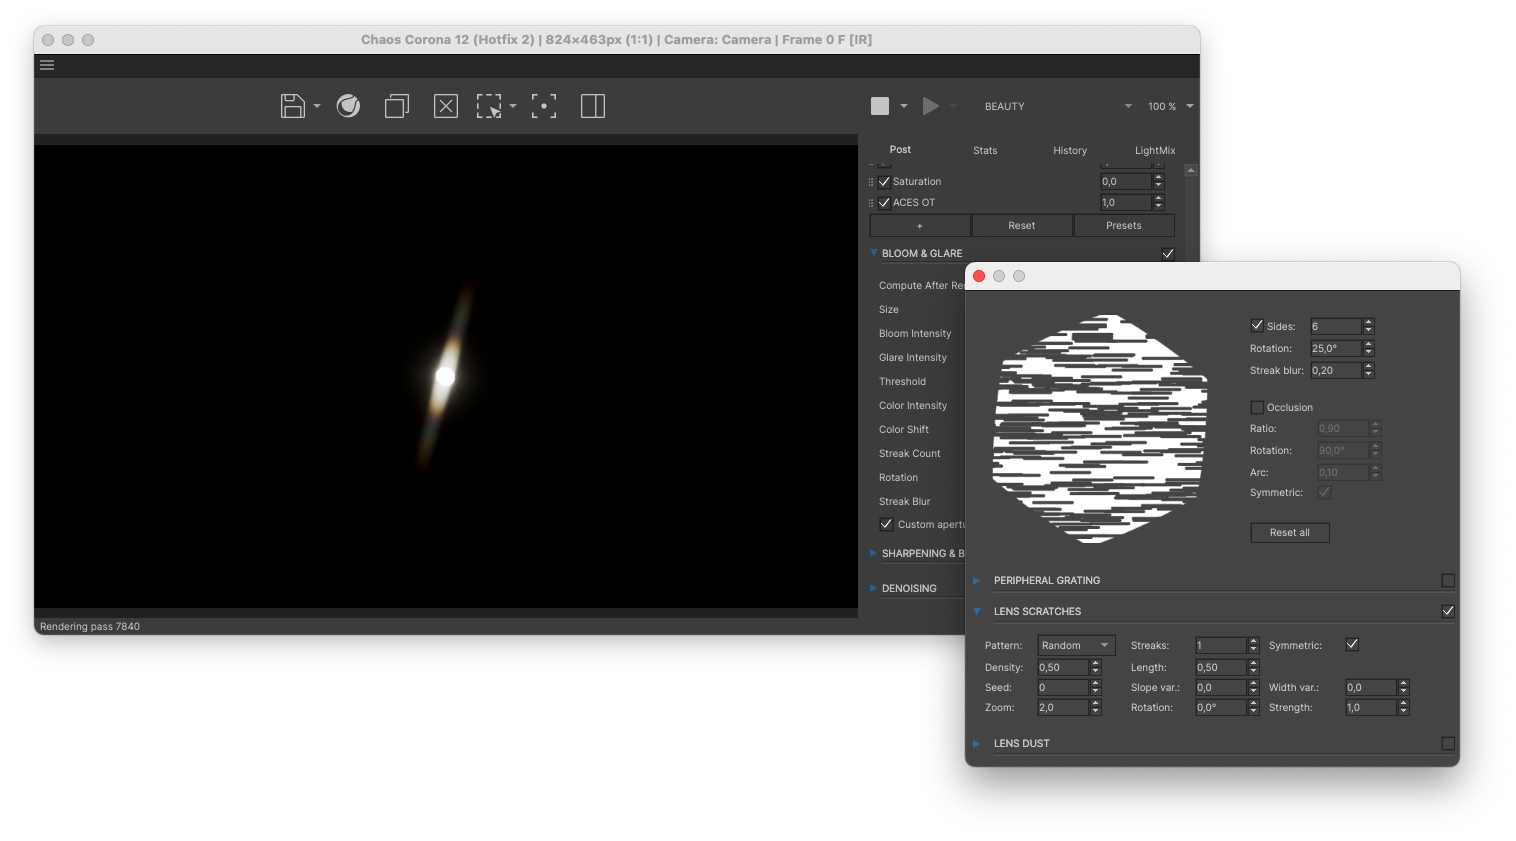
Lens Scratches
When a camera lens is scratched, the light streaks along the grooves of the scratches. This makes this setting so powerful. It allows you to either add more streaks or stretch the current streaks into a single direction.
After enabling the Lens Scratches effect it has the Pattern set to “Random” by default. Horizontal streaks are placed over the aperture which results in an elongated straight flare.
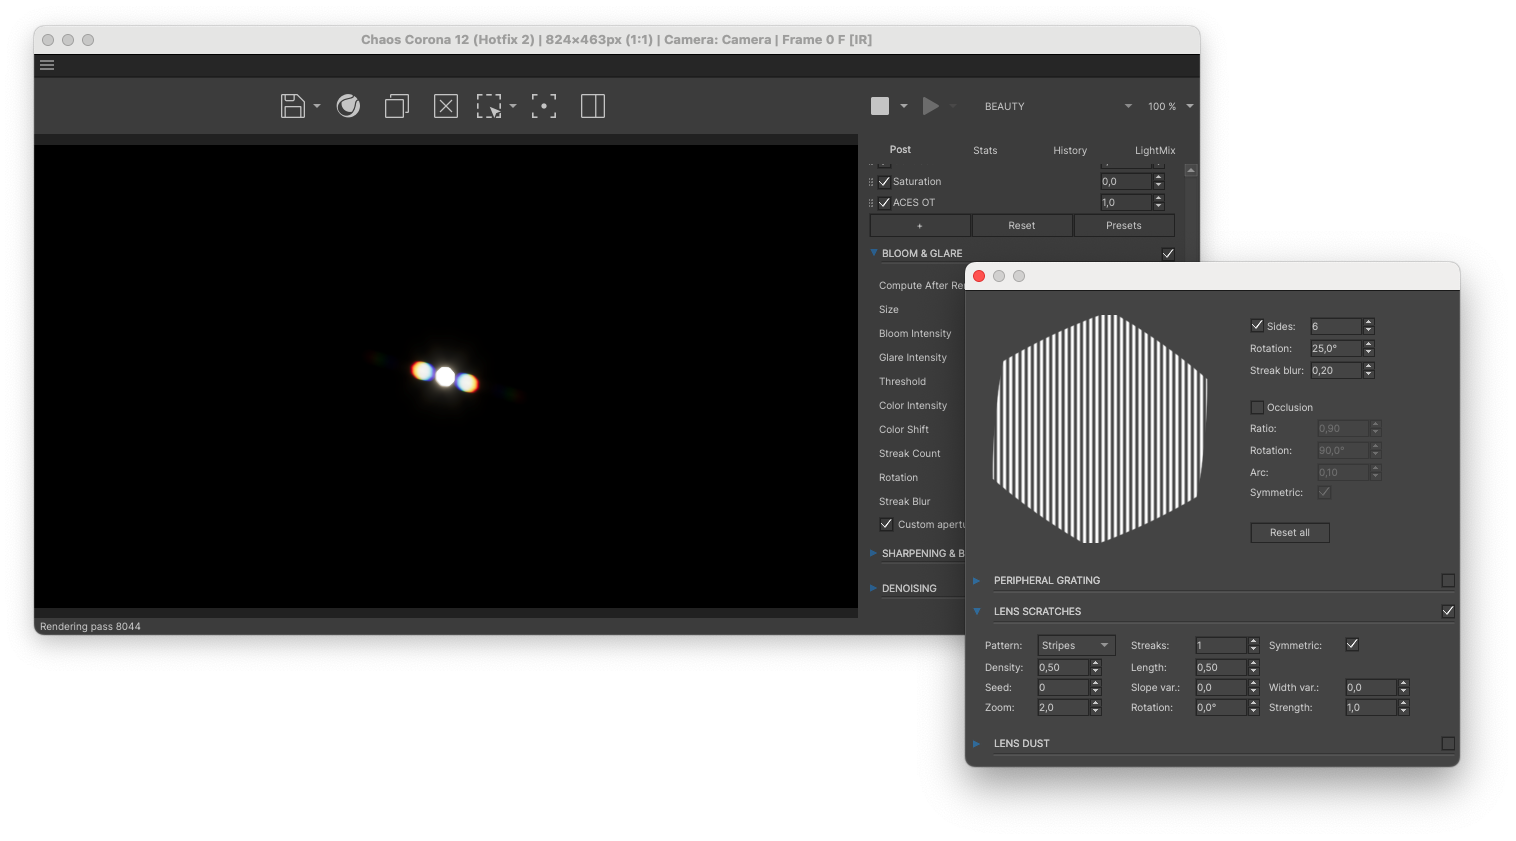
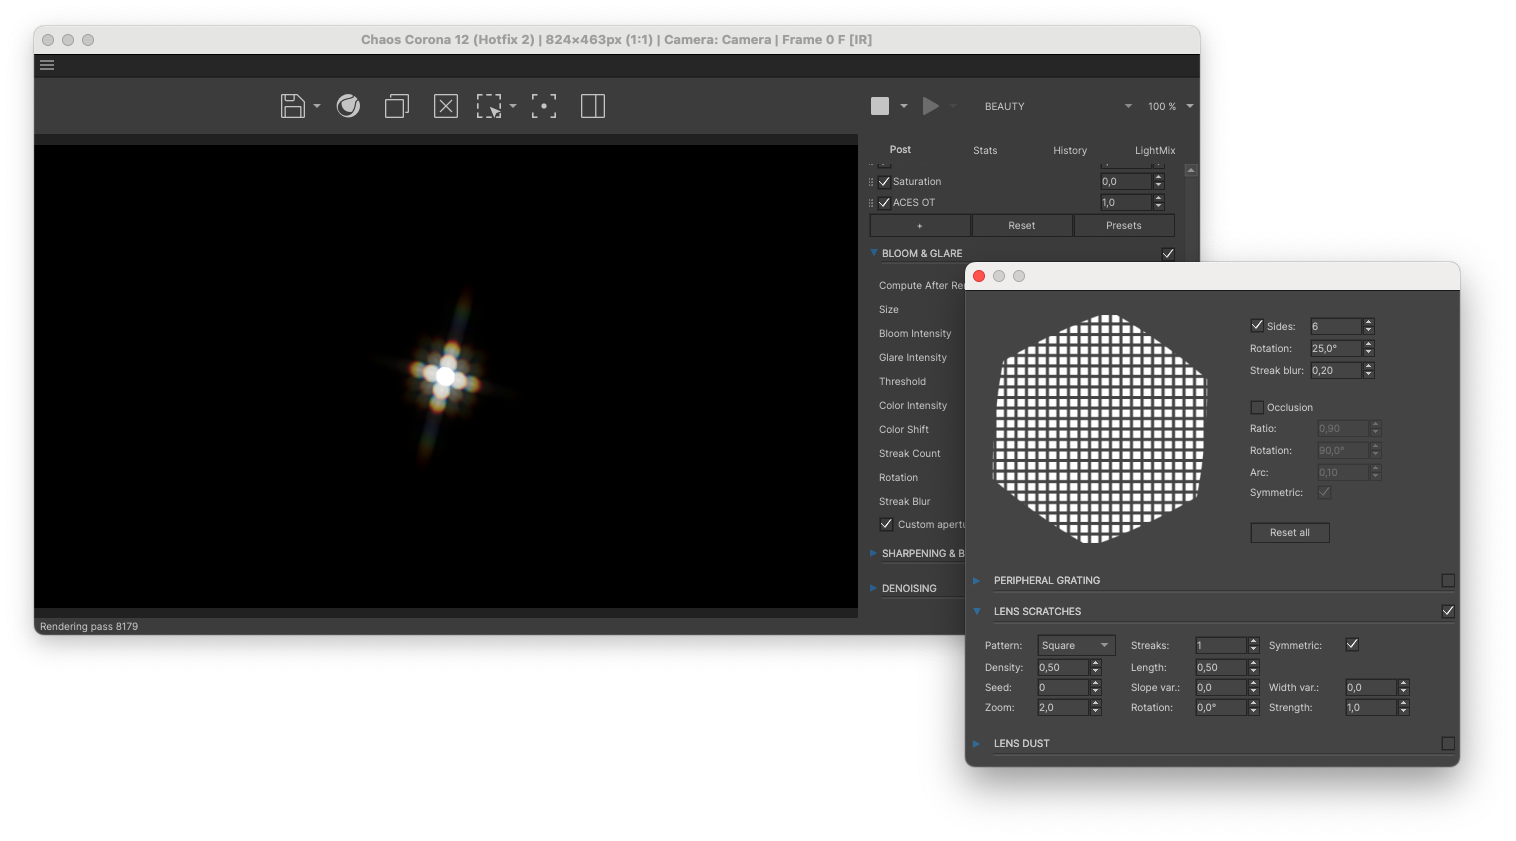
We can also change the Pattern to be Stripes, Square or Hexagonal. Below are some examples of how that impacts the flare:
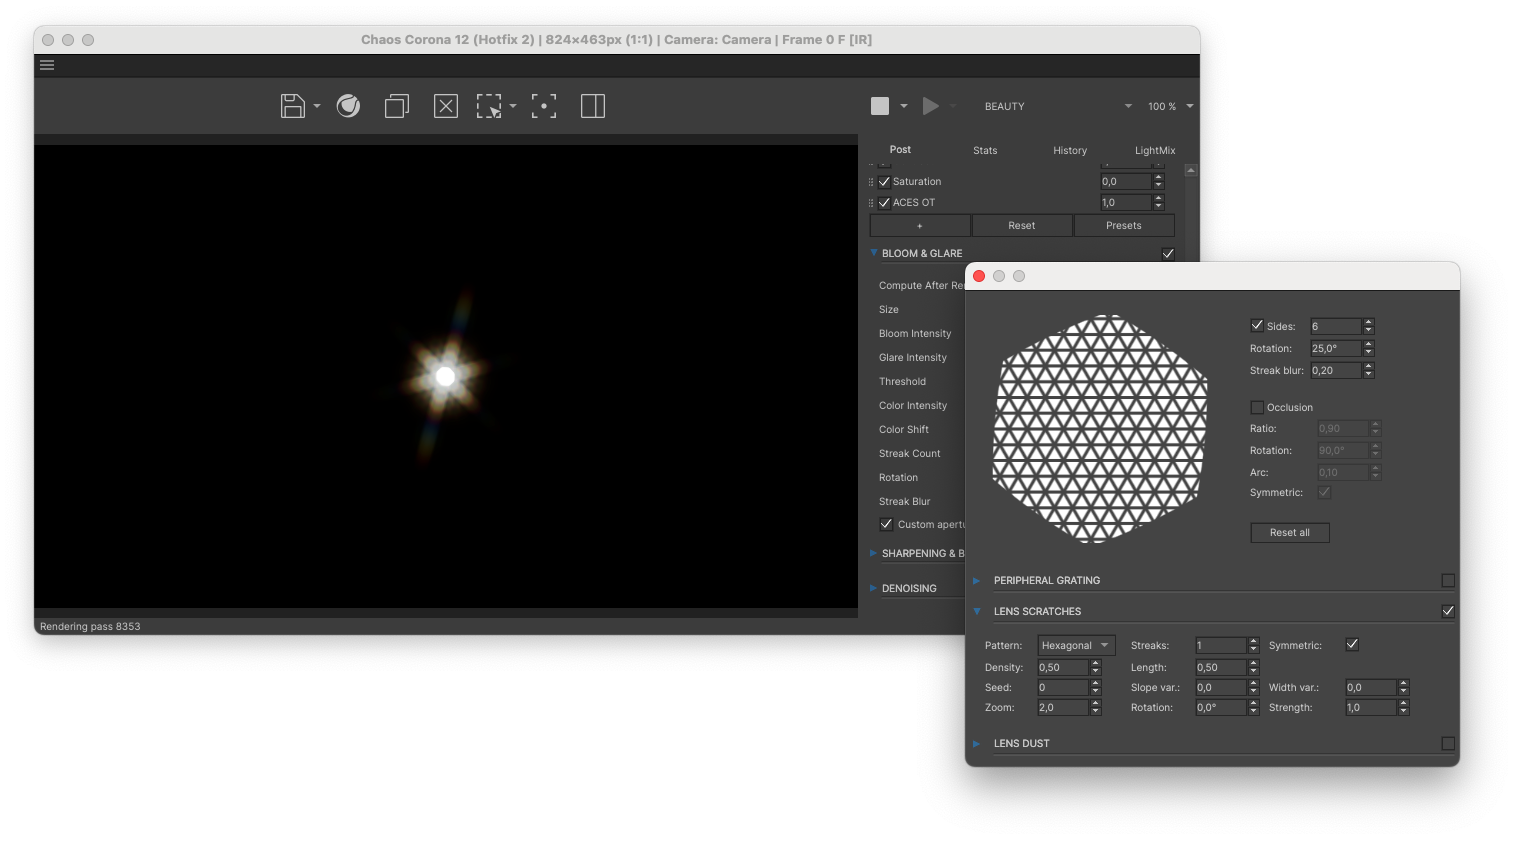
If we take the Random Pattern we can change the Density slider. The lower the range, the more the core Glare of the aperture continues to shine through. While the higher the Density of the scratches, the less of the glare shines through. With a Density so high as 1,0 you will basically remove any visible scratching effect.
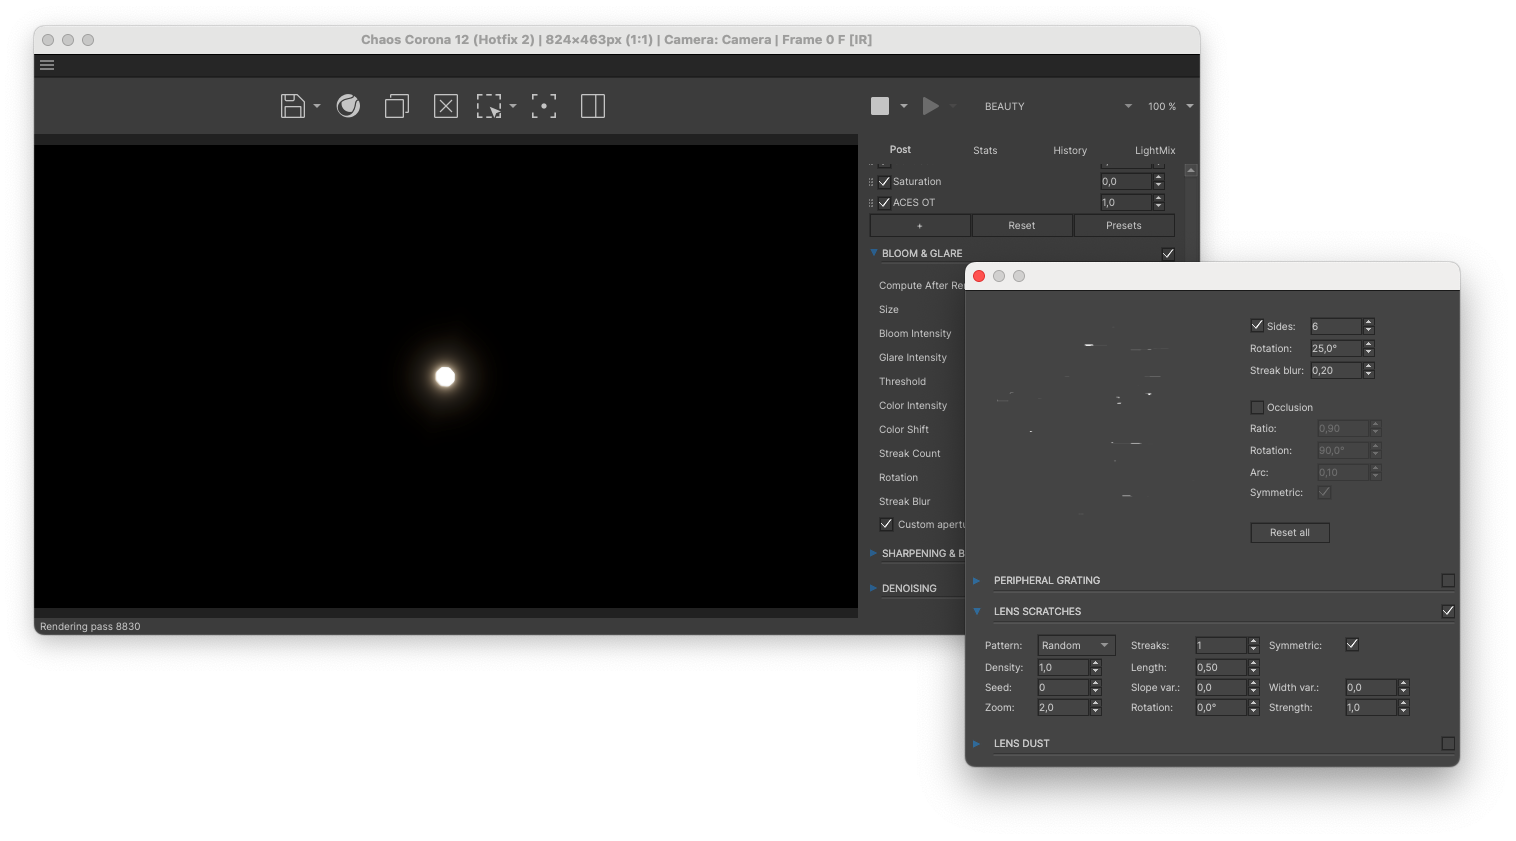
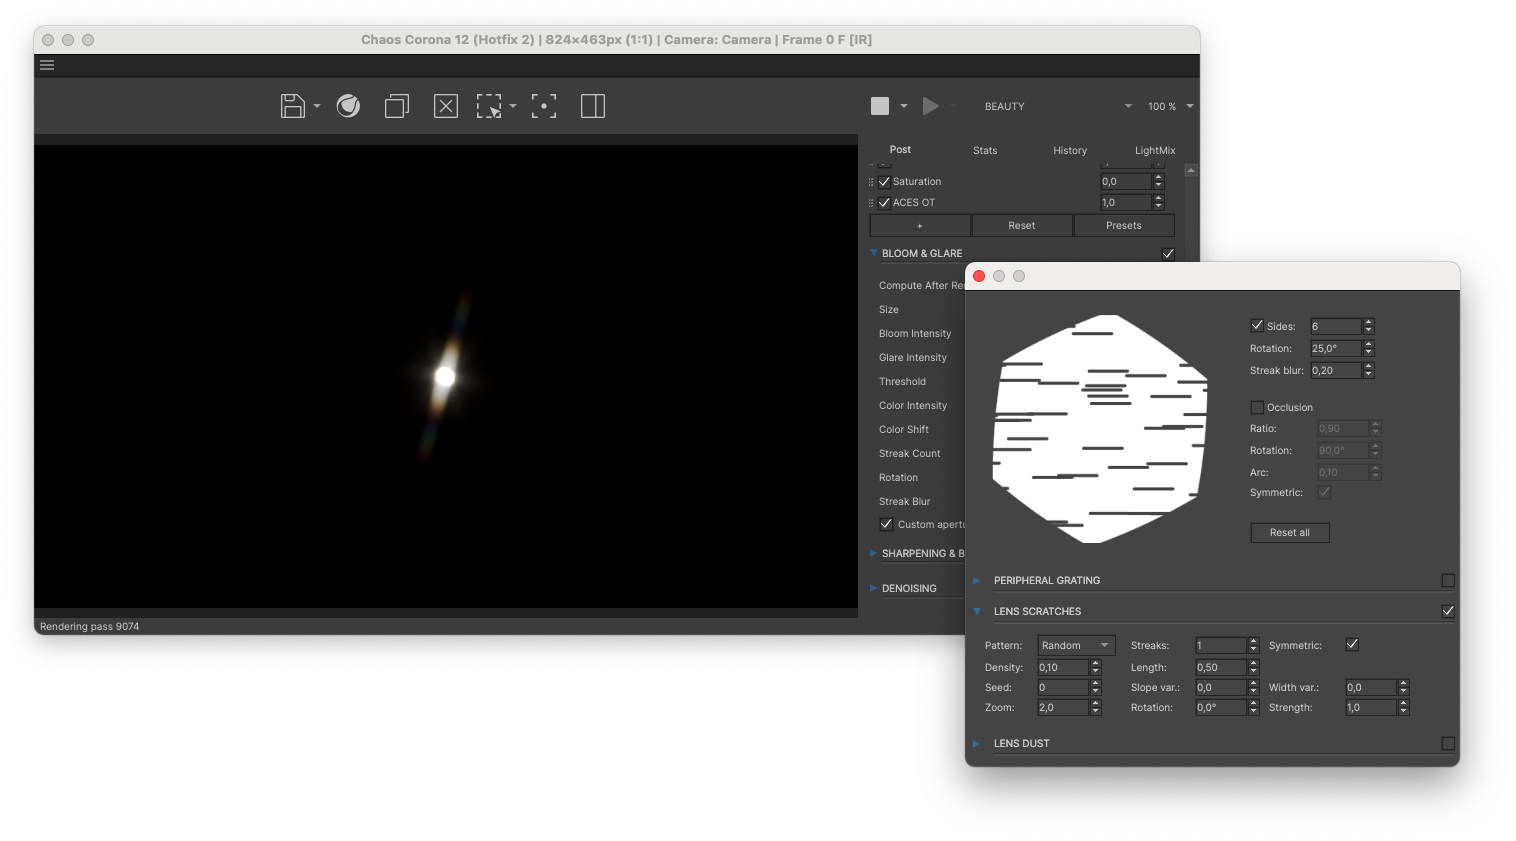
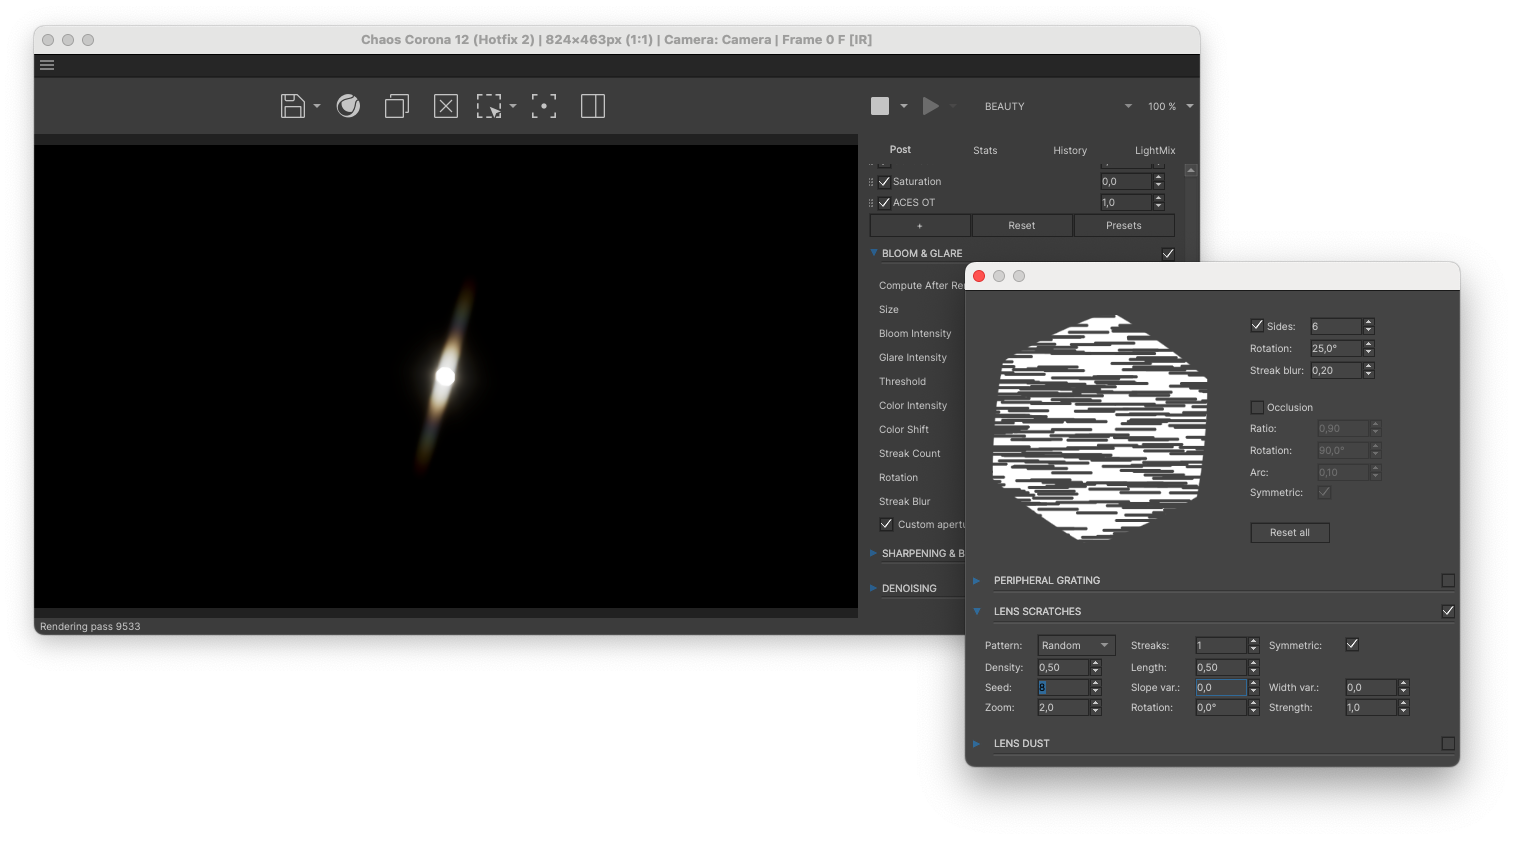
The Seed value simply changes the scratches around, giving you minor changes in the look. I’ve set the value to 8 for the sake of argument :)
Zoom affects how thick or thin the scratches are that cover the lens. The lower the Zoom, the more the effect builds up closer together. One might argue that the chromatic shift starts disappearing at such a small scale. The higher the Zoom however, the larger the gap between aberrations. At a high enough Zoom it simply starts fading out around the edges.
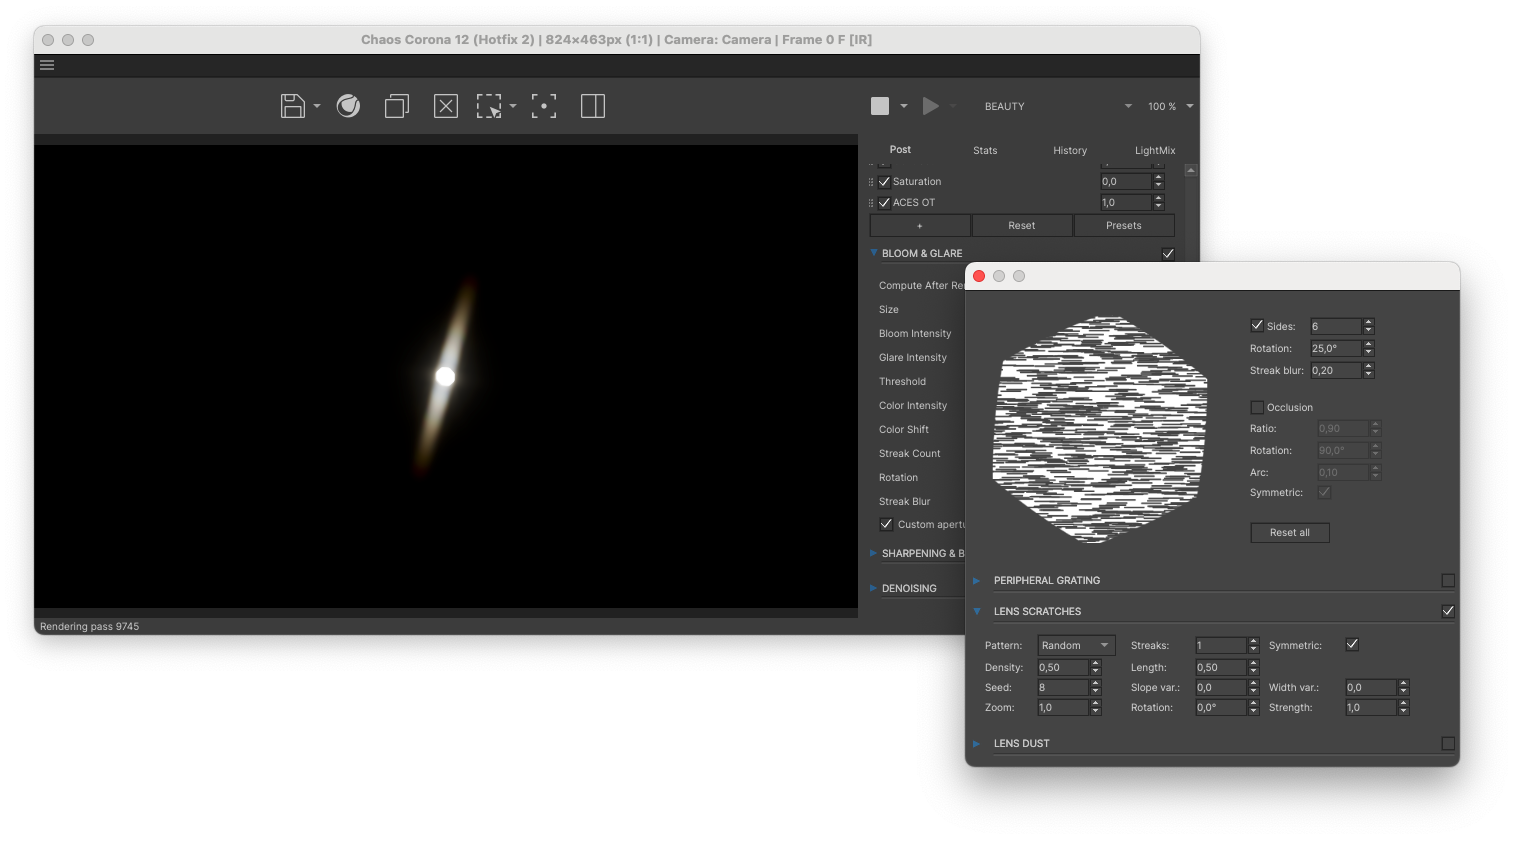
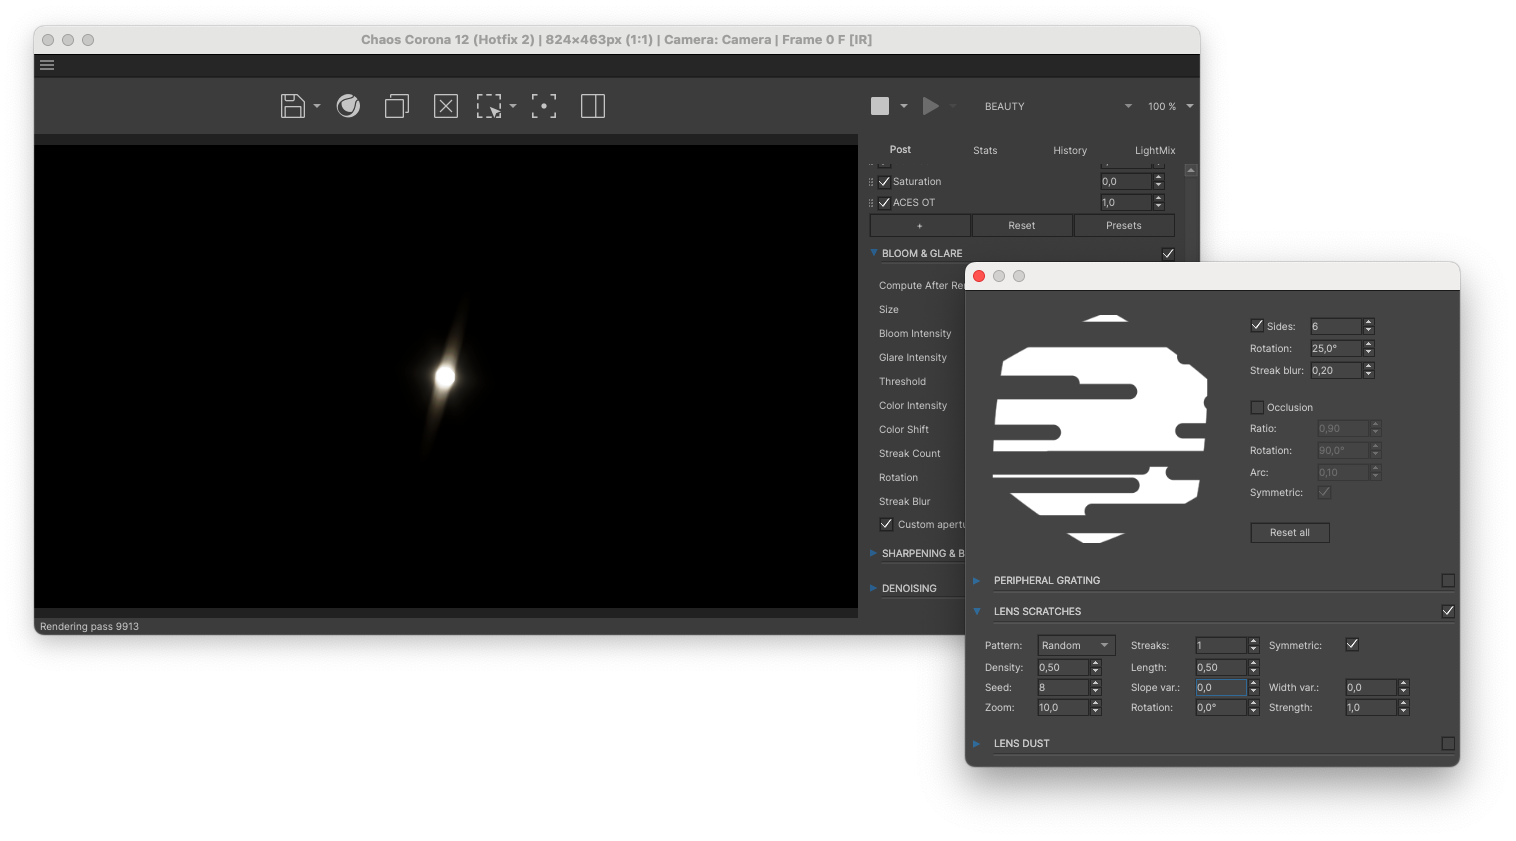
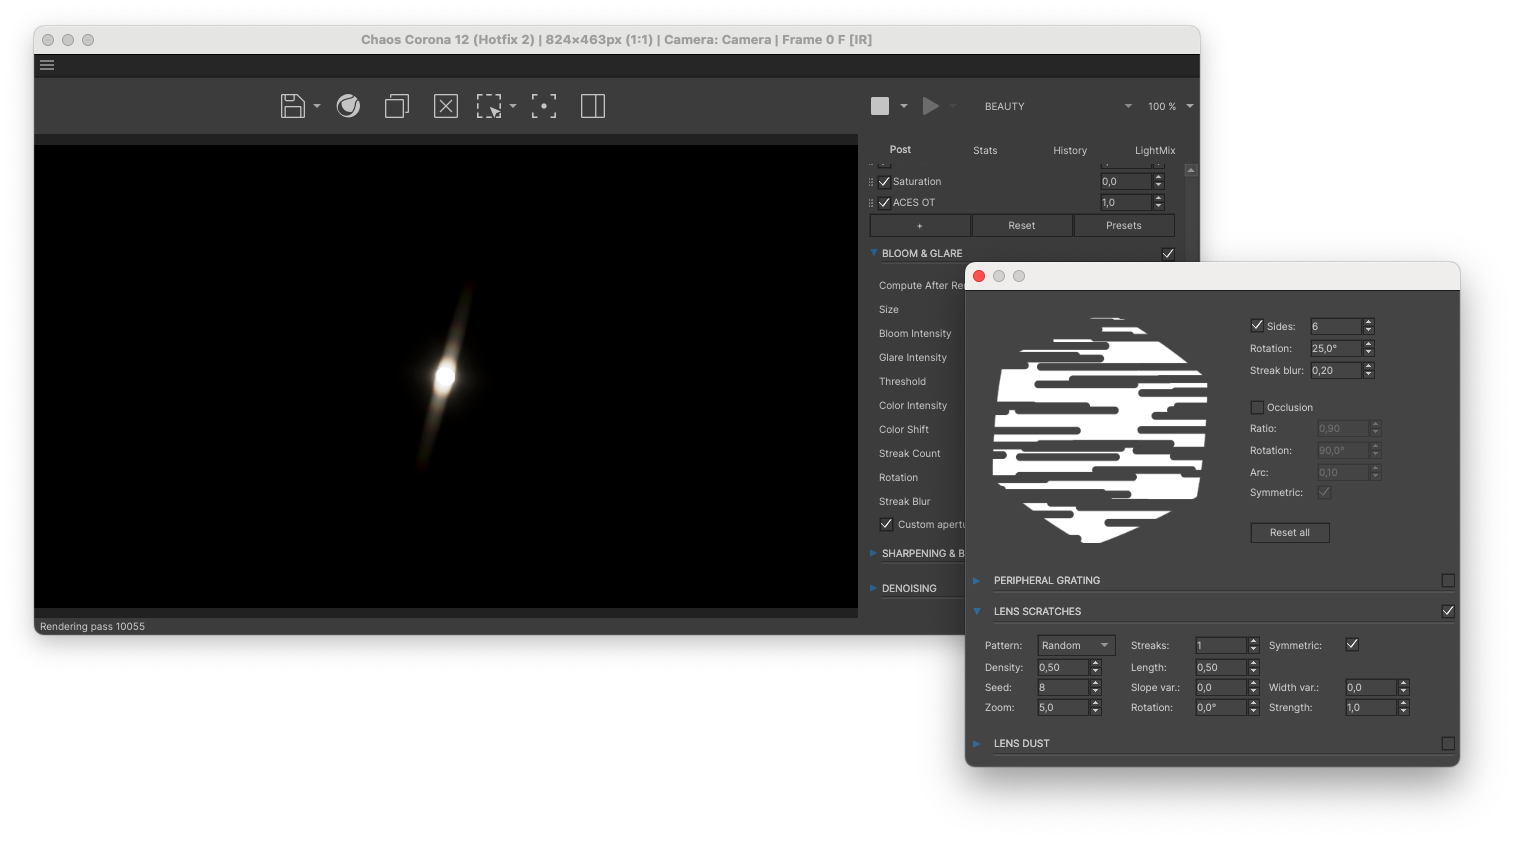
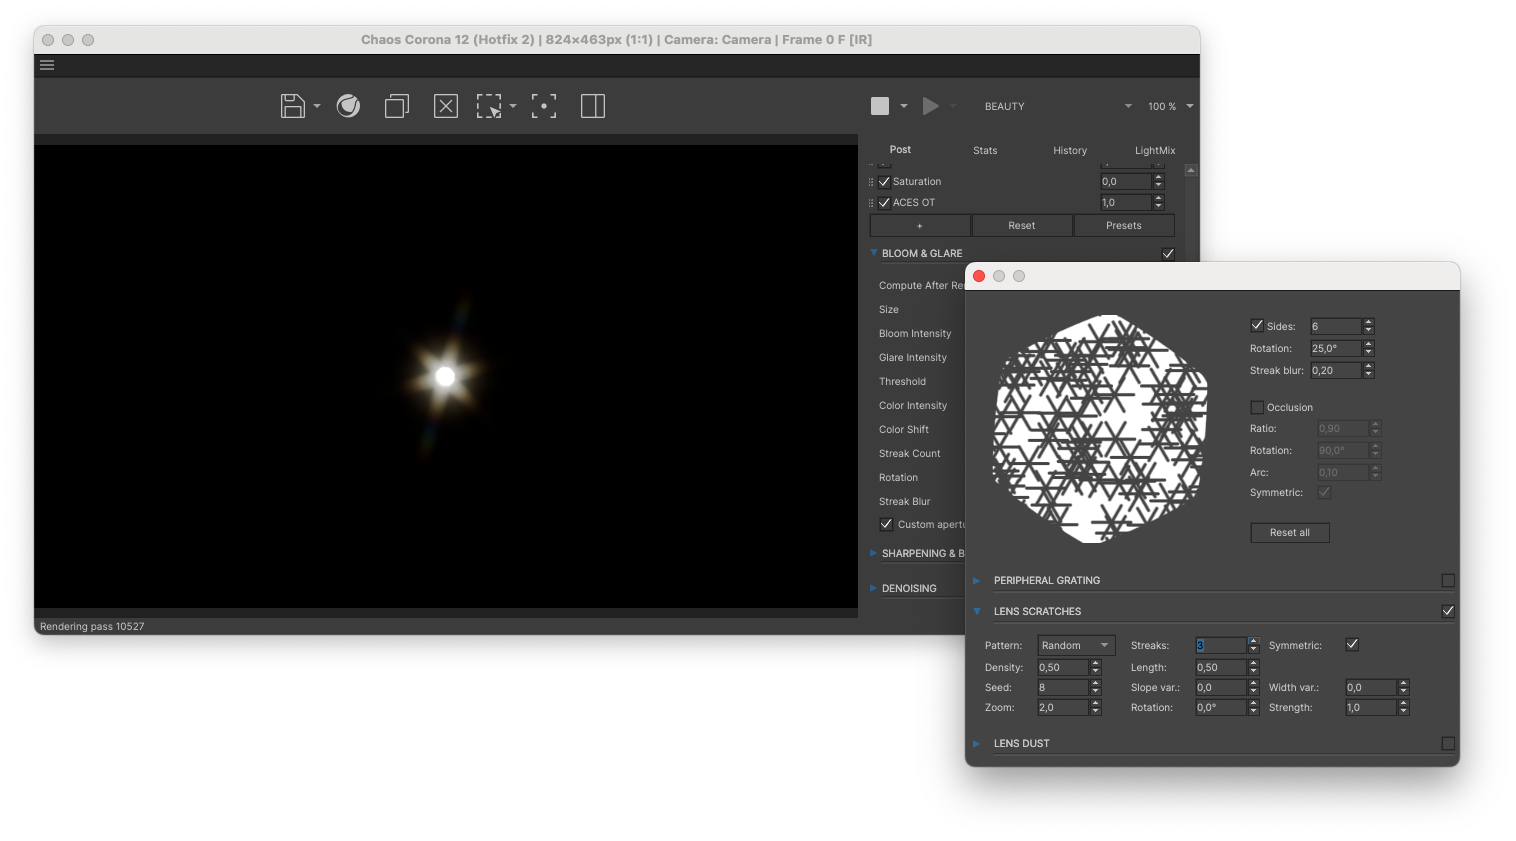
Streaks is a value that changes the number or streaks around every individual scratch. This is a great method to achieve additional star effects in your lens flare. Below are some examples of what increasing the value does to your flare:


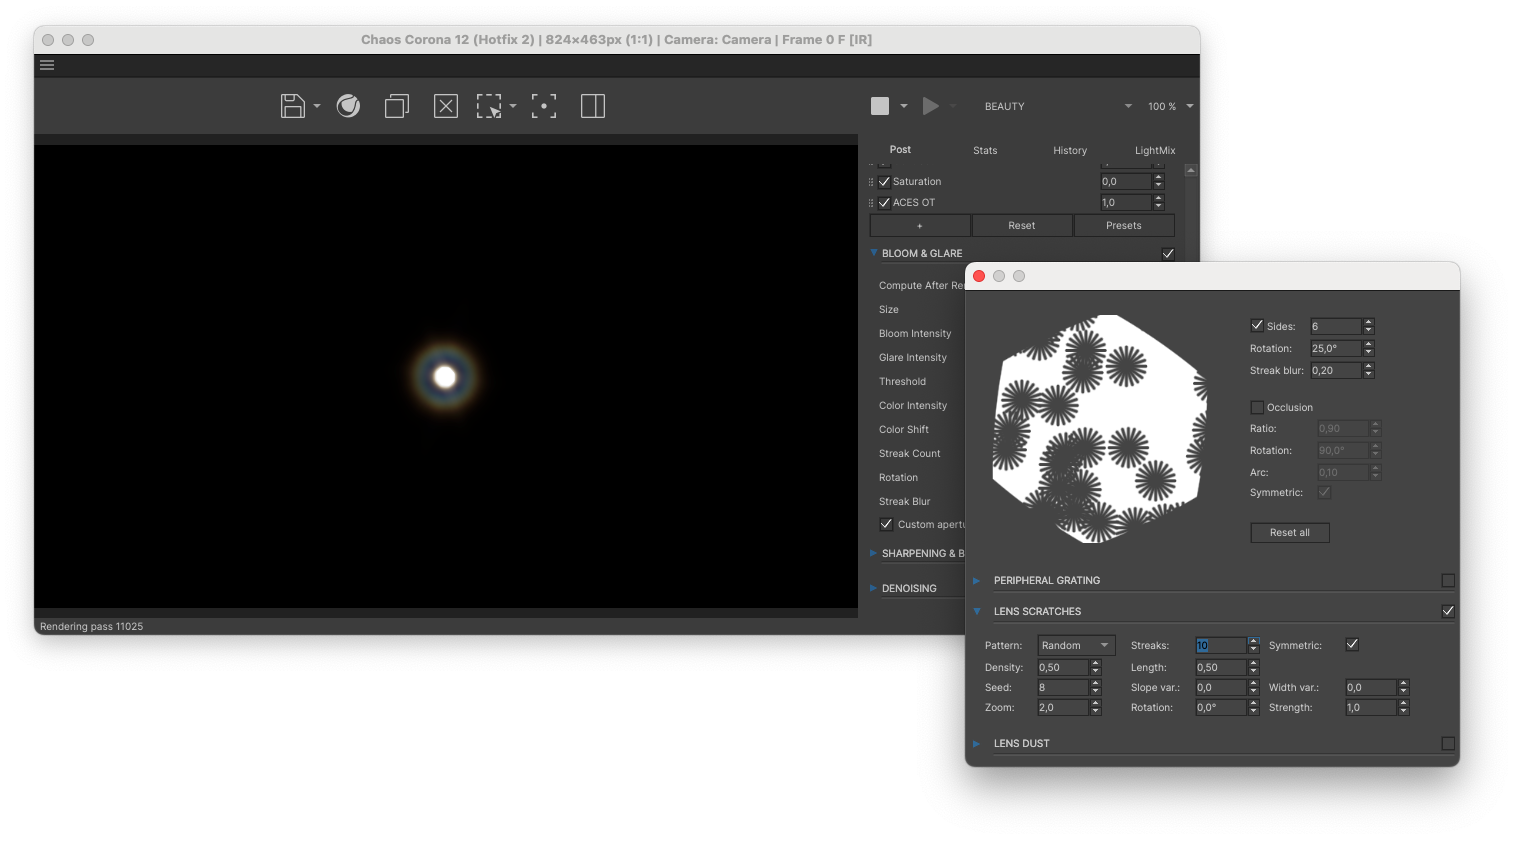
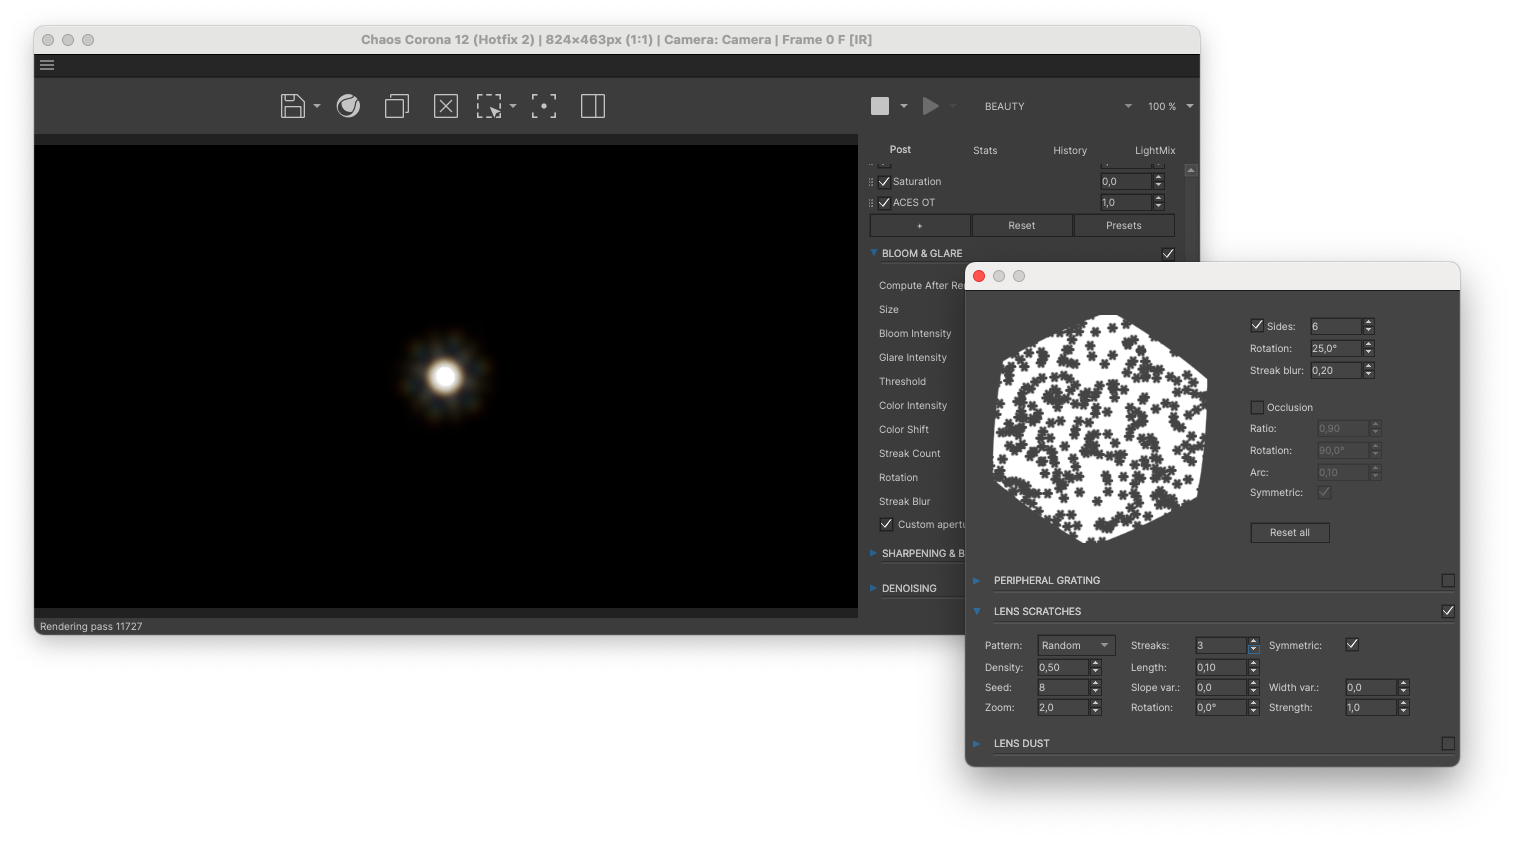
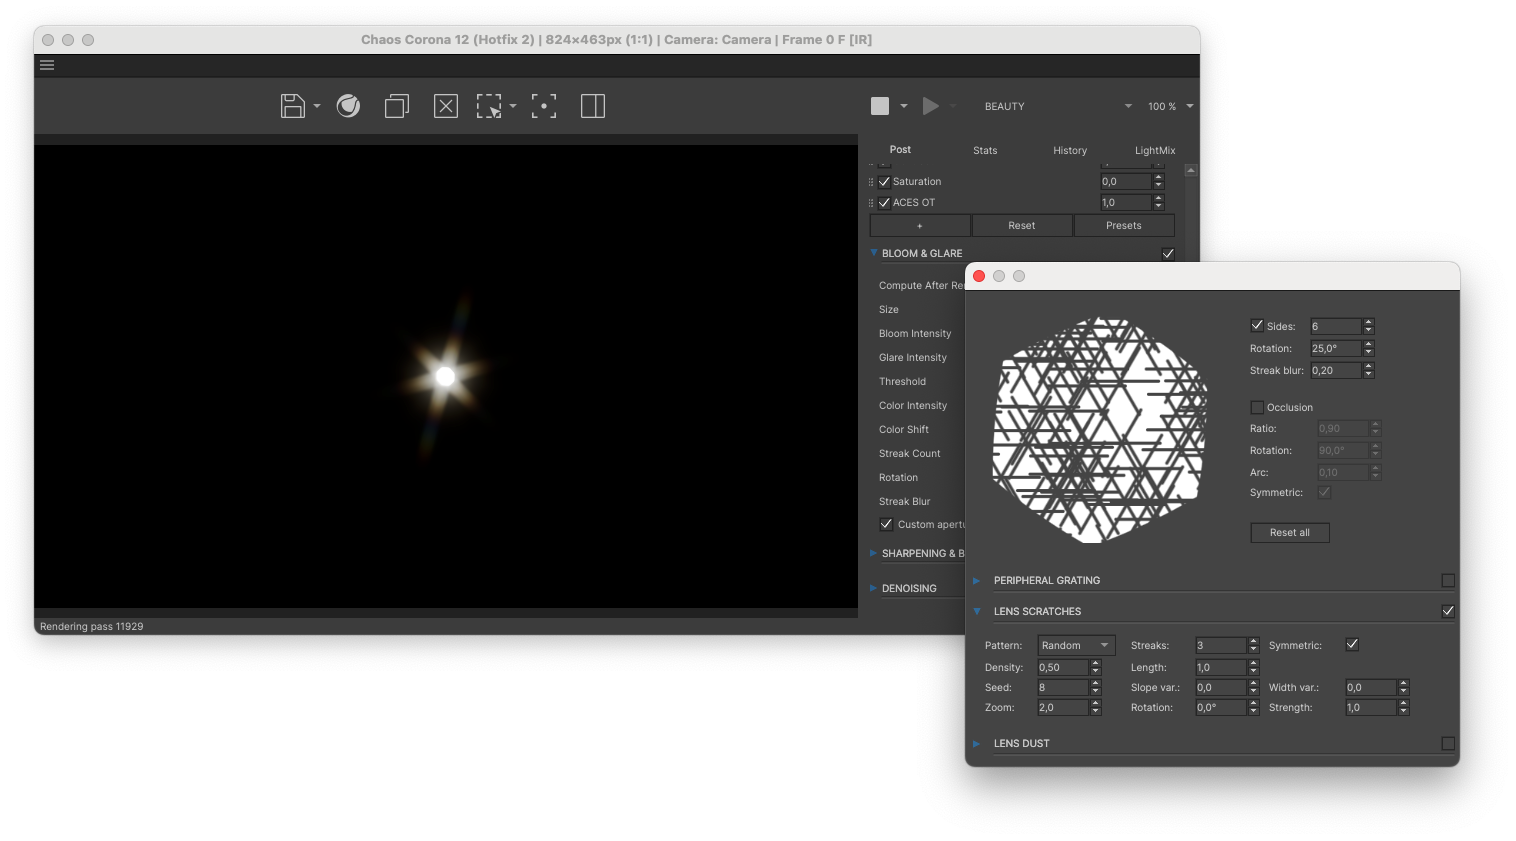
Length defines the size of the scratches’ streaks. When the Length value is set to low it starts to collapse in on itself causing a similar effect to Lens Dust. However, when the Length is set to high, it exaggerates the lens flare to look more like the scratched shape.
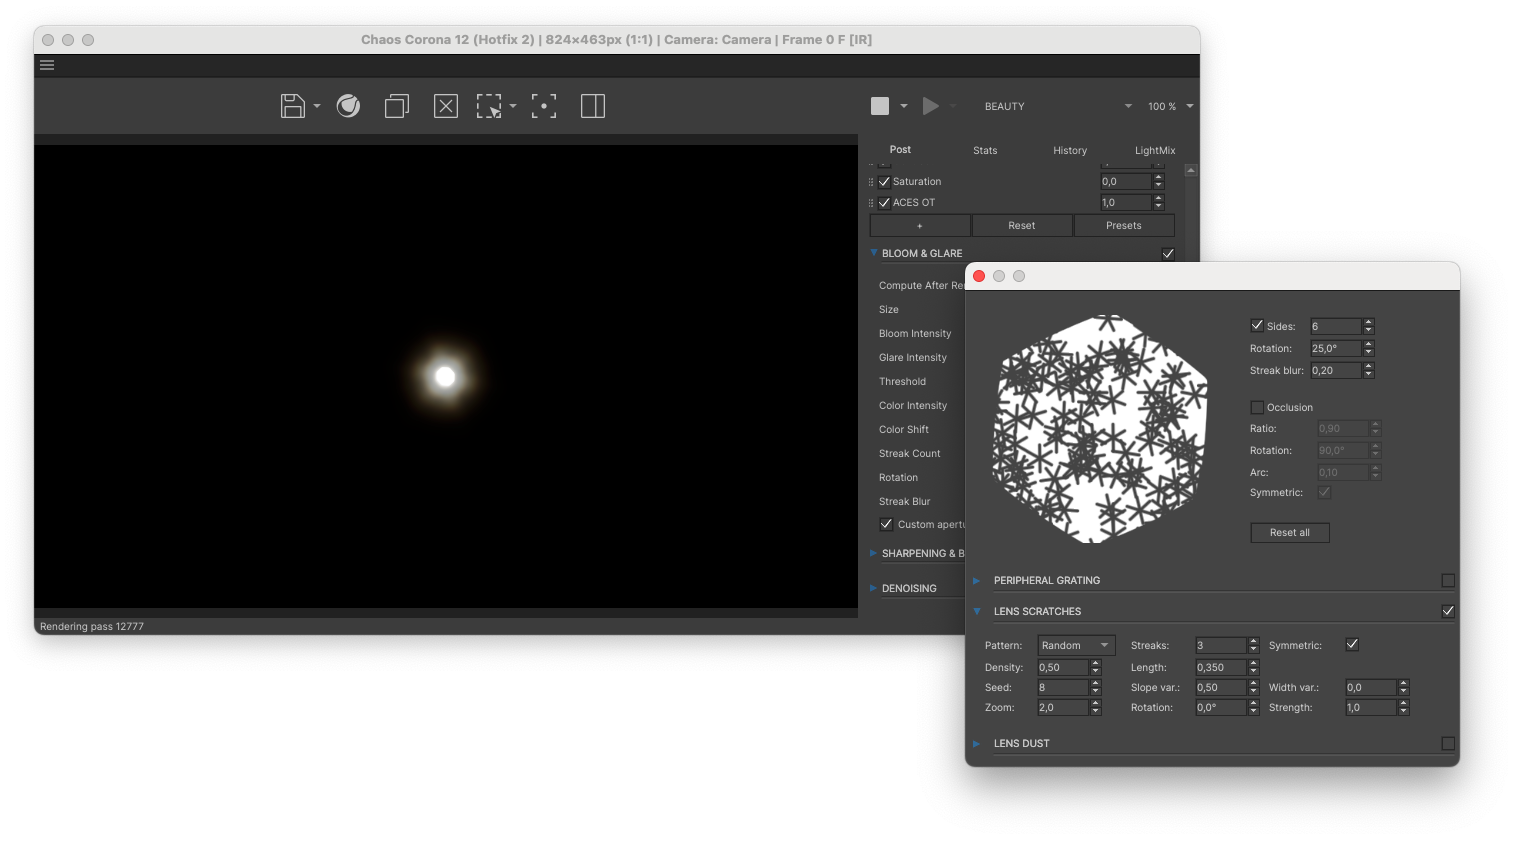
Slope Variation turns the scratch around on itself. This means that the higher the value, the less of the lens scratches are maintained in their original shape. The examples below make it easier to see for yourself what it does:

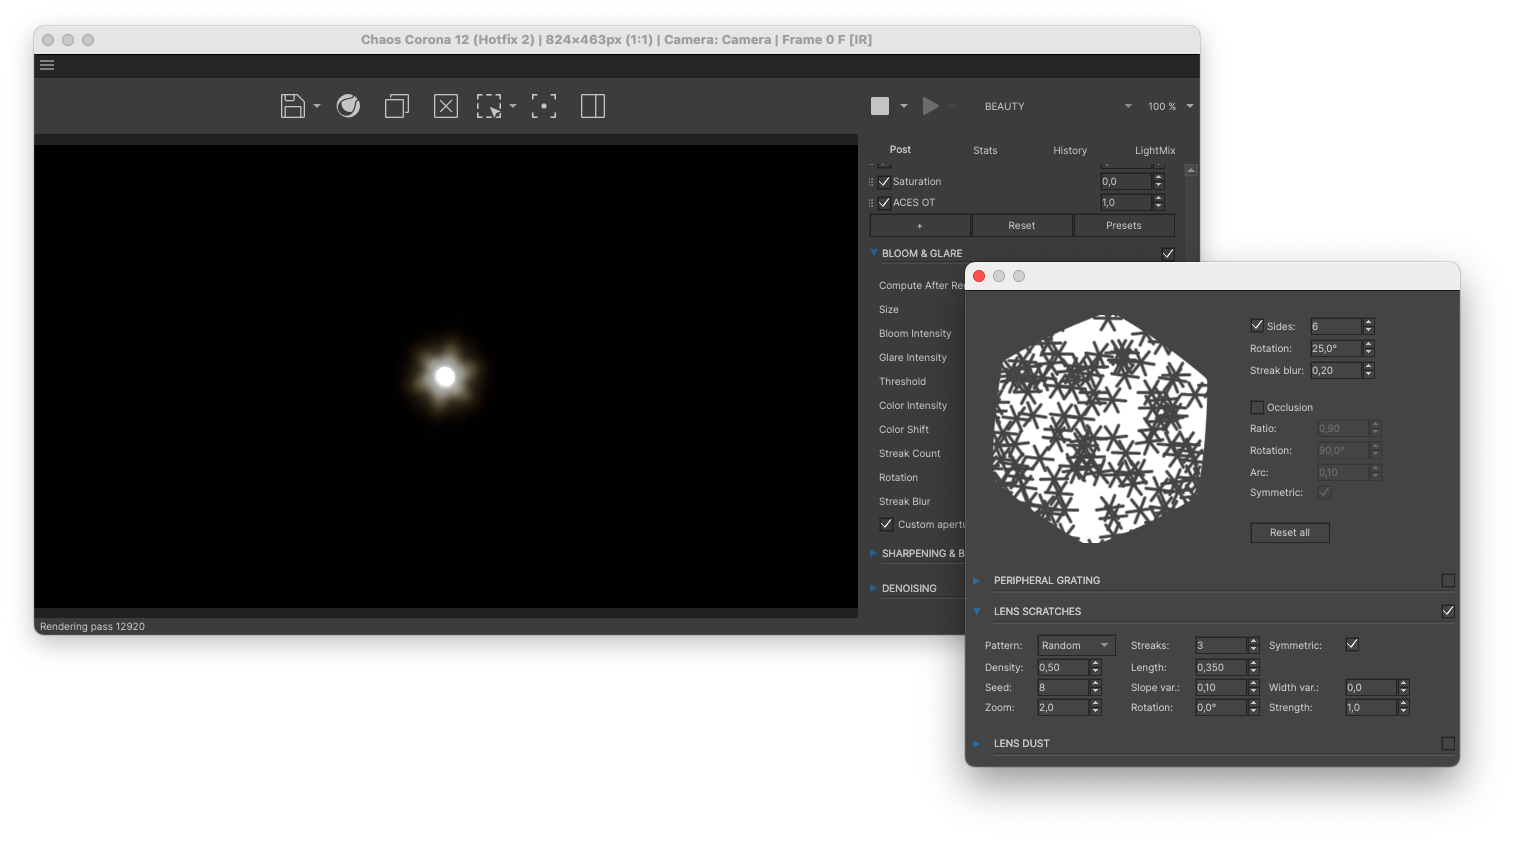
Rotation allows you to simply rotate the lens flare around its own axis, similar to the previous version of the Rotation slider. Have a look below as I apply a 45˚ rotation.

Width Variation changes the thickness of the different Lens Scratches based on the ratio you apply. This is great for adding additional layers of imperfections to your lens flare.
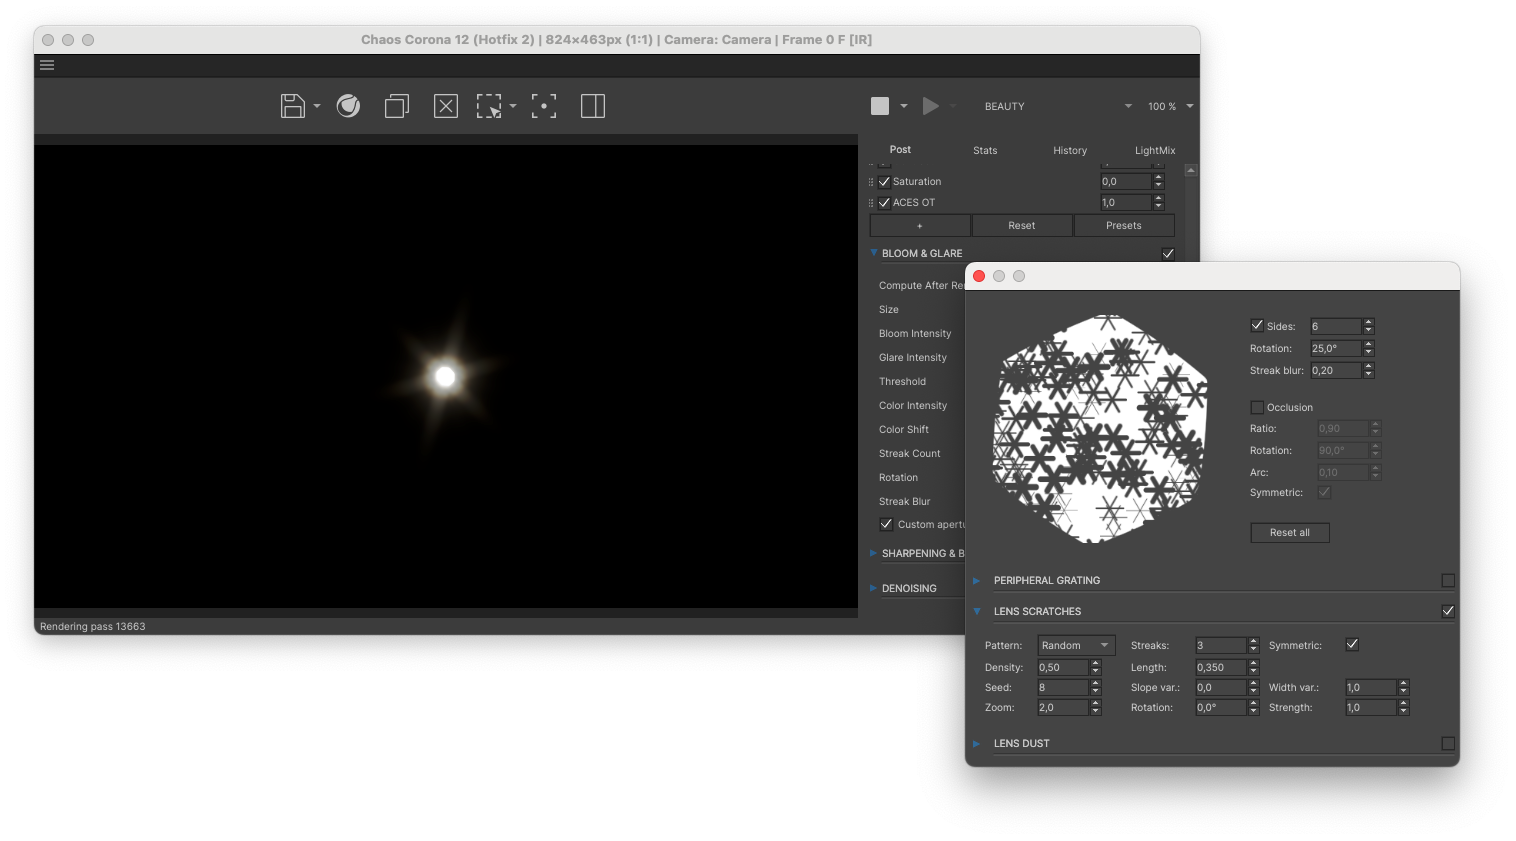
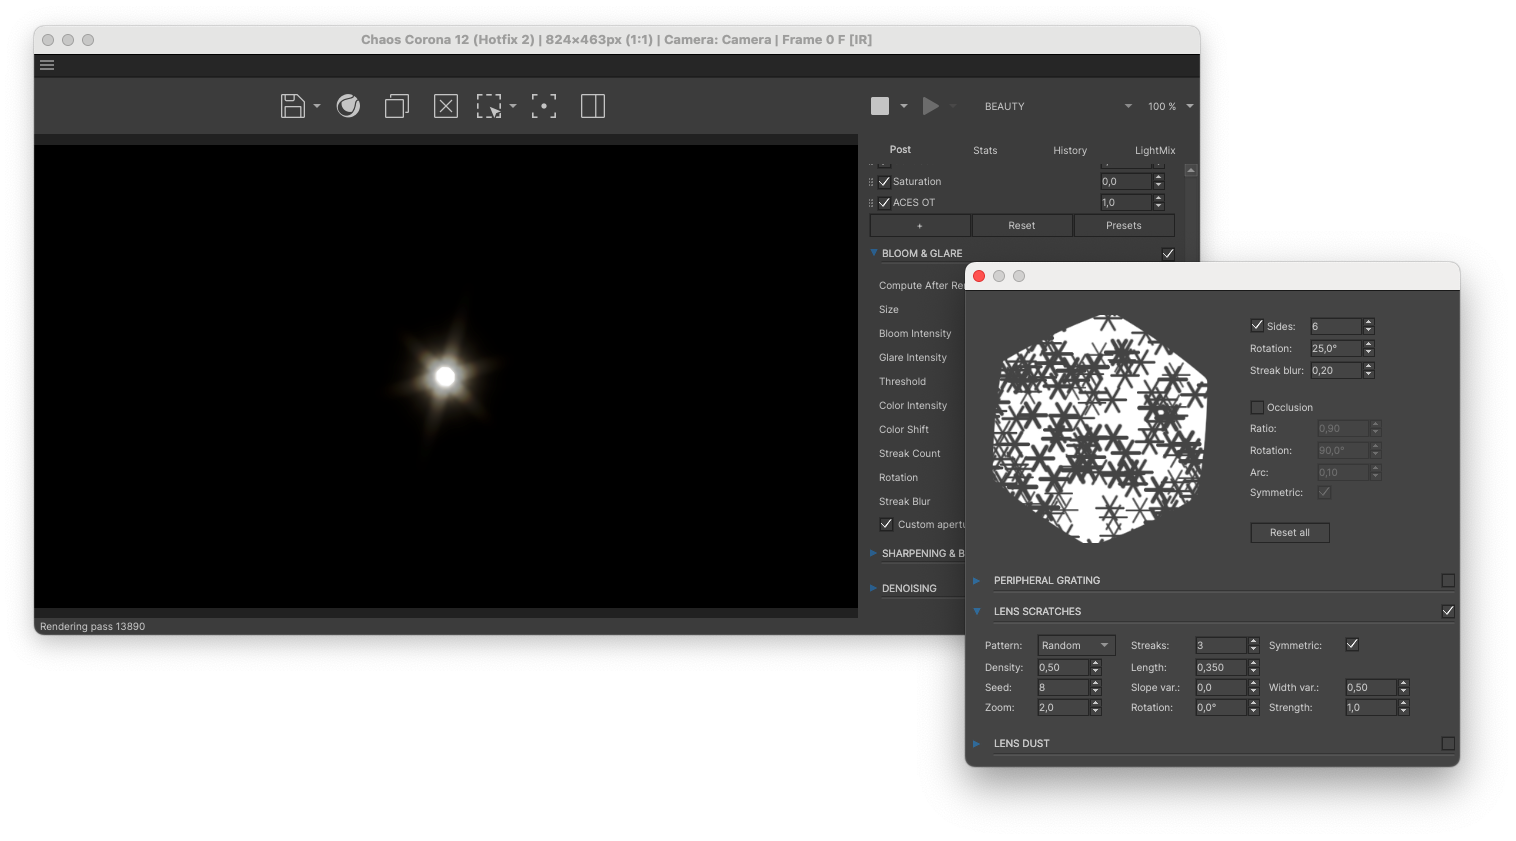
And finally there is Strength. This value is simply an intensity slider which you can use to increase to decrease the opacity of your Lens Scratches.

Lens Dust
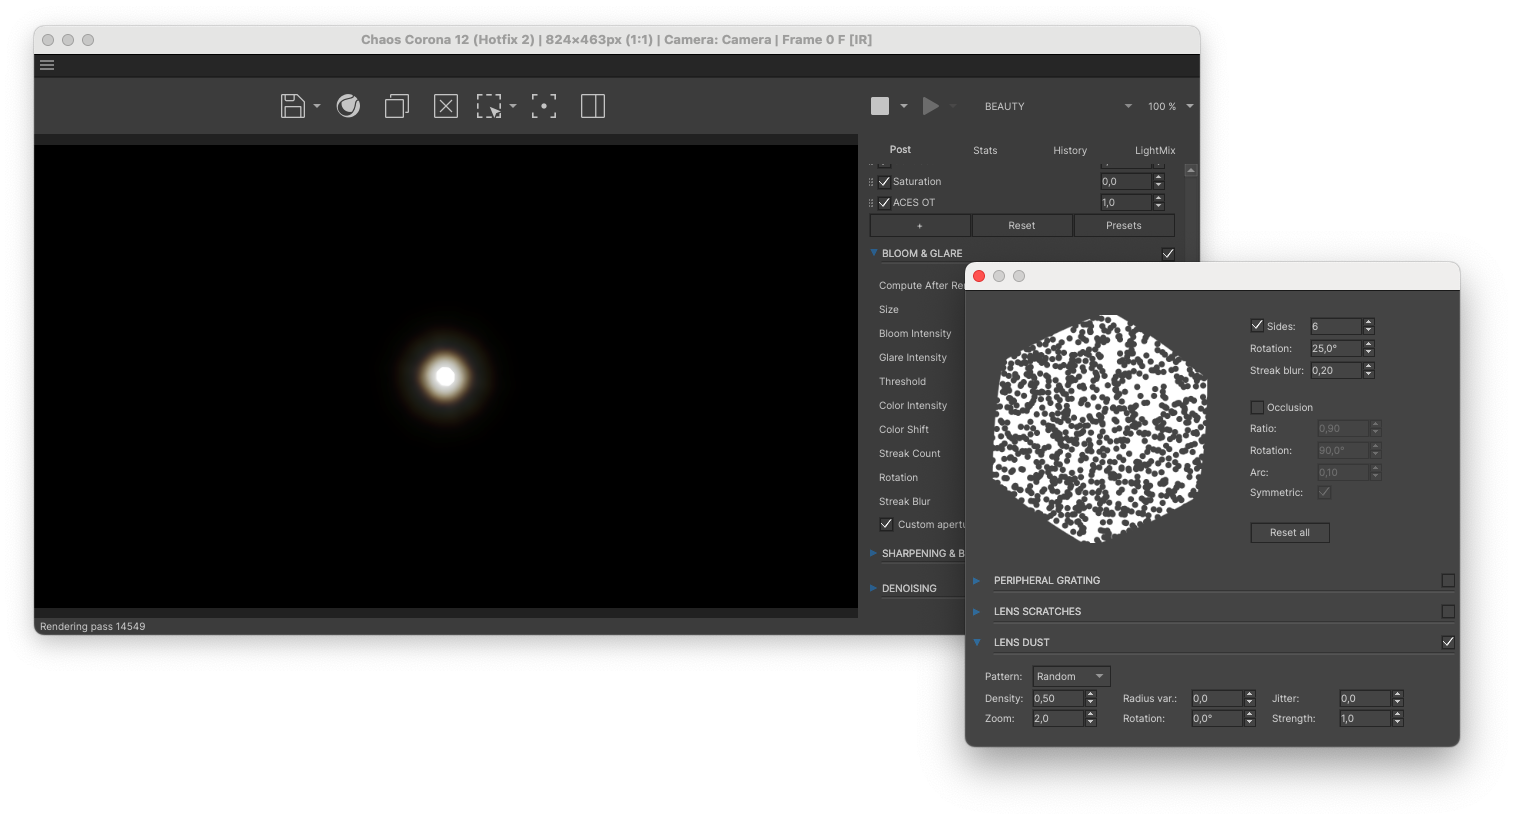
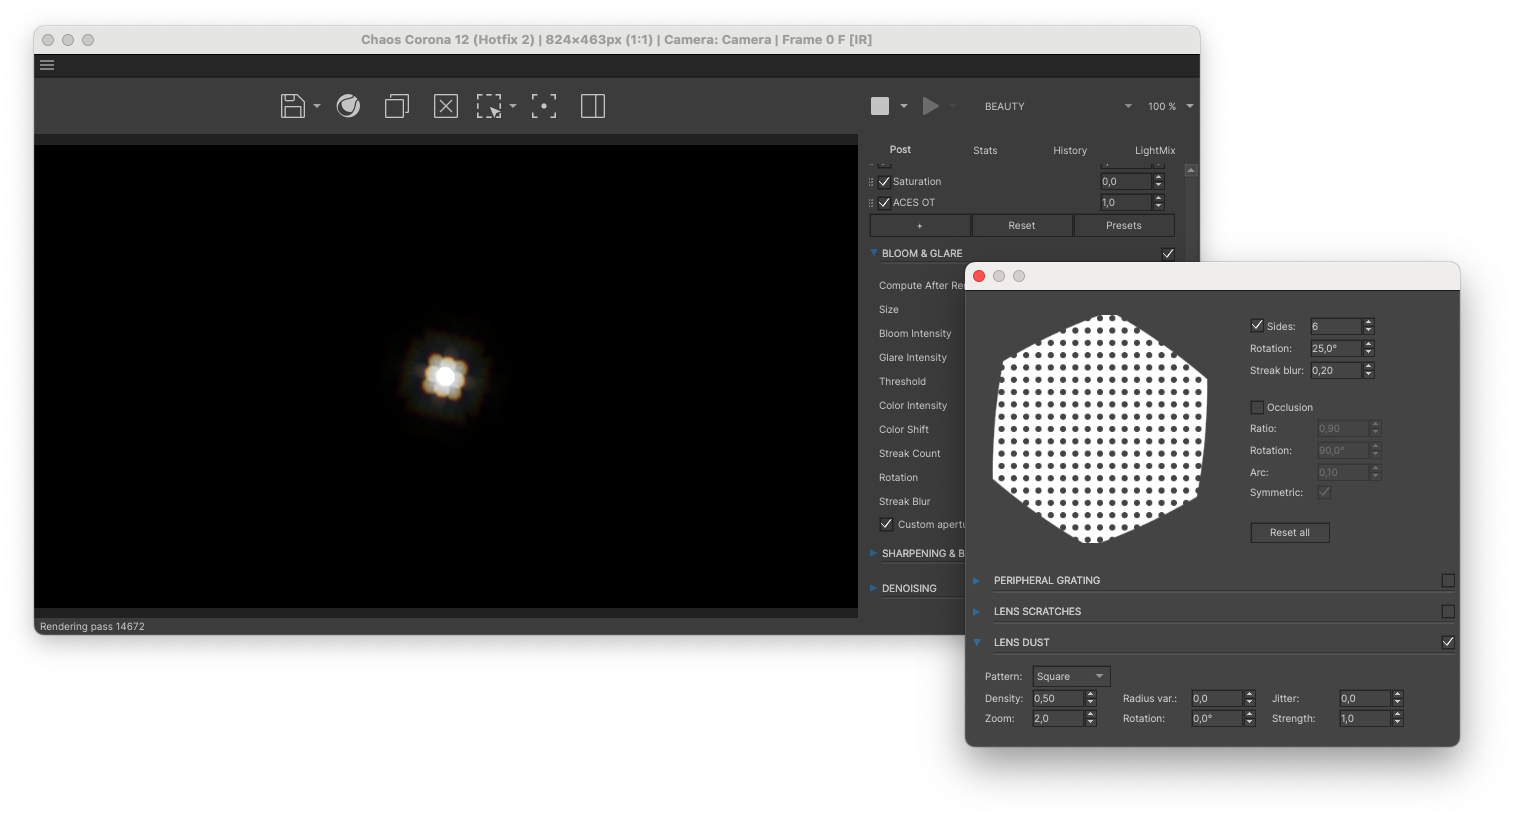
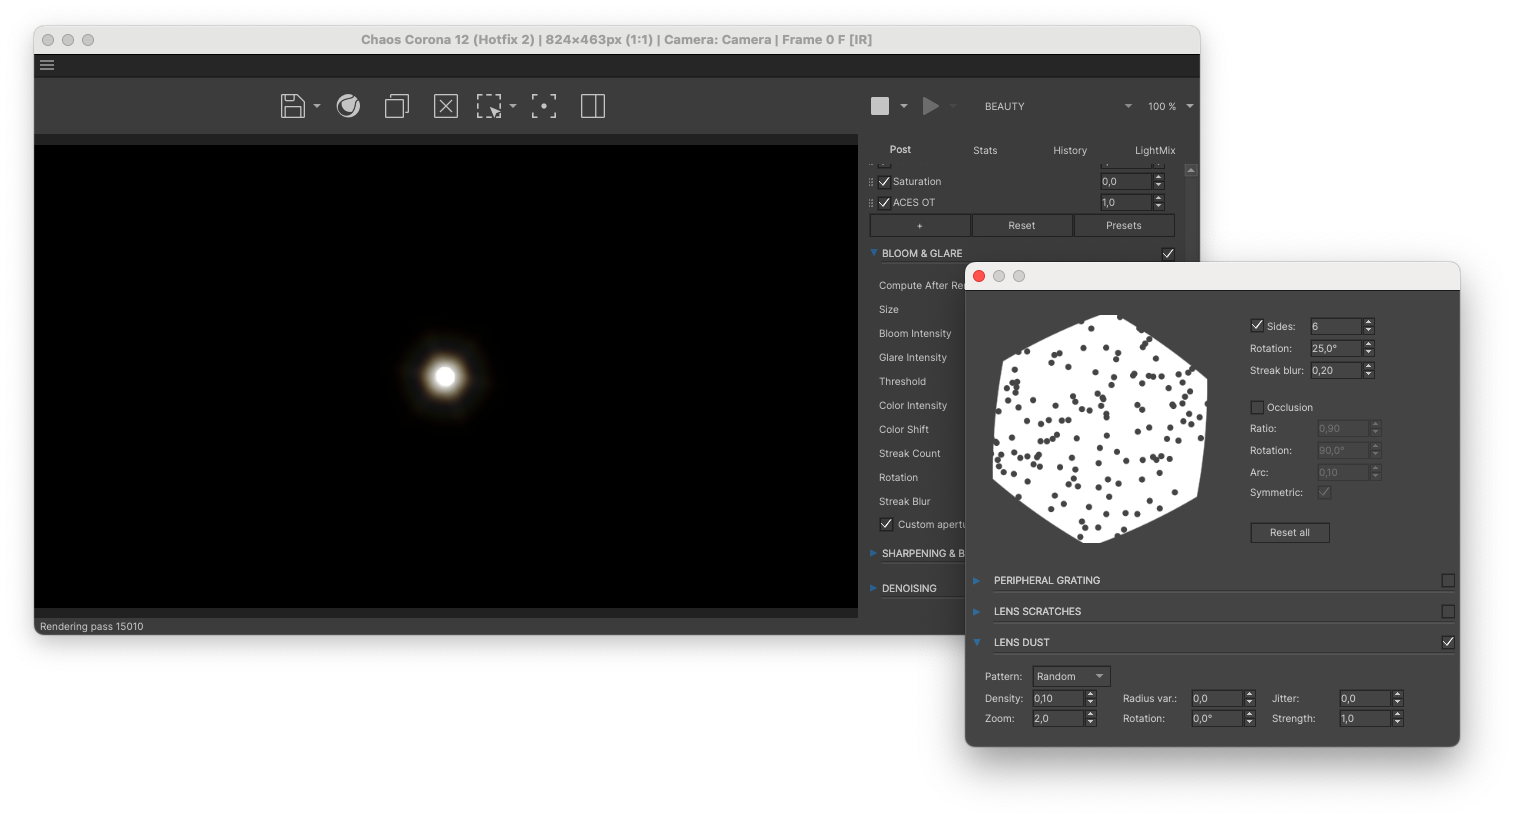
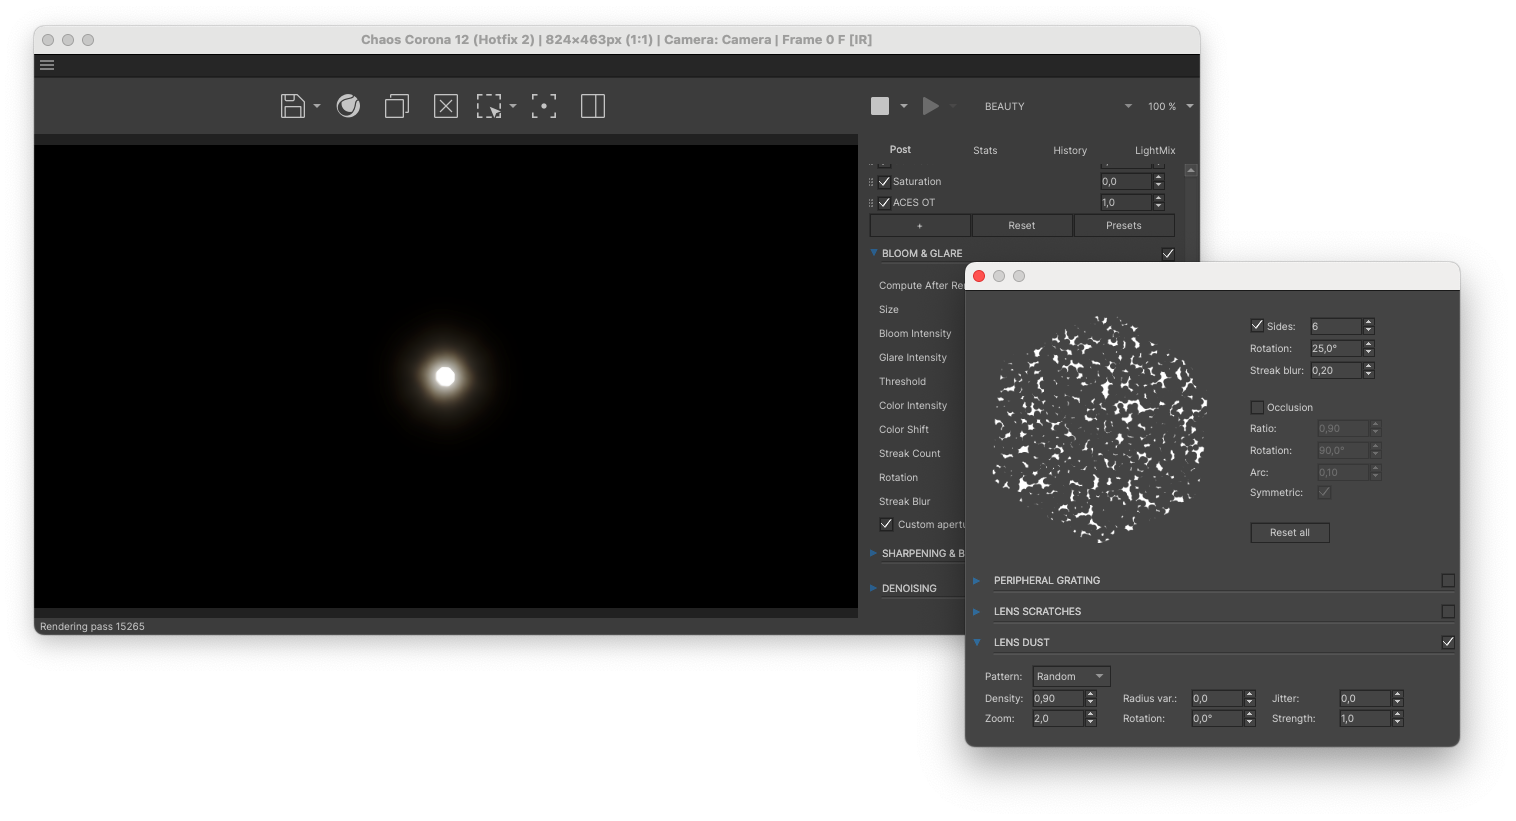
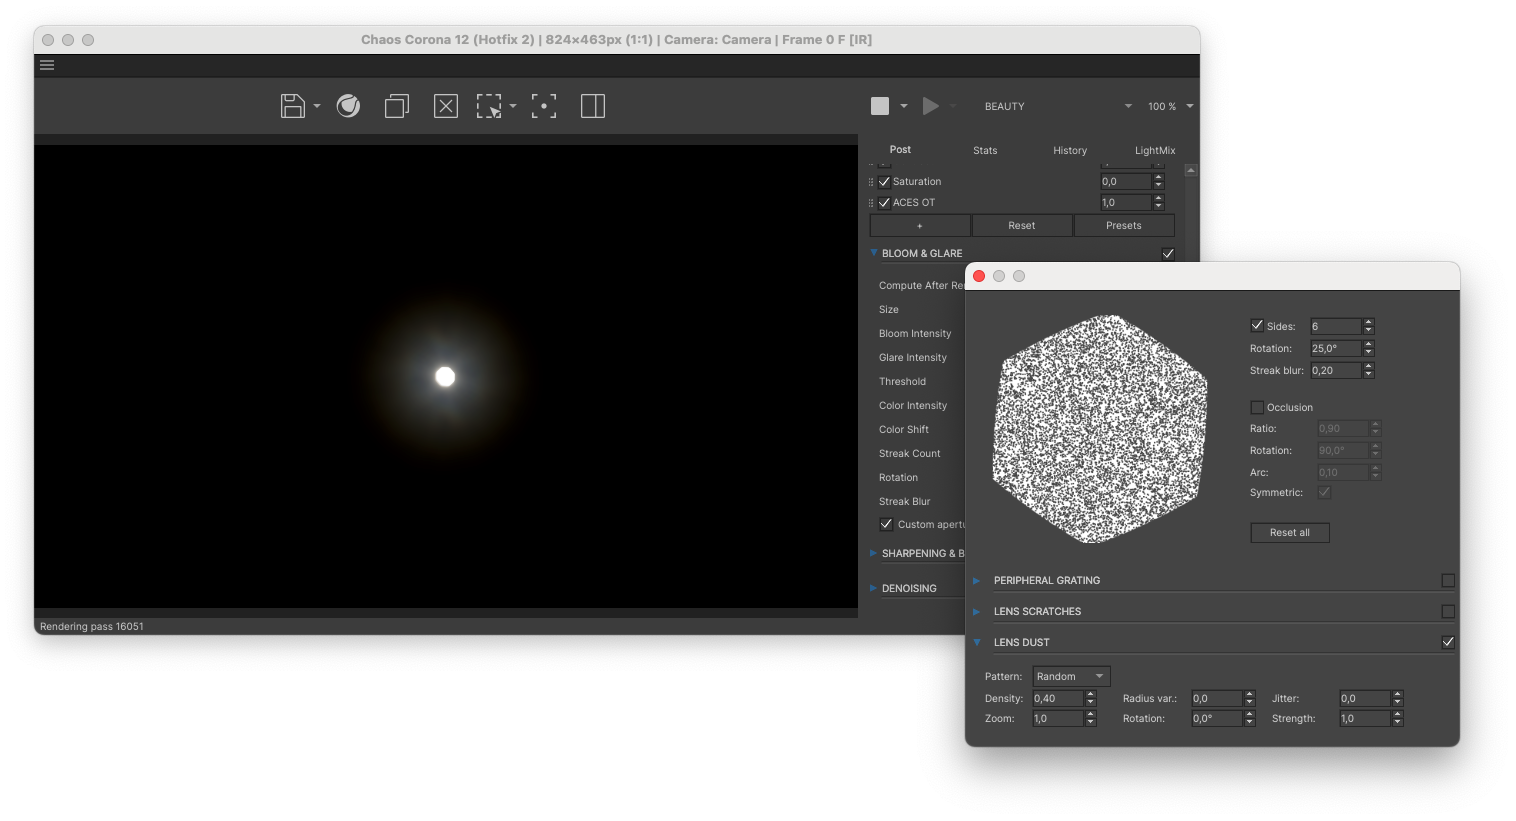
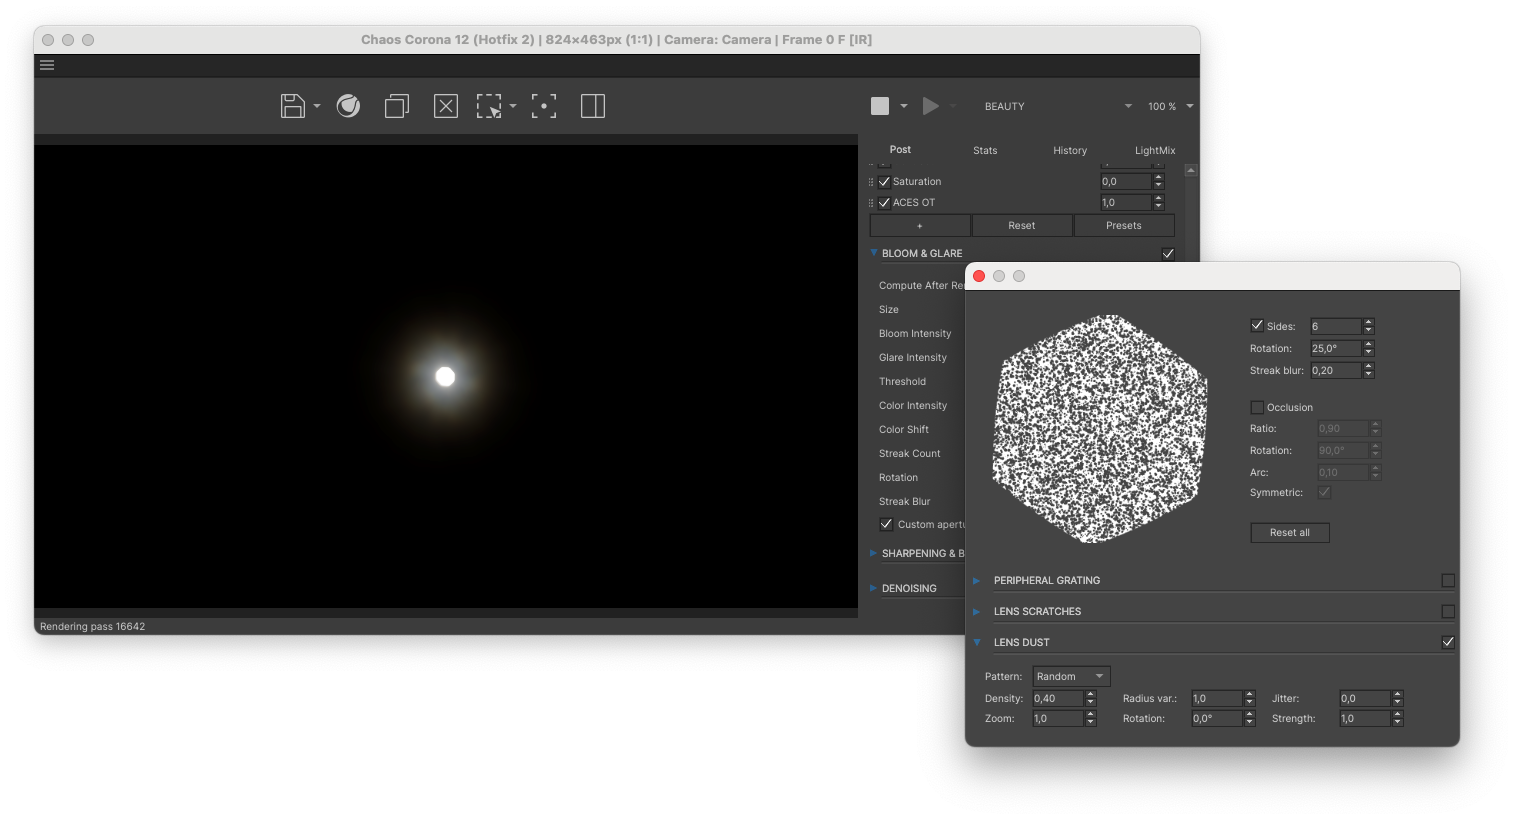
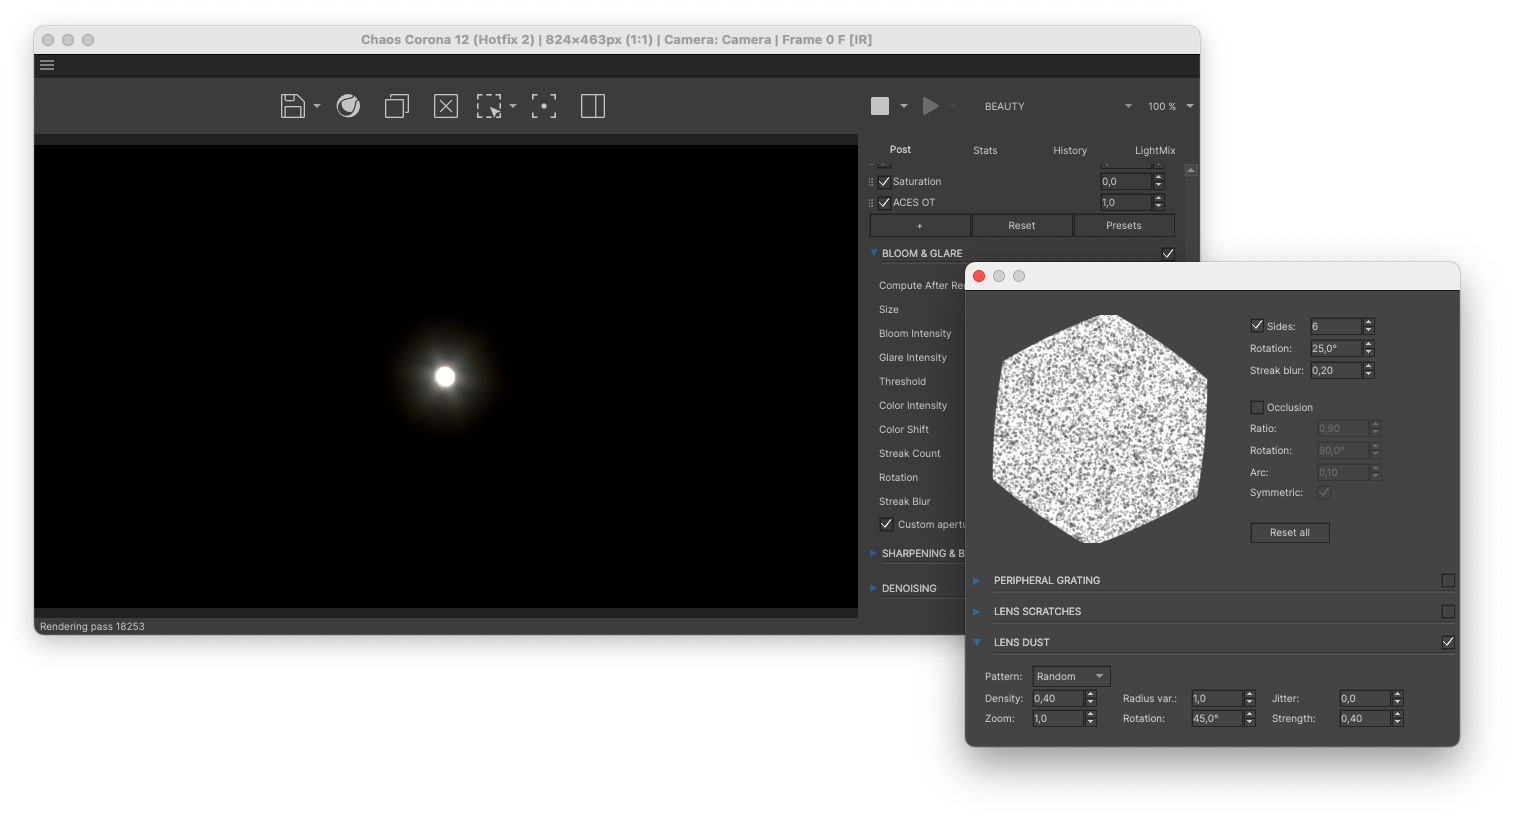
With pretty much all the same settings as with Lens Scratches, the Lens Dust effect adds an additional layer of imperfection to the flare. By introducing a micro pattern over the aperture it scatters the light in such a way that it simulates dust particles on the lens.
Below are some examples of what the different settings do to the flare:


Combining the effects
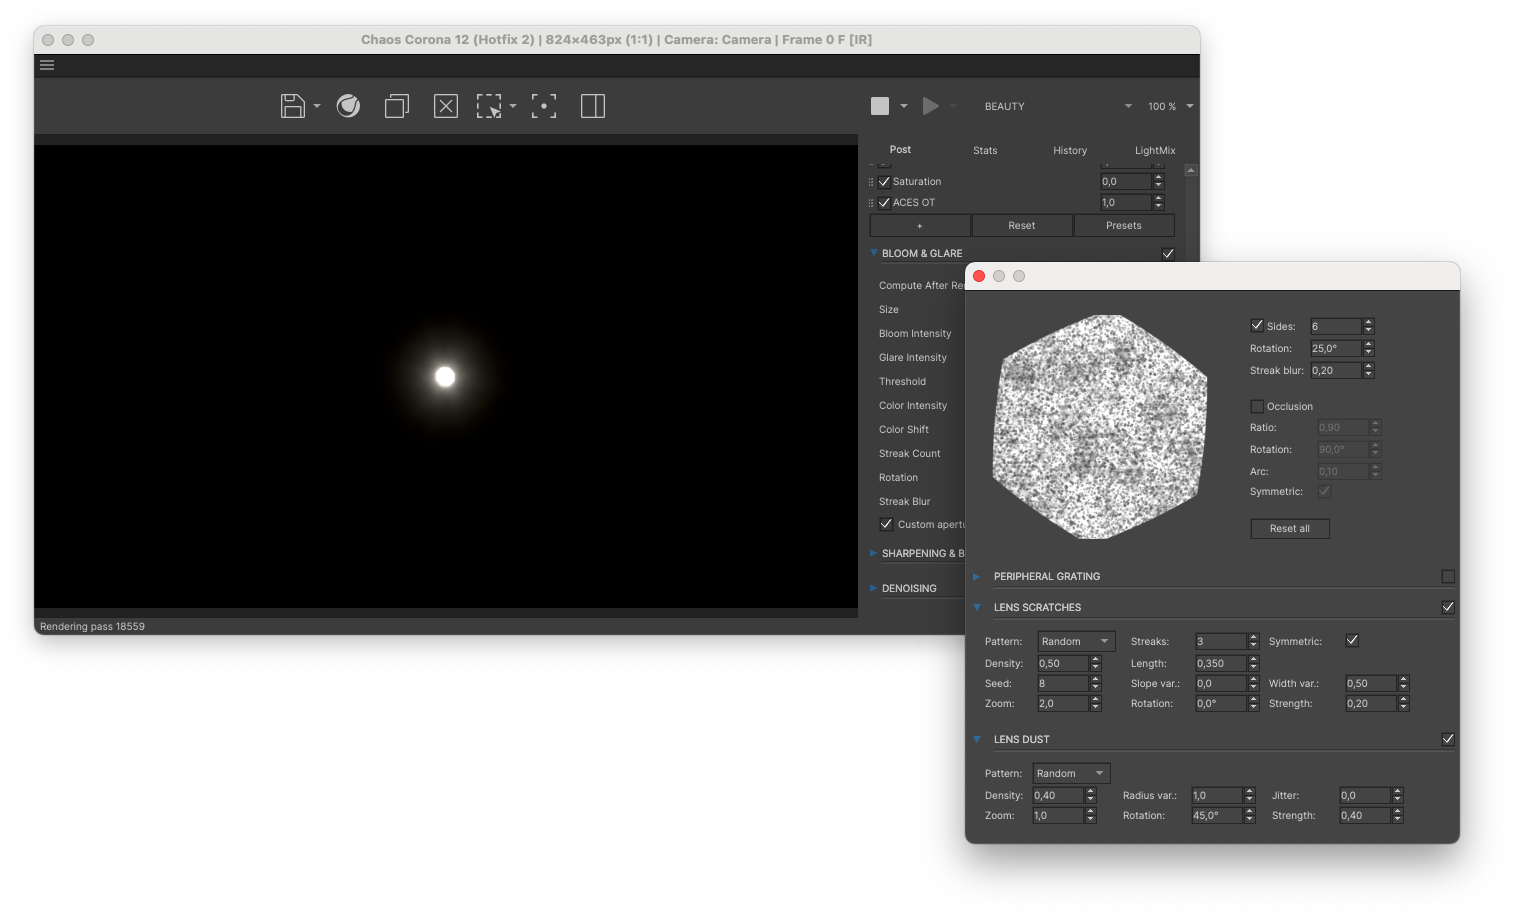
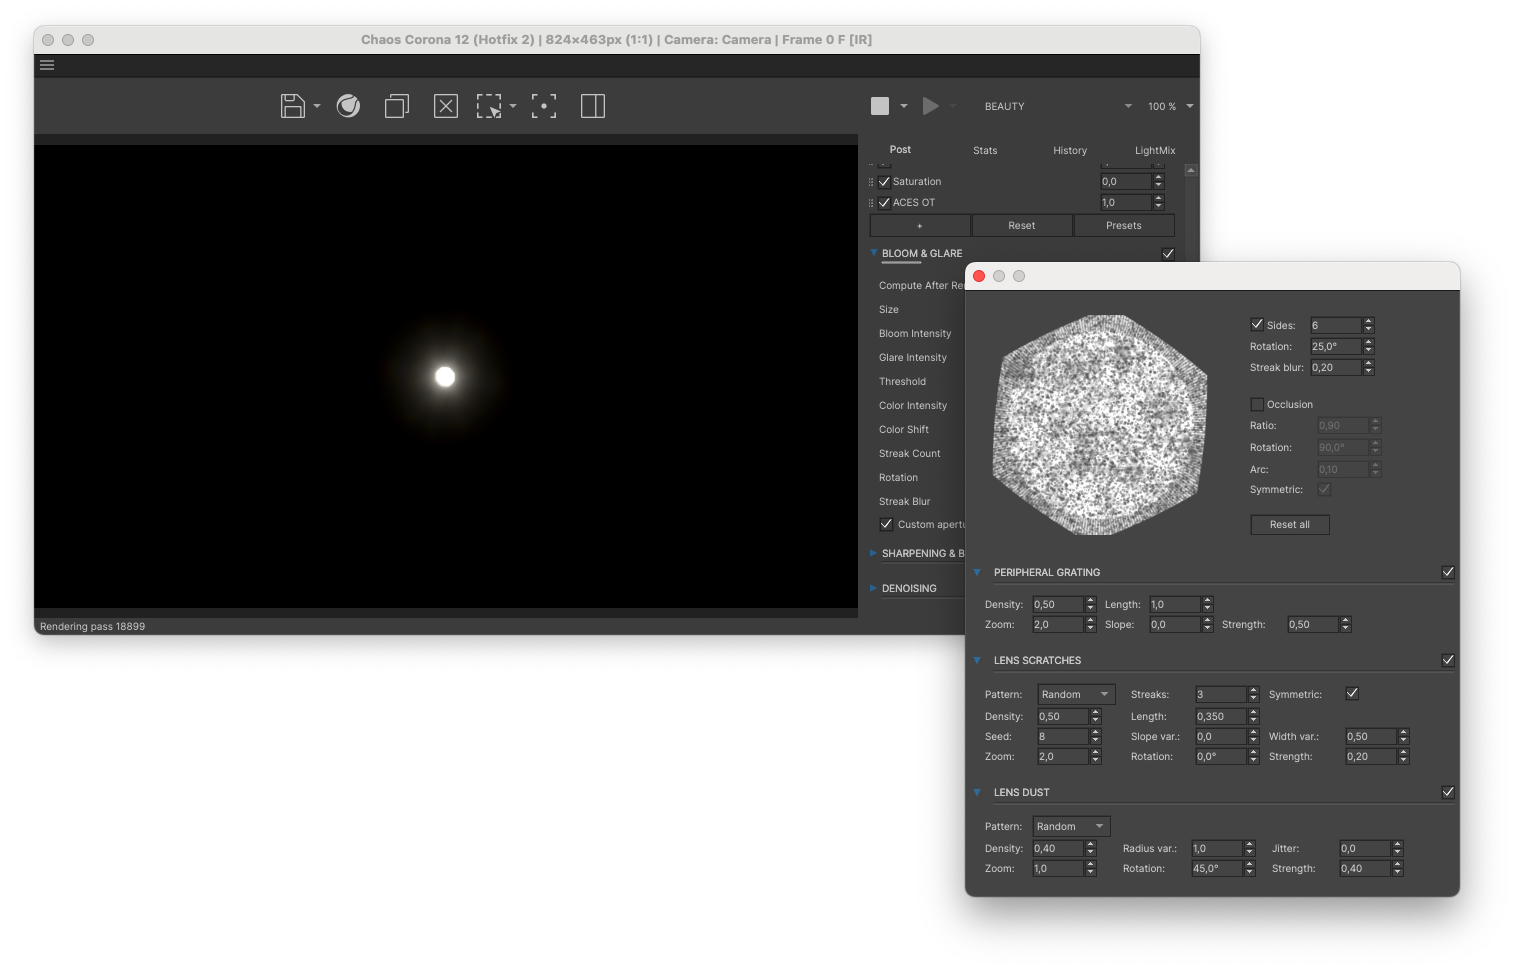
To achieve the best results you want to define the settings you like and then play around with each individual Strength so that they nicely blend together. Here you can see that with all the effects added together we create a realistic and organic looking flare. And if you rather have a different look, you can simply change the settings again in real-time until you get the effect you desire.

Realistic Lens Flare Example
I recently made several 3D-renders of the moon, for which you can read about the process in this blog. And when I turned the camera around towards the sunlight I was presented with a lens flare. Upon going into the Bloom and Glare settings I applied all the techniques I know to get a soft flare with a subtle variation in color. Below you can see the settings I used for this effect:
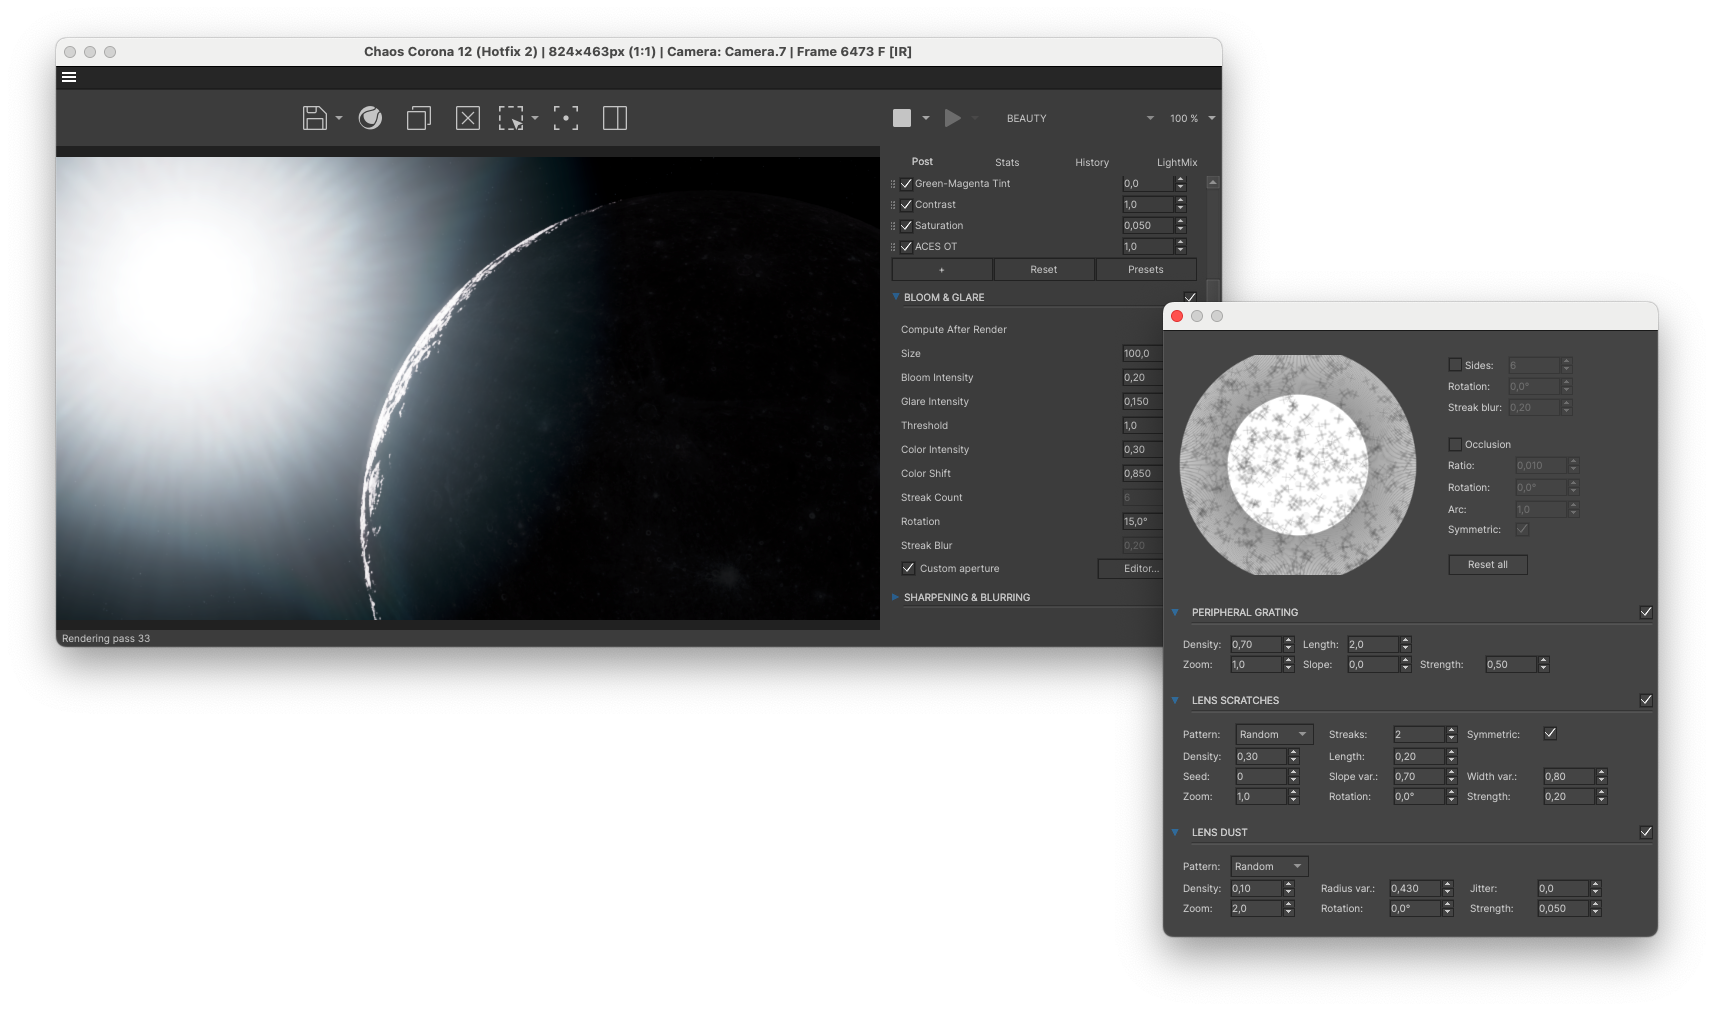
And to showcase how you can very simply change up the look, let’s say I wanted a sharp diagonal streak with a little bit of forking at the ends. I changed the settings to the following and it worked :)


Conclusion
Achieving realistic 3D-renders requires practice, patience and to be honest, a good understanding of the tools you are using. As a creative you might know what type of lens flare you would like to have on your shot. You might have a great reference image of the lens flare on a real lens you love. But if you don’t fully understand how your render engine breaks up those components into settings, it will be very difficult to achieve it.
With that being said, the Bloom and Glare settings in Chaos Corona always require a bit of trial and error to get exactly what you’re looking for. So don’t feel discouraged :)
I hope this breakdown helps you better understand how each component affects the overall look and feel of your lens flare. Good luck!





%20by%20Ivan%20Aivazovsky.jpg)




0 Comments